Options for Large Windows in High Wind Load Areas

“It is the great north wind that made the Vikings.” – Scandinavian Proverb

If the great north wind helped make the epic, strong Vikings, it’s no wonder that the wind impacts some of the recent innovations to create better, stronger construction practices! We’re seeing it happen day in and day out with new approaches for fenestration – windows and doors. 

The Challenge

Homeowners increasingly want larger and larger expanses of glass in their homes.  At the same time, municipalities, including Boulder, CO, have realized that due to climate change, wind speeds have increased. As a result, Building Departments have increased the required Design Pressure (DP) ratings for windows and doors. The DP rating represents a building component’s ability to withstand a given amount of wind load.

And the challenge is not simple because the wind loads vary based on numerous things including: is the component closer to the edge of a wall or higher up on the building – e.g. multi-story buildings. In short, wind loads are a bit of a moving target across the building facade.

Additional Challenges

With large glazing assemblies, often windows are mulled together creating hinge points which are weak points in the window assembly. Also, as the size of the assembly increases, the DP rating generally suffers – decreases.  There are ways to increase the strength and DP rating of window assemblies which include adding structural mullions, thicker glass, and/or frame reinforcements.  However, these methods help only so much and eventually additional approaches must be considered – especially since homeowners are increasingly requesting entire window walls. The question becomes 
 How do we create a window wall with high performance and well insulated assemblies without having to use generally lower performance, more costly, commercial focused, structural storefront, curtain wall and ribbon window technologies?   

Consider Steel Tube, LVL or Lumber posts between the windows and doors

While we are not structural engineers here at AE Building Systems, we have been able to help our customers manage the new DP rating requirements necessary for code by suggesting solutions like leveraging steel tube, LVL, or lumber posts at the breaks in the window assemblies. You might think that it’s going to greatly reduce the performance due to thermal bridging and you’re right. Insulating those posts is critical.

Overview of the Steel Tube/LVL/Lumber Assembly: 

Insulate Strategically

Good design that withstands higher wind loads is possible with this steel tube/LVL/Lumber window surround or vertical posts. In the assembly diagrammed below, double LVL’s are used and then insulated with a block of insulation.  The insulation is then wrapped in break metal.  While a double 2x could also be used, LVLs and steel tube are stronger and more dimensionally stable than say a double 2×4. The use of steel tube and LVL helps minimize the bulkiness/width of sight lines, and these are done on the vertical as vertical posts. Keep in mind that windows at the edge of walls or near corners typically have higher DP or wind-load requirements than those in the center of the wall. Also keep in mind that the width of the steel tube or LVL is an important consideration as ideally the window screw flange (often referred to as nail fin) doesn’t overlap.

Especially if you use the steel tube option, you will have significant thermal bridging, so it’s vital to insulate strategically. The image above shows a fairly small thermal break proud (to the bottom) of the LVLs.  We would suggest a deeper block of insulation and then the brake metal wrap should be designed accordingly. Some builders have used fairly thick blocks of insulation outboard of the LVLs or steel tube – e.g. 3” of foam. As mentioned above, you generally do not want to overlap the screw flanges (nail fins). One option might include increasing the RO just enough to accommodate the flanges without overlapping them. 

Benefits: 

  • Large assemblies or even “window walls” using this vertical post approach are possible and meet the wind-load requirements. 
  • Steel Tubes and LVLs can help reduce the bulkiness of vertical posts. 
  • Vertical posts can help reduce the required header size generally required for large expanses of glass.
  • Allows for more design freedom to build creative elements into the design of the home, while still sticking within code parameters. 
  • Allows for smaller glazing assemblies which can more readily be transported without heavy equipment, reducing cost.

Cons: 

  • Requires insulation as the use of the steel tube or heavy lumber can be a significant source of energy loss. It is critical that the design includes an insulation component, and more is better. 
  • This assembly can be more costly and require more labor to build. 

If you find yourself working on a project with tight constraints around wind-load parameters, consider an approach like this. Our team is more than happy to talk through how this works in real life and what considerations you may want to have as you design out this assembly! 

Disclaimer: Please consult your structural engineer when using these concepts.

Energy-Minded Design: The Balance Between Form & Function

There are some pretty snazzy design ideas out there in the world. If you look at design contests, architectural school projects, or even just down your own street, you’ll probably see some very beautiful designs that simply don’t make a lot of practical sense. It comes back to the age-old question of form vs. function. Designers have been walking that delicate balance for thousands upon thousands of years, and in today’s world, it’s no different. Simply put: certain design attributes cause complexity with energy efficiency and force project owners to make hard decisions. 

Complex Design Attributes: There are a handful of common design attributes that simply add complexity to the energy efficiency of a house. For someone designing a Passivhaus building, or just wants to be energy-aware, the question usually comes up and you have to decide between bump-outs that make the energy model more challenging and something that will help prevent energy loss.
Design Features: Bump-outs, cantilevered floors, dormers, knee walls, and more are some of the common culprits. Often, these are poorly insulated and add extra exterior wall surface area and seams in a wall or roof construction. All of these factors lead to energy losses due to air infiltration and thermal bridges.

Conditioned Breezeways: Breezeways that are conditioned, heated, and cooled, are another common culprit for energy loss. While these are great for connecting parts of a home, they often have multiple exterior facades, increasing the potential for thermal inefficiency. The surface area to volume ratio is much higher in a breezeway than typically is found in the primary parts of a home. 

Poor Orientation: Orientation of a home is often the last consideration, but especially in sunny climates like Colorado, the way a home faces the sun can make a big difference. Whether you’re dealing with a room overheating or a spot in the home being too cold from lack of direct light (and heat) from the sun, it can make a difference. 

How to Design Well, But Efficiently
Simple is Better: Every time you add a turn, an opening, or additional surface area to the exterior, you increase the potential for energy losses while increasing the complexity of how you will maintain thermal integrity at that juncture. Simplicity allows for higher performance than highly complex building envelopes!

Orient Well: Take note of the orientation from the start. You’ll want to consider your views as well, but keep in mind which side of the home will get the most sunlight and daytime heat. Also, think through where the windows will be positioned in relation to this orientation. It makes a big difference in states like Colorado where the sunlight can cause huge temperature swings for some spaces. 

Materials Matter: If your overall exterior facades are fairly simple, you can still add some elements of great design and interest with the placement of unique finish materials and colors. Breaking up a facade with a few materials and complementary color schemes can add interest without causing extra energy losses. In fact, you can even incorporate these design material choices in a way that supports extra insulation (e.g. continuous insulation). Finish and insulation material selections can help protect a home even more from the harsh sun, wind, or outside temperatures. 
Purposeful Corners: If you are adding complexity to your design with additional corners and bump-outs, make sure you are designing those weak points with intention. Proper design and use of materials to seal off and improve the thermal performance of these junctures is vital!

Exterior Living Spaces: Consider how exterior living spaces like porches, pergolas, and covered patios can allow depth and great design, while strategically protecting the home from energy losses. 

Are we saying your house needs to look boring to be energy-efficient? Absolutely not! Some of the most efficient, sustainable homes we’ve encountered are true works of art. However, an energy-efficient home doesn’t happen by accident. It must be a continual conversation between you, your architect, and your contractor to ensure any and all goals on the project are met. 

As you consider these energy-efficient options for your home, make sure to keep our team involved in the process. We often help our clients find the balance between form and function so that your home is truly the energy-efficient work of art you’ve always dreamed of!

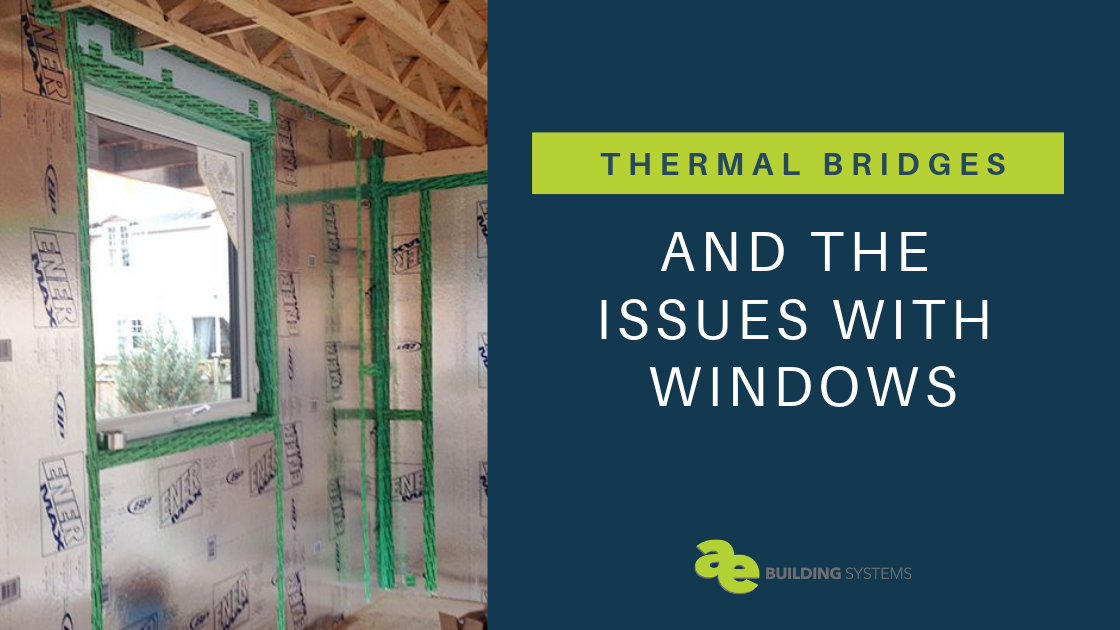
Thermal Bridging and Issues with Windows

As a homeowner, heat loss is or should be a big concern. Energy escaping through the building envelope (walls, roof, floor) means more energy is required to maintain a consistent temperature or better said – comfort -within your home. It also means higher utility bills whether you’re building a new home or looking to refurbish an existing home. One of the most significant considerations should be how to make your home more comfortable but also more energy-efficient – less costly to operate. Which leads us to the topic of Thermal Bridging!

What is thermal bridging?

In a heating climate and similar to air infiltration, thermal bridging results in heat loss and occurs when heat escapes from the inside of the building to the outside, via conduction and through the building envelope. If you’ve ever been in a house that has a “drafty” spot or just constantly feels cold, that’s likely the result of thermal bridging as much as or even more than air infiltration. Even airtight homes can have a heat-losses of 20 to 50 percent due to thermal bridges.

Types of Thermal Bridges

There are several types of thermal bridges that designers, builders, and homeowners should be aware of and the following are three common types:

  • Repeating or Systematic thermal bridges: A common cause of heat loss are repeating thermal bridges which are predictably found inconsistent breaks in the thermal envelope allowing heat to pass through easily. It’s important to keep these in mind during a building’s design. Common Examples include wood and steel studs, steel wall ties, ceiling joists, and insulated suspended floor joists.
  • Non-repeating thermal bridges: This method of heat loss doesn’t follow a pattern in the way that repeating thermal bridges do. A non-repeating thermal bridge tends to pop up in specific areas impacted by an interruption or break in the construction. Common culprits include things that penetrate the thermal envelope to include windows and doors, structural beams, pipes and cables, and cantilevers.
  • Geometrical Thermal bridges: Generally found where the building envelope changes directions and where the materials meet, Geometric thermal bridge examples include wall corners, wall to roof and floor junctions.  The more complex a building design is, the more geometric thermal bridging will be prevalent.

Regardless of the source, avoiding thermal bridges wherever possible is essential – and knowing where your home is losing heat can help you take the proper measures needed to reduce the problem.

Thermal Bridging and Windows

Often, it is windows that are a major culprit when it comes to heat loss and thermal bridging in the home. Standard or code minimum windows often represent a compromise. “We” accept their lower thermal performance because we enjoy the view, natural light, and ventilation they provide. However, when adding high-performance windows with higher R-values (lower U-values), windows become less of a concern for thermal bridging, especially when properly installed.

In an existing home, an expert can determine the state of a home’s windows by doing an inspection. They know what to look for in terms of damage, deterioration, and condition. Knowing a window’s age is a big help as well. Most older windows did not have high-performance glazing nor did manufacturers generally consider thermal bridging in the frames and spacers.

With new construction or existing homes, to reach your energy and comfort goals, it is important to consider high-performance windows. The thermal image below shows the thermal bridging – shown in blue/purple. This is likely why you have seen condensation on windows.

This image below shows the thermal bridging – shown in blue/purple.
The magic of thermal imaging!

Note also high-performance windows help with other variables to include sound attenuation. They reduce the sound coming from the busy street in front of your house for example.

Thermal Bridging Results in Condensation – and Mold

Four variables come into play with condensation: outdoor temperature, indoor temperature, your home’s humidity level, and the indoor surface temperature of an exterior building envelope component. Since outdoor temperatures are not something we have control over, we focus on what is in our control. Windows that have well-insulated frames, multi-panes of gas-filled glass and have higher performance spacers will help increase the interior surface temperature of the windows. Higher interior surface temperatures help to effectively prevent the condensation of moisture on your windows preventing mold from growing. This subsequently improves your air quality. We would be remiss if we didn’t also mention the importance of ventilation systems which improves indoor air quality.

Check out this SIGA Fentrim F for preventing condensation

How To Prevent Window Thermal Bridging

  • Glass: Pursue options that included triple or even quad glazing.
  • Gas: Gas filled glazing is no joke. Argon gas is cost effective and provides a good boost in performance over air-filled units. Krypton gas, while more costly, provides an excellent increase to performance.
  • Frames: Select frames made of low conductive materials. Aluminum frames without thermal breaks are a complete no-no for energy efficiency and comfort. Aluminum is a tremendous conductor of heat. Better options are wood, fiberglass, and PVC with insulating air chambers. These frames are even better if they are insulated. Note, thermally broken aluminum is a good option depending on how good the thermal break is.
  • Spacers: Selecting windows with better spacers can help prevent thermal bridging in the windows as well. These spacers separate the panes of glass and appear where there are divided lights. Avoiding spacers made of aluminum and steel, and selecting stainless steel and various composite materials are much better options. Warm Edge, Super Spacer, and Swiss Spacer are some of the composite spacers that are available.
  • Installation: Proper window installation including air sealing and insulation around the windows will significantly reduce the amount of energy loss. To reduce thermal bridging around windows, Thermal Buck is a great product for the installation.

Final Thoughts

Bringing awareness of thermal bridging to all of your construction partners will aid in your goal. An architect can design to minimize thermal bridges. By not paying attention to the details on the construction site or if there is a lack of training, reaching your goals will be difficult.

If you’re looking for ways to minimize thermal bridges and select high-performance windows for your project, contact us today.

What Are Construction Thermal Bridges in Buildings?

Do you have a random “cold spot” in your dining room or perhaps in an area where a sweater is always needed, no matter how high the thermostat is set?  Thermal bridges may be at play.

If you don’t work in or around construction, you may have never heard the term “thermal bridging”–but you’ve likely felt its effects. In a nutshell, it’s the movement of heat across an object that is more conductive than the materials around it.

Thermal bridging not only causes a loss of heat within the space, it can also cause the warm air inside to cool down. As we approach the coldest season of the year, this means higher utility costs and potentially uncomfortable shifts in temperature inside your home or building.

Keep reading to find out exactly how thermal bridging works and what you can do to stop it:

What is thermal bridging?

When heat attempts to escape a room, it follows the path of least resistance. Likewise, the same process occurs during the summer, only in reverse, allowing heat to enter your otherwise cool building.

Thermal bridging happens when a more conductive material allows an easy pathway for heat flow–usually where there is a break in (or penetration of) the insulation. Some common locations include:

  • The junctions between the wall and the floor, roof, or doors and windows.
  • The junction between the building and the deck or patio
  • Penetrations in the building envelope to include pipes or cables
  • Wood, steel, or concrete envelope components such as foundations, studs, and joists
  • Recessed lighting
  • Window and door frames
  • Areas with gaps in insulation

Impacts and risks assumed due to thermal bridging

What does all of this mean for you? In addition to poor climate control, there are several other lesser-known (but still serious) effects caused by thermal bridging.

Thermal bridges can increase the risk of condensation on internal surfaces, and also cause condensation within the walls.  Both can lead to mold growth, which in turn can cause unpleasant odors, poor air quality, and most importantly long-term health problems. Additionally, unchecked condensation may eventually cause rot and structural damage.

Thermal Bridging in windows

Thermal bridging can have a significant effect on the energy efficiency of windows. The frames and spacers are the primary culprits.  Spacers are the, typically metal, “strip” that goes between and separates the glass on double and triple pane windows.  Different materials have different conductivity and impact the performance of the windows differently.  Condensation on a double pane window is generally due to the spacers.

With retrofit situations, knowing exactly how old a window is, as well as the component materials, can provide you with a general idea of its efficacy. Unfortunately, if your windows are rather dated or just poorly made, it is nearly impossible to add thermal breaks into an existing framing system.

Issues with roofs and foundations

By their very nature, roofs and foundations present a large number of challenges in terms of maintaining a thermal boundary. Drains, vents, and holes for pipes and wires (amongst other things) create unavoidable penetrations in the building envelope and insulation. Heat transfers from the building into the ground or from the building into the air are often inevitable, though they can be minimized.

Strategies and methods to reduce thermal bridges in buildings

Bottom line? In new construction, design it right which a whole topic in itself. With existing homes, if you suspect there is thermal bridging occurring in your space, you need to eliminate or reduce the effects as much as possible.

Proper planning, design, and construction can help remedy thermal bridges in new structures. However, if you live in an older home, there are still steps you could take. These strategies include:

  • Performing an energy audit to identify thermal bridges in your home
  • Installing double or triple pane windows with argon or krypton gas, better spacers and insulated frames
  • Updating and/or adding insulation to your home – ideally adding a continuous insulation layer.
  • Installing storm doors (especially if you have metal doors)
  • The ultimate remedy is to complete a deep energy retrofit that addresses everything and more than mentioned in this blog

Studies show that in an otherwise airtight and insulated home, thermal bridges can account for a heat loss of up to 30%. Whether you’re building a new home or retrofitting an existing structure, care should be taken to avoid unnecessary breaks or penetrations so that the possibility of thermal bridging decreases.

If you’re looking for ways to minimize thermal bridges in your next project or existing home, contact us today.

Dive into our other blogs on thermal bridging:

» Thermal Bridging and Issues with Windows
» Thermal Bridging in Roofs and Framing
» Thermal Bridging in Foundations and Footers
» Thermal Bridging and Decks, Cantilevers, and Balconies

SIGA Majrex: A Skin Like the Cactus

What can we learn from the cactus related to building science? The cactus “skin” has essentially two perm ratings. The cactus absorbs vapor through its skin at night, and in the daytime when temperatures rise, that same skin prevents the moisture from escaping. The skin of the cactus allows moisture to migrate inward, but not outward.
SIGA has learned the answer to keeping walls dry by incorporating the unique characteristic of the skin of the cactus to collect and store water. In our buildings, we want the opposite to happen — prevent moisture from getting into our walls and allow it to migrate out. SIGA’s new product Majrex does just that.

While a cactus needs water to survive, our walls do not. In fact, moisture in our walls has the opposite impact — effectively “killing” our walls instead of nurturing them. So, the goal is the reverse of the cactus.
Humidity/moisture is higher inside our buildings due to such activities as cooking, showering and many other sources, even breathing. That moisture gets into our walls through a couple mechanisms, including air infiltration. With air infiltration, air and the moisture it carries travels from the interior of the building into the walls. That moisture within the air then condenses on cold surfaces in the interior of the walls — like a “sweaty” glass of ice water on a humid summer day. While it is best to keep the air out of our walls in the first place, some air will get in regardless carrying moisture with it.

At the point we have condensation in our walls, we absolutely need that moisture to dry or migrate out of the walls. Moisture in our walls causes mold, mildew and dry rot. In a typical home, if we were to add up all the cracks in the walls, corners and around the windows and doors, we have a hole equal to a 3-foot by 3-foot window open 24 hours every day of the year. Not only does this make us cold, but it also empties our pockets. Most importantly, it enables moisture to get into our walls with air as its transport mechanism.

SIGA patented its unique, one directional moisture transport and named it Hygrobrid technology. With this technology, SIGA developed Majrex, a “smart” interior membrane. Majrex has two different perm ratings. The perm rating from interior of the building to the interior of the walls is less than 0.097. In the other direction, from the interior of the wall to the interior of the building, the perm rating is greater than or equal to 4.25. Unlike other “smart” membranes that react to humidity and become more permeable to moisture, Majrex is essentially vapor open one way and nearly vapor closed the other. Combined with the SIGA Majvest air and weather barrier on the exterior with its 68-perm rating, we can effectively keep air and moisture out of our walls and effectively enable our walls to dry to the interior or to the exterior.


Majrex offers the benefits of:
1. Making our walls airtight so air and moisture cannot get in.
2. Making sure walls are vapor open, enabling moisture to migrate out of the walls.

Unfortunately, we often hear from building practitioners that walls need to breathe, and there is a very important distinction we would like to make. We do not want air going into our walls, because that very air is the culprit which brings moisture into our walls. We do not want them to “breathe.” Instead, we want them to be vapor open.

Simply put, Majrex is a directional membrane which allows moisture out of our walls and prevents it from coming in. Thanks to the cactus, SIGA has learned the secret to keeping our walls dry.

For more information or to order SIGA Majrex, call us at 720.287.4290

Source: sigacover.com