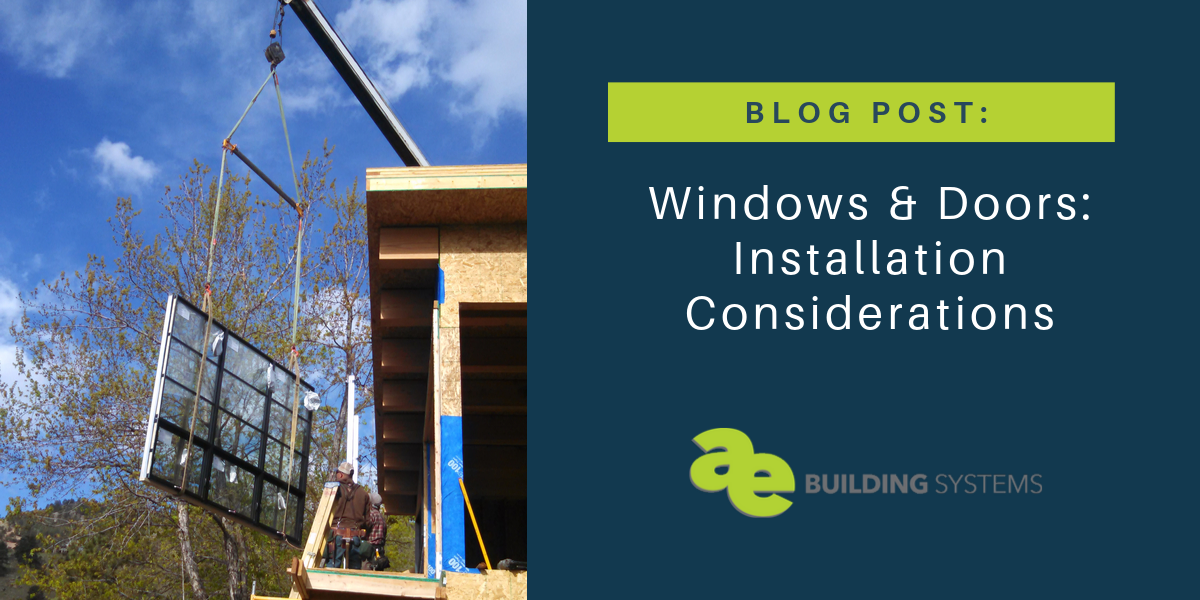
Windows and Doors: Installation Considerations

In this post, we’ll go over a few key tips for installing windows, sliding doors, and swing doors. Whether you’re updating windows in your home to modernize the look or increase energy efficiency, or you’ve got a new build going up, we hope the information we’re about to drop gives you some insight to the highlights of installation. NOTE: Any window or door you purchase should come with an installation guide, which you’ll want to read thoroughly. If we provide information here that is not in your instructions, please confirm with the manufacturer before proceeding.

While it may seem intimidating, installing a door or window is completely doable for everyone from the DIY-er to the seasoned builder. If you need a refresher on the various types of windows and doors, head back to our last post. Otherwise, grab your ‘driver, level, and some shims – here we go! 

Installing windows

There are many different kinds of windows, but the approach is generally the same. The basic steps are 1) Flash 2) Frame, 3) Install, 4) Seal, and 5) Trim. You’ve got this!

A few rules to live by:

  • Do it right the first time.
  • Measure, measure, and measure some more.
  • If the opening is wider than 3 feet, use temporary supports.
  • Moisture is your enemy.

We’ll assume you’ve already done your measuring and have prepped your framing, including checking for any water damage and replacing any wood that’s not up to the task at hand. Better to do it right at this point than to tear out all that hard work later.

Prep and preflash

First things first, prepare your opening by protecting the wood. There are a number of products you can use, but we won’t get into all the options here. Here’s a brief document that shows how to prepare an opening. However, if you’re doing a retrofit and working with replacement windows, getting the situation to look like this is not likely. You’ll just prepare and protect the opening as well as you can. 

Plumb, level, and square

Next, you’ll “dry fit” your window – pop it into place and add a few screws at the top to hold it there temporarily. Grab a couple shims and make sure the window is plumb (level along the jambs), level (from the sill), and square (corners are perfectly 90à„Š) on both the sash and the frame. 

A trick for measuring plumb: Measure the diagonals of the windows, and if the numbers are equal each way, you’ve arrived at plumb. The longer the level you use, the more accurate you can be.

Don’t put away your level and framing square yet – you’ll be checking and re-checking each piece throughout the whole process.

Nail flanges

Many windows will have a nail or screw flange (also called a fin), that attaches to the window jamb. Not only do they make installation pretty simple, they also do a great job keeping moisture out. While you will hear folks call these nailing flanges, do we really want to swing hammers near our windows? Screws are also a much better fastener for the long run.

You can screw right through these flanges to attach the window frame to the jambs, but first, you’ll need to cut the siding and slip in weather barrier behind the siding, wrapping around the framing for weather protection.

Next, you’ll caulk all around the opening where the flange will attach. Before you tilt the window into place, be sure you have some shims handy so you can shore up level, plumb, and square once again. Then drive your screws through the flange. 

Anchor brackets & through-frame install 

Another option that is increasingly used and very common with Euro windows is anchor bracket install. Generally installed to the interior, anchor brackets are metal strapping that is attached to the window and then fastened with screws into the jamb.  All the usual guidelines – plumb, level and square – apply. Anchor brackets are often used to install windows in thick walls like double stud walls and in high performance situations where we want the window in the middle of the insulation layer. 

Through-frame, sometimes referred to as a block-frame install, is just that – screwing through the frame to fasten the windows. Note that this is more common with operable windows like casements and tilt/turn windows. If using a through-frame approach, make sure you communicate that to your sales representative as special accommodations might be necessary with the windows. Using through-frame is less common with fixed windows as it generally means you have to remove the glazing and then re-glaze after the frame is installed. 

Fastener frequency

Always refer to the manufacturer’s instructions related to frequency of the fasteners. Also, pay special attention to fastener frequency when in high wind-load areas. More fasteners are often necessary where the wind loads are higher.

Interior jamb and sill extensions 

If your jamb turns out to be flush with the drywall inside once you’ve installed the window, lucky you. For the rest of us (especially when retrofitting an older home), jamb extensions may seem like a good option.

A jamb extension is the piece that extends the jamb (the frame of the window) along the inside depth of the wall. Not only does this clean up the window framing, it gives you a clean edge to attach the casing. 

Sill extensions build out the sill area and give you a smooth line, whether you’ve opted for a deep window frame or not. If you’ve chosen not to have a substantial window sill, this may only extend to the edge of the window trim; otherwise, it can be as deep as you’d like it.

Pro tip: We recommend against interior jamb and sill extensions because it limits access to the rough opening gap for insulation and air sealing. If you do go for it, it is often easier to build and install these extensions onsite. Also, we recommend taping the interior all the way around to the jamb to complete the air barrier. Please contact us for more information on this. 

Exterior finishing

On the exterior of the building, you’ll add your exterior casing, fasten that into place, then caulk all the way around. Install your drip cap over the window with some caulking, slipping the top edge just beneath the siding. Secure that drip cap to the top of the window casing.

Inside, fill any gaps between the window jambs and framing elements with loosely packed fiberglass insulation or a window foam. Then you’re on to a final caulk (and ideally tape) on the flange and painting.

Exterior frame extensions and sill are also available, which create a different look but also help to improve the performance of the wall overall. Passive House would say to put the window in the center of the insulation layer to get the best overall wall performance (window and walls collectively). An “innie” install makes things a bit trickier for detailing. Exterior sills and frame extensions help reduce some of the brain damage of these details. Again, please contact us for more information on these options. 

Installing sliding doors

Sliding doors are great. All that added light, plus they don’t require the interior clearspace a traditional swing door needs to swing open. What’s not to love? 

When installing a sliding door, the key pieces to pay attention to are where and how the door meets the floor and getting everything super duper leveled up to keep that sliding action smooth for years to come. If you’re doing your project with us, we’ll talk through all the micro details up front so the installation process is as seamless as possible.

There are a couple options related to the floor detail, and specifically to the threshold. Give us a call to discuss options like FASTrack where the sliding door actually embeds into the concrete floor providing a super clean look. Note that there are thermal bridging considerations related to these types of systems. 

Plumb, level, and square

Just as with your windows, taking the time to get plumb, level, and square straight will save you a host of headaches down the road. Since sliding doors are usually bigger than windows, small degrees add up and can mean your door will sag, stick, or even drift open and closed. 

We’ll add another term to this: “True.” True is your double confirmation: If plumb, level, and square are right on one side but ever so slightly sloppy on the other, you’re not true. Both sides of the door need to be plumb, level, and square to be true.

Installing swing doors

If we haven’t hammered this home enough yet, plumb, level, and square are operative words when it comes to doors, too. When installing a door, shims will start to feel like your right hand. This is most important on the hinge side of the door. One key thing to keep track of is how high off the ground the door hangs – you don’t want your crew arrive to install flooring and find out said flooring is taller than the bottom of the door sash/slab, making the door impossible to open.

Euro doors: The sash condition

It is very important to remember that European doors have very little clearance between the bottom of the sash of the door and the bottom of the threshold – generally less than a half inch. What that means is wood flooring installed after the door at Ÿ” will prevent an inswing door from opening. Make sure to accommodate the finished floor height relative to the door when selecting and installing doors.  

Brick mould and other trim considerations

Pre-hung exterior doors often have brick mould attached – an additional piece of exterior trim (wood, vinyl, whatever your door frame is made of) designed to cleanly overlay a brick exterior and produce a finished look. It doesn’t matter whether or not you actually have a brick exterior – this is just the name the piece comes with. 

Because brick mould makes it difficult to access the rough opening gap, to insulate and air/weather seal around the doors, we often recommend against using it and instead finish the door trim in the field. 

A quick note on installing Euro balcony doors

Balcony doors are essentially a window installation. What sets a balcony door apart is that you have to lift your feet to step over the bottom of the frame – the threshold is not flush with the floor. Not great for high-traffic areas, but it can save you a few bucks where it counts (more here). Plumb, level, square, weatherproofing, and off you go.

Wrapping it up

We hope you found some answers to your burning questions about installing windows and doors in your building. There’s a lot of information out there, and the specific product you get will come with its own installation guide. We’re here to help point you in the direction of some of the tried-and-true products we recommend (like our windows & doors or weather barriers), and we’re always happy to chat about your project. You can get in touch with us here.

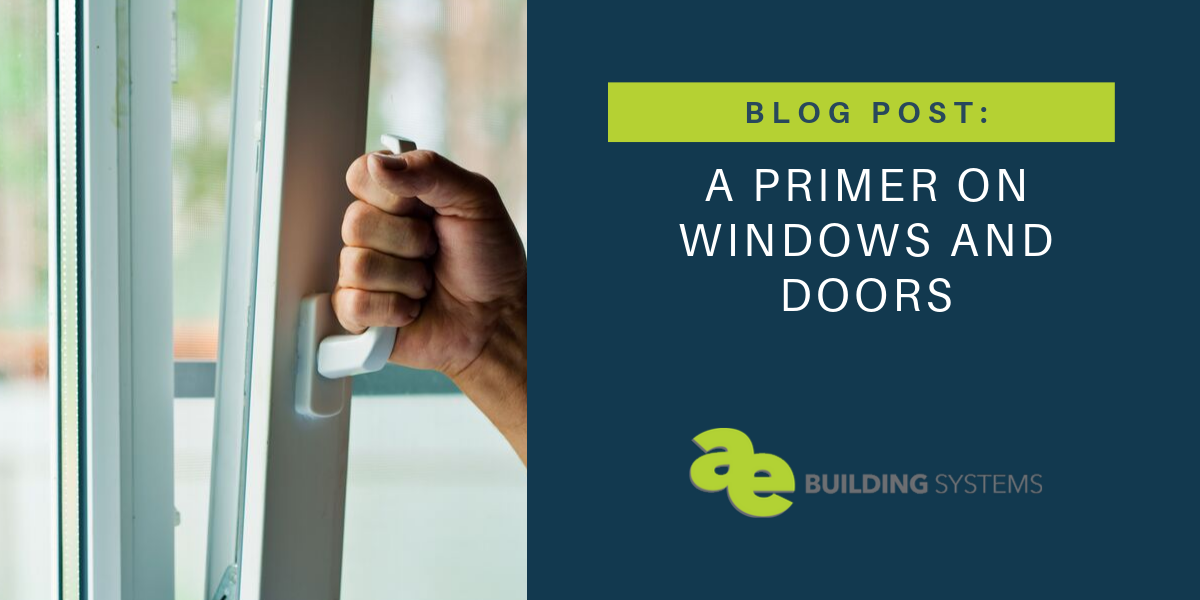
A Primer on Windows and Doors

Knock knock.
Who’s there?
Harry.
Harry who?

 Harry up and answer the door so we can talk about that big hole in your building!

There are lots of things we geek out about over here, and gaping spaces in buildings get our full attention. First-world countries have come a long way since the Three Little Pigs style of building, and we’ve learned a few things about thermodynamics. 

If you were to take a gander at the headlines for some of our other blog posts, you might guess (correctly) that we’re a little bit obsessed with thermal performance. Keeping heat in and out – consistently – is a big deal no matter whether we’re talking about a hotel, an office complex, or your own home. Of course, it goes beyond comfort: maintaining temperatures the right way can have a big impact on your wallet.

If you’re putting in the effort (and money) to insulate your home well and mitigate heat loss and thermal bridging, it sure makes a lot of sense to peer into the situation created by your windows and doors. 

Let’s look in to windows first.

Windows

Windows occupy, on average, 20% of wall space. But they’re responsible for more heat transfer per square foot than any other surface in your home. So if you’ve been patting yourself on the back for a job well done with insulation and think you can make sacrifices on the windows, sorry folks – windows are worth the investment.

There needn’t be a battle between letting the light in and settling for a closed-in space. Fortunately, there are some great products out there that let you create both Instagram-worthy spaces and the cost savings of a well-insulated environment.

Here are a few things to ask yourself when shopping for windows:

  • Given your objectives and climate zone, how much thermal performance and how airtight do you need your windows to be?
  • Do you want the windows and doors to open to the inside or outside? 
  • Would you like dual-action windows, meaning they can swing AND tilt open?

Let’s fling open the sash, shall we?

US windows vs. European windows

We’ll just get this out of the way first: If you’re new to window shopping, you may be confused by the whole US- vs. Euro-style window thing. In Europe, energy costs a whole lot more, so their windows tend to be extra energy efficient. This is accomplished in many ways, from high-performance frames and glass, to a higher quality and attention to detail. Even the way they open is designed to maximize energy efficiency.

European-style windows are


  • Certified using ISO standards
  • Generally more energy efficient
  • Sometimes more expensive
  • Growing in appeal in the US
  • Starting to be made right here in North America

American windows are


  • Certified using NFRC standards
  • Easier to install thanks to a nailing flange/fin – some Euro windows have nail fins as well
  • Have operation options commonly found in the US

Here at AE Building, we’re partial to European-style windows that are made in the USA

Types of windows

Functionality and durability should be considered right up there with energy efficiency. That includes the material used, how the window will open, and what you need the window to do for you (let the light in, let air in, or even potentially let people out).

Fixed / Picture Windows

These windows are called fixed because – surprise surprise – they don’t open. If you want light but don’t need airflow, these windows are a simple (and less costly) way to go. Fixed windows usually perform better than operable windows as well, both thermally and in terms of air infiltration.

Benefits of fixed windows:

      • Let the light in when you don’t need airflow

      • Can be many different shapes

      • Perform better than operable windows

      • Are less costly

      • Sometimes have more glass even with the same overall opening size

Tilt and Turn Windows

These dual-functioning windows have hinges both at the bottom (so you can tilt it open at the top) and the side (to swing the window open). They’re more thermally efficient, so they’re popular in Europe, and can be more expensive. Note that the turn/swing function is to the inside and not to the outside like typical US-style casement windows with a crank handle. 

Benefits of tilt and turn windows:

      • Lets heat out the top for ventilation during the summer

      • Blocks strong breezes

      • Easy to clean from inside the building

      • Multipoint locking makes them more secure and airtight

      • Tilt function enables venting with security

Casement Windows

Casement windows are usually rectangular windows that are tall and narrow. They are hinged on one side of the frame and the other side has a cranking mechanism to open the window for ventilation. They open outward.

Benefits of casement windows:

      • Multipoint locking available

      • Tight seal against heavy outside winds

      • Open outward, which means they won’t take up room in your interior spaces

Hopper 

Hopper windows have a hinge on the bottom that allows the top edge to tilt or open into the room a few inches. They’re usually opened with a handle at the top of the sash and can be difficult to reach on tall windows.

Benefits of hopper windows:

      • The opening is at the top and blocks rain from coming inside

      • Opens about 4-5” at the top for ventilation

      • Common for bathrooms

      • Great for schools

Awnings

Awning windows are similar to hopper windows, except the hinge is on the top and they open to the outside from the bottom of the sash.

Benefits of awning windows:

      • Nice solution for airflow in rainy climates

      • Wind won’t blow them open

      • Great option for baths and showers

Horizontal sliding windows

Sliding windows slide open on a horizontal track. We generally steer our clients away from sliders and hungs because their air infiltration rates tend to be not as great (due to the open seam around the operable portion of the windows). However, there are times when sliders and hungs are a better choice. Talk to us if you need help deciding!

Benefits of sliding windows:

      • Fewer moving parts and hardware = less maintenance

      • Can be advantageous where a casement would open out on a deck and a tilt-turn would open into the space intruding on your interior space – like over a kitchen sink where the window might hit the faucet

Single-Hung vs. Double-Hung

Where a double-hung window lets you open both sashes, top and bottom, a single-hung window only opens on the top or bottom. Here again, we try to avoid these due to the air infiltration rates, although hung windows can be advantageous where you don’t want a tilt/turn intruding into your space or a casement window opening out to a deck. There are also historical considerations with hung windows as they were the primary option for operation in older buildings.

A few definitions

NFRC = National Fenestration Rating Council

This independent, third-party certification agency assigns specific energy efficiency measures to complete window system, from frame to glass. (“Fenestration” has to do with windows and doors – if you skipped fifth grade or Shakespeare class, “defenestration” is to be thrown out of a window). 

U-factor / U-value

U-factor measures how well a window prevents heat from moving through the window’s materials – in or out. The lower the U-value, the less heat is lost in winter. These ratings generally fall between 0.20 and 1.20, with the higher rating being, say, a single-glazed window with aluminum frames, while a triple-glazed window might get a rating of 0.20 and even lower depending on the gas that used within the glass unit. These days, you can get quad pane glass which can run even lower – into 0.10 +/- U-values.

Visible Transmittance (VT) 

This one’s simple enough: Visible Transmittance measures how much natural light is able to pass through the window. It’s influenced by the number of panes and glass coatings.

Solar Heat Gain Coefficient (SHGC)

A number between 0 and 1, the SHGC looks at solar radiation transmitted through a window or door. The lower the number, the less solar heat it transmits (= more shading). Some people rely on a center-of-glass or glass-only SHGC, which will give a higher number. Full window values include the frame, which has no solar heat gain. The direction your window faces, whether or not it’s shaded, and your climate zone will drive the optimal SHGC for your windows. For example, in colder climates, you want to collect solar heat on the south elevation of the home and block it on your west elevation to minimize overheating in the summer.

Energy Star Certification

Energy StarÂź bases its certification on U-factor and SHGC ratings for four different climate zones. Learn more here >


We feature:

Doors

Now that we’ve got a handle on windows, let’s cover the next gaping hole in your building. Entry doors, interior doors, wood, steel, vinyl, with glass or without, one lock or many… When it comes to doors, you’ve got options.

US doors vs. European doors

Notes on European doors:

  • For balcony doors, we can incorporate a tilting mechanism similar to tilt/turn windows which allows for additional ventilation options
  • Often, a thicker design makes for improved thermal and acoustic performance
  • Usually features multipoint locking which improves air infiltration rates and security

Notes on American doors:

  • Includes swing and sliding doors
  • Features multipoint locking, with locks generally at three points on the handle side of the door

Types of doors

Balcony swing doors 

Balcony doors are a popular choice for accessing exterior living spaces like… balconies (go figure, right?). Because they have a higher threshold, they are generally not used as main entry or in high-traffic doorways.

Benefits of balcony doors:

      • Weather-resistant access with ventilation-only (tilt) option

      • Don’t lock or unlock from the outside, making them more secure

      • Multipoint lock similar to Euro windows

Standard US-style and Euro-style swing doors with a low threshold

For a quick mental picture of a swing door, recall any old Western movie scene where a man with spurs and chaps bursts through the saloon doors. The in-and-out swing of those doors is what gives these hinged doors their name. Thankfully, we’re looking at much more elegant and airtight solutions these days (for starters: hinges, not springs).

Benefits of swing doors:

      • ADA-compliant options are often available

      • Multipoint locking options

      • Higher performance – thermally insulated options are available

      • Many hardware options

Lift and slide

You’re familiar with sliding doors, and the “lift and slide” door takes things to the next level. The “lift” action here utilizes a system of levers and wheels to lift the door up from its position flush against the floor/seal and move with little friction across an internal track. The lift function lifts the door out of an air seal and slides it open. Lift-slide doors generally seal better than typical US-style sliding doors.

For a closer look, check out our Advantage Classic or Mira lines, available as windows and doors.

Benefits of lift and slide doors:

      • Large, heavy panels move gracefully

      • Superior air infiltration over standard US-style sliding glass doors

      • Good for opening up large spaces

      • High storm rating protection

      • Strong forced-entry rating

      • Can use larger glass panels

      • Popular for window walls

Tilt and glide 

Tilt and glide doors slide open, with the added flexibility of tilting open at the top for ventilation. The advantage of this tilt is that it’s secure when tilted – kids stay inside, animals stay outside (or inside), and the door remains locked.

For a closer look, check out our Tyrol Line.

Benefits of tilt and glide doors:

      • Added ventilation option

      • Superior air infiltration over standard US-style sliding glass doors

A note on multipoint locking

As the primary point of entry for your building, doors generally have a higher security threshold than windows. Multipoint locks are more common in European doors and usually include a deadbolt, live latch, and several additional locking pins around the door sash.

Benefits of multipoint locking:

      • Helps prevent break-ins

      • When engaged, the locks aid in supporting the door and reducing wear on the hinges

      • Insurance often recognizes the added security

      • Additional ventilation option

Wrapping it up

Hopefully this primer has helped clarify some of your questions and given you some ideas about what kind of window or door is best for your unique scenario. We’re proud to provide made in the US, European-style windows and doors that are Passive House certified. We’re here if you have any questions, so don’t hesitate to reach out.

In our next post, we’ll get into installation methods. Stay tuned!


Thermal Bridging in Roofs and Framing

This post is part of a series on thermal bridging.

Warm air rises, so you can imagine roofs are kind of a big deal when it comes to thermal anything. Point of fact, your roofing system’s thermal performance is a major factor in your building’s overall thermal performance. And one sure-fire way to sabotage the whole deal is to ignore thermal bridging – the movement of heat through thermal-conductive materials. 

Roofs top off your building’s thermal boundary or envelope. You may think that an attic provides an adequate barrier and insulating your ceiling is enough, but there are some serious reasons to intentionally address thermal bridging whether you’re smoothing out blueprints or staring down a renovation project. 

Read on to discover how reducing thermal bridges can help you: 

  • keep your energy costs from going through the roof (literally)
  • avoid extreme temperatures in your attic
  • prevent condensation problems
  • reduce the potential for ice dams
  • ensure the longevity of your roof

The good news: Thermal bridging is avoidable. As with any project, it’s possible to go overboard, so recognize the point of diminishing returns, stop there, and enjoy your energy savings.

Recap: What is thermal bridging?

Thermal bridging is the movement of heat through a material that’s more conductive than the air around it. Failure to mitigate can account for overall heat loss of up to 30% – so it’s not a thermodynamics lesson to be taken lightly. (Brush up on Thermal Bridging 101 here.)

When it’s cold outside, the heat inside your building will make its way through wood as much as three times easier than it will move through insulation (and steel is even happier to move heat). So insulation is a good move. But only part of the solution, because mitigating thermal bridging through structural elements and anything that penetrates your building’s envelope is key to building a more efficient building.

To be clear, improved energy performance and energy savings are great, but addressing thermal bridging means you’ll also get a more comfortable and durable building – both in terms of temperature and because you won’t find yourself dealing with fallout from moisture problems down the road.

In this series, we’ve covered how to navigate thermal bridging when it comes to windows, wandered out to decks, cantilevers, and balconies, and drilled down to foundations and footers. Now let’s take a look up at the roof.

Challenges for roofs

We talk a lot about building envelopes, and the roof is part and parcel. The key principle here: Maintain a continuous thermal boundary to help prevent thermal bridging. But before you forge ahead too enthusiastically, take your pick from this list of challenges to make your design phase more exciting: 

Pre-built challenges

Maybe the previous builders used too much heat-transferring wood to construct the roof joists (or worse, filled awkward spaces with wood). Maybe the angle of the roof slope leaves you gaps and tight spaces that make filling with insulation difficult.

Attic temperature control

In a perfect world, you want your attic to feel as close to outside temps as possible. And because hot air rises, clearly the top-most part of your building presents a special challenge. In cold seasons, you’re focused on keeping the warm air in. In warmer weather, it’s all about moving heat out to keep your interior cool. So there’s a balance to strike between venting and insulation when trying to encourage your attic to cycle heat and moisture up and out.

Venting

We won’t get into venting here to stay focused, but it’s worth a mention: you’ll probably want to consider ridge or gable vents that can quickly dissipate heat and maybe even draw cooler air in from outside.

Condensation

If you’re doing an exceptional job keeping your attic cool in summer, you may end up seeing condensation on the underside of the roof deck due to warmer, moister air outside. Any interior cold spots (think A.C. pipes or vents) can also lead to condensation, moisture damage (mold and mildew) and heat loss. And that moisture buildup can cause damage to your roof deck. In winter, the opposite scenario is relevant, with condensation forming on the underside of the decking. 

Roof perimeters

Air sealing is an important part of building a strong building envelope. When air leakage happens at the roof perimeter, you’ll see issues like frost inside the attic (even snow blown inside), ice damming at the edge of the roof, condensation buildup on the fascia, and metal corrosion. You need airflow to help your attic cycle heat and moisture away.

Ice damming

Winter weather can be relied on for its inconsistency. Snow and sunshine are both hitting your roof from above, with the sun usually doing its job to melt the snow. Whatever the sun doesn’t melt, heat transfer from your warm attic will probably make short work of. Sounds great, right? Except these melt-freeze-melt-freeze cycles can put you in a real pickle when the melted snow has the audacity to re-freeze at the edge of the roof where it’s colder, backs up, and then dams under your roof shingles. Great.

Skylights and other penetrations

Structural elements that penetrate the roof (remember, the roof is part of your building envelope) create a thermal bridge. Chimneys, railings, vents, plumbing stacks, skylights – all potential penetration perpetrators. Yes, skylights generally have poor thermal performance. But are they wonderful? They sure are. Traditional installations tend to forgo thermal breaks in the frame, so significant thermal bridging tends to be common around the perimeter of skylights. There are ways to mitigate energy loss, such as wrapping the framing in insulation and ensuring thermal continuity throughout the skylight support. 

Roof-to-wall transitions

Flashing, blocking, and structural supports all decrease R-value. But sealing the roof-wall connections is critical. Do what you can to select non-conductive flashing materials that will minimize thermal bridges and mitigate the rest with spray foam and other insulation products.

Support framing

Wood framing directly conducts heat and cold. If you’re using steel studs, well, then thermal bridging becomes an even bigger deal. And you’re almost certainly using metal fasteners – maybe even hundreds of them across the entire roof. One solution to the fasteners issue is to use a low-density foam to adhere the insulation, but there’s a better way overall… read on for a straightforward solution to many of these roofing woes.

Thermal Bridging and Roofs
For an even better visual take a look at these thermal images.

Mitigation strategies

The roof has one job: Keep the weather outside. But because weather can be crazy (and seems to be getting crazier), tasking the roof with keeping the peace between inside and out can be more challenging than it seems.  There are two approaches to roofing strategy, and it all comes down to whether it makes more sense in your climate to keep your roof warm or cool. 

Warm roof vs. cool roof

Cool roof

A cool roof is:

  • Traditional (most existing buildings likely use this approach)
  • Vented
  • Utilizes insulation placed above the ceiling to maintain temperatures
  • Has an advantage for warmer climates because venting allows heat to escape faster

Insulation is placed between and hopefully above the rafters or joists with (sometimes) extra insulation underneath, along the ceiling. Now, if you’re retrofitting an existing building, this could get tricky real fast. You may have to open up the roof from the outside or even underneath by taking down the ceiling to add insulation, and you may lose ceiling height inside the room. Plus, when you’re cutting the insulation to fit in each nook and cranny, you have to be pretty precise to get the coverage right. 

On the upside, a well-insulated, ventilated roof can help to control or prevent condensation and the formation of ice dams by allowing heat to escape through the roof in the winter months.

Warm roof

Instead of insulating between the rafters, the warm-roof approach relies on insulation placed OVER the roof deck. In this case, rigid insulation is simply installed on top of the existing surface. This ensures the entire roof structure is insulated – which lends itself to being more energy efficient. 

A warm roof is:

  • Usually not ventilated
  • Rigid foam insulation is attached directly over the roof deck
  • Heat is contained in the attic space or there is no attic (in the case of vaulted ceilings or low slope roofs)
  • Growing in popularity for new builds

With the insulation placed outside, if water or air ducts are run through your attic space, they’ll be less likely affected by extreme temperatures, saving you money on utility costs.

This approach is not terribly difficult to implement when retrofitting an existing building, with one note: By putting insulation over the existing roof level, you will add extra height to your roof that may require reviewing your local code as well as making adjustments to your exterior design details (fascia board, decorative trim, and so on).

Exterior rigid insulation

In keeping with our aim to create an unbroken building envelope, wrapping your building with exterior rigid insulation (warm roof) is the best strategy across the board. Be sure to use materials that are less conductive, like fiberglass, mineral wool, cellulose or high-strength foam – or our favorite, Rockwool. Continuous rigid insulation is so effective that some builders are actually foregoing interior insulation because it’s unnecessary at that point!

But wait, isn’t cavity insulation just easier? You might think so. You could use a dense-pack, blown-in cellulose or fiberglass insulation (preferred over trying to squeeze hand-cut batts into cavities) or a more expensive closed-cell spray foam, but you will inevitably find some tight spaces where it’s tricky at best to get the needed amount of insulation stuffed in – usually where the roof slope approaches the exterior walls. For this, there’s a great solution called the raised-heel truss which we’ll get into in just a minute…

Continuous insulation

Having a continuous insulation layer is critical– especially if you’re using any metal framing. Any supports for the insulation layer should be low-conductive or thermally broken. Sure, the support system is bound to have some negative effect on your R-value, but the overall performance advantages still give continuous insulation an advantage over cavity insulation options.

When you’re installing continuous insulation, your layers should be (from the outside): thermal control, water control, air control, vapor control. This should match up with the layers on the walls of your structure.

Seam taping / Air barriers

Seam tape (Majcoat, Fentrim F, and Wigluv for roofs) prevents air and moisture transfer where your rigid insulation boards join and at corners and joints. This helps to prevent condensation at the seams where air might travel through, bringing moisture with it. Seam tape is often used on foil-backed rigid Polyiso (closed-cell, rigid foam board insulation) which also acts as your WRB (water-resistant barrier). Another option is to make sure your WRB is airtight prior to installing the continuous rigid on the exterior. So many options!

Fascia boards

When baby it’s cold outside, and your attic is nice and cozy (or the A.C. is humming during a hot, humid summer), dew point along the fascia board is a real concern. What’s happening here is that moisture wants to drop out of the air onto a cooler surface – in this case, your fascia board. Continuous exterior insulation will help, but if you’re aiming for a cool roof or want to overprotect your fascia, you can also fill the space between the joists with insulation so it’s continuous through the ceiling to the point behind the fascia. 

To insulate the joist gaps or not to insulate?

If you’re installing rigid exterior insulation, it’s probably overkill to insulate the joist gaps. If you can’t do rigid exterior for any reason, or are going for a cool-roof strategy, then absolutely insulate between the joists. A well-insulated, airtight ceiling (so make sure to add air and vapor barriers, too) will help reduce heat loss into the attic in the winter, and save you money in the summer. You can then add spray foam to enhance the air seal at the perimeter, where the walls meet the roof. 

Raise the roof for raised-heel trusses

Where the roof slopes down to meet the wall there’s usually not enough room to install enough insulation.  We’re talking 4’’ vs. 12’’ from the rest of the roof, and in an area where you’re probably going to lose more energy. So that’s not great. (Yes, if you’re doing rigid continuous exterior insulation you’ll still want to look at adding a little extra insulation to your roof-wall connection.) Here’s a great post from the Energy Vanguard blog (with pictures!) for more on this.

With new construction (or serious retrofits), the solution is to add raised-heel trusses (aka “energy heel trusses” or just “energy trusses”). The raised-heel truss approach adjusts the framing at the edge to add height, effectively raising the roof to give you all the room you need for installing insulation that won’t get compressed in that space. Voila, adequate (if not great) insulation over the exterior walls at the eaves. Bonus: You might solve some wind washing problems (air from outside circulating in your attic) while you’re at it.

R-values

It makes sense that since warm air rises, R-values should be higher for attics and cathedral ceilings vs. what you would need for a wall. Not to mention, energy code requirements for the R-value of roofing insulation are becoming more stringent, often requiring an increased thickness of insulation.

There’s no blanket answer for figuring out your target roof R-value. Start by considering your local climate and ideally use Passive House Modeling. Colder climates might necessitate R-values of 60 and even higher – R-100 is not unheard of for a Passive House. In milder climates, you might get away with more like R-30. 

Compensating for poor design

Obviously, addressing thermal bridging is most effective when tackled at the design phase. But sometimes we don’t have that luxury, and there are solutions that can be applied during construction or renovation. In areas where you’re seeing thermal bridging, closed-cell spray foam or even aerogel products can come to the rescue. While probably not cost-effective compared to eliminating thermal bridging in the design phase, you should also weigh the cost of applying these solutions against simply accepting some minor heat losses. 

“And now that you don’t have to be perfect, you can be good.” (Thanks for the permission, John Steinbeck.)

Wrapping it up

Exterior rigid insulation is a great solution for protecting your building envelope as you design your roof. But, it’s not the only solution — we’re going to cover another popular method, framing with double-stud walls, in a future post. 

Serious about energy efficiency and want to get thermal bridging right on your next project? Talk to us.

Want to learn more about the impact of thermal bridging? Start with this post: What Are Construction Thermal Bridges in Buildings?

Thermal Bridging in Foundations and Footers

This post is part of a series on thermal bridging.

Exposed concrete foundations are notorious for glowing yellow on thermal imaging. All that concrete acts as a highway for heat to leave the building, and should be given as much attention as windows, balconies, and the rest of the building envelope.

Let us join the chorus of builders in emphasizing that it’s not just about heat loss. When you have an uninsulated basement wall or slab, yes, you’ll certainly see lower interior temperatures. But the direct result of a lower interior temperature is not just a cooler space, it’s also an environment where condensation is likely to form. And no one wants a damp, dank, musty environment at the base of their building.

Recap: What is thermal bridging?

Thermal bridging (also called a cold bridge, heat bridge, or thermal bypass) is the movement of heat through a material that’s more conductive than the air around it. Thermal bridging can account for heat loss of up to 30%, so you can imagine the importance of addressing this when constructing your foundation! (Brush up on Thermal Bridging 101 here.)

Which materials act as heat highways, you ask? Steel, concrete, and wood (core construction materials) are prime offenders – and can’t really be avoided when building. But you CAN take into account some design considerations that will minimize thermal bridging, if not stop it in its tracks.

We’ve covered how windows are a prime offender for thermal bridging in your home, and we addressed some design considerations for decks, cantilevers, and balconies. Now, let’s drill down into foundations and footers.

Challenges for foundations

If you’ve ever had a basement, you may have noticed that any musty smell becomes stronger in the summer months. That’s because the warmer, more humid air is coming in contact with cooler surfaces that are below the dewpoint of the air inside (more on dewpoint in a minute). Particularly guilty are rim joists, as they tend to run colder.

In a two-story home, basements can account for 10-30% of the home’s annual heat loss in winter – more for a single-story building. Let’s take a look at what’s happening where.

Heat loss

All the cement, studs, and supports that go into shoring up a foundation are perfectly primed for thermal bridging if you don’t take the necessary steps to insulate and construct appropriately.

You might think, “heat loss, no biggie for a basement.” But it’s not just about reducing energy bills and keeping temps comfortable. As we mentioned, because thermal bridging also moves condensation and wetness along those pathways, enter the potential for expensive damage due to moisture and mold.

Moisture

Let’s do a little refresher on dew point.

When a thermal bridge whisks that heat out, you get cooler interior surfaces (good if you wanted a root cellar, not so good if you’re hoping for a cozy place to hang out). And those cooler interior surfaces invite moisture – the root cause of mold, mildew, and decay. Why? It’s all about dew point, the temperature at which the vapor in the air begins to condense.

To control moisture, it’s more or less a matter of properly insulating your foundation and installing vapor barriers. We’ll get to that in a minute.

Foundation-to-wall transitions

One particular area to keep in mind is where the foundation meets the rest of the house – a particularly problematic area for thermal performance. Foundations of course are still considered part of your building envelope, so wherever the concrete (slab, foundation, or foundation wall) meets the exterior wall will need extra attention because any insulation at those points is generally non-continuous.

Challenges for footers

Footers are typically poured concrete with rebar reinforcement and set just underground. Footers support the foundation and help prevent settling. You may also find yourself constructing a footer for a deck, pergola, wall, or garage.

While heat loss through footers can be reasonably low, if you’re going for Passive House, you’ll still need to address it.

Mitigation strategies

When it comes to thermal bridging, two things are critical to consider when constructing your foundation or footer: Insulation (interior, exterior, midlayer) and permeability (vapor and air barriers). Keep this in mind: Your goal is to keep the interior warmer than the exterior in the winter. However, condensation can also happen in summer when the air can hold more moisture.

Insulation

Foundations, basements, and crawl spaces can be insulated internally, externally, between layers of concrete, or both internally and externally. While exterior insulation is the most effective, interior insulation is more common – but it comes with more moisture problems.

Interior or exterior, you may want to check which materials are recommended for your climate zone, as your insulation needs will depend on temperature and humidity ranges in your region.

Exterior insulation

Let’s cover exterior insulation first.

In a perfect world, the best solution is to wrap the exterior of your entire building envelope with rigid insulation, including the foundation.

For below-grade foundations, select an insulation material that can withstand conditions underground, which means it should hold up to moisture, freezing, and thawing. If your insulation will be in direct contact with the soil, extruded polystyrene (XPS) holds up well and will retain most of its original R-value. However, XPS has some reasonably concerning environmental drawbacks (global warming!). Higher-density, rigid mineral wool board is a more environmentally considerate choice.

Heat loss tends to be greatest at the corners of a building (where more material is in contact with the soil which absorbs more heat away from the walls). So, it helps to overlap the insulation at corners – including recesses for doors and windows.

Bonus: Insulation installed outside the foundation wall, as a wing or straight down vertically, can help prevent or absorb some of the effects of frost heaving (for those of you blissfully in warmer climates, frost heaving is the upward swelling of the soil as it freezes). Contact us if you would like more information on this.

Interior insulation

Interior insulation is designed to protect the interior air in the basement or crawlspace from contact with cold surfaces (the concrete and framing).

At one point or another, you’ve probably stuffed insulation into framing cavities and called it good. It’s easy, it’s cheap
 but you’re not stopping thermal bridging through the studs and cold hard concrete floor.

Several options for insulating your stud cavities:

  • ROCKWOOL or fiberglass batts. While a touch more costly, ROCKWOOL is our top choice for several reasons (which we’ll likely explore in a blog post down the road).
  • Open and closed-cell spray foam insulation. Closed-cell spray foam rings in with a high R-value rating. Note that these spray foams act as a vapor barrier at around 2″ thickness. The downside: This creates an impermeable layer which you’ll want to avoid if you have an impermeable layer on the exterior, too. Open-cell spray foam diffuses moisture and can completely fill cavities. The downside: This creates a lot of waste when trimmed. Also, note also the environmental impacts of urethane foams as well as the duration of the air-sealing of urethane. These are likely for another discussion.
  • Flash and batt or flash and fill is a hybrid approach to insulation that combines closed-cell spray foam insulation (to create an air seal) with fiberglass batt (usually, or blown fiberglass, blown cellulose, or sprayed cellulose) insulation.

Whatever you use, aim for an insulation layer with a permeance rating that allows for drying – this will lower the risk of moisture accumulation. (Rule of thumb: The greater the permeance, the greater the drying capability.)

Above-grade foundation insulation

While you’re probably used to seeing exposed concrete meeting the siding, you can imagine this is an undesirable scenario when it comes to thermal bridging.

But the laws of physics are on your side. Simply installing an R-10 insulation from siding to footing can cut heat loss by about 70% (for a heated basement). Applying a protective “board” or coating over the foundation insulation above grade will help protect it from damage due to the trades, sunlight, pests, and 
 weed whackers. There also are boards and coatings that can be colored and textured so as to add to the building’s visual appeal.

Notes for footers and foundation walls

While many kinds of rigid foam insulation have a good compressive strength higher than most soils, you may still want to consult with a structural engineer to verify the likelihood of “creep” – slow compression of the insulation under the footings. One option that is getting more recognition is foam glass. It can be costly but has great compressive strength.

Insulation on the interiors of any stem walls and a horizontal layer of continuous rigid foam or mineral wool under the slab can help address thermal bridging. A lesser-known option for insulating under the slab is perlite, a naturally occuring, expanded volcanic rock that has similar properties to glass. Contact us to learn more about perlite below slabs.

Retrofitting

If you’re retrofitting a building, focus on insulating the top half or top third and save yourself some digging. Warm air rises!

Vapor & air barriers

Make sure you get a vapor barrier beneath the slab to prevent moisture from rising up through the concrete. A sheet polyethylene will work well for this purpose, as well as a capillary break between the footing and the perimeter of the foundation wall. Then you can use tapes or sealant to seal the basement wall to the slab.

Be very cognizant of the ramifications of using  interior vapor barriers as you’ll want to allow drying. The general idea here is to keep the moisture out (obviously). We talk more about vapor barriers and breathing in this post.

Wrapping it up

Hopefully, this post has helped give you some insight into how to properly address thermal bridging as you construct your foundation or building footers. Now that you know what to look for, you won’t be able to un-see all the uninsulated concrete poking up around your neighborhood!

Serious about energy efficiency and want to get thermal bridging right on your next project? Talk to us.

Want to learn more about the impact of thermal bridging? Start with this post: What Are Construction Thermal Bridges in Buildings?

Thermal Bridging and Decks, Cantilevers, and Balconies

This post is part of a series on thermal bridging.

Have you been charged with designing an energy-efficient deck or balcony? Or maybe you’re looking at blueprints with cantilevers that has your gut telling you something’s not quite right. Perhaps you’re a homeowner itching to start a project, but the term “thermal bridging” stopped you in your tracks. Whatever you’re working on, we hope this entry helps clarify what thermal bridging is, why you can’t afford to ignore it, and how to address it appropriately when constructing a deck, balcony, or cantilever.

Recap: What is thermal bridging?

Thermal bridging, quite simply, is the movement of heat through a material that’s more conductive than the air around it. Anytime a thermal-conductive material like steel, concrete, or wood penetrates the building envelope, it creates a highway for heat to exit (or enter) the building. Don’t think it’s worth taking seriously? Consider that this can account for heat loss at a rate of up to 30%! (Want to learn more? Read our 101 here.)

The inefficiencies created by thermal bridging not only reflect poor design, but can result in high energy bills and discomfort for the homeowner. Worse, because these materials move condensation and wetness along with temperature differences, thermal bridging introduces the potential for expensive damage due to moisture and mold. Just think about the havoc persistent moisture within your walls could wreck!

We’ve already covered how windows are a prime offender for thermal bridging in your home. Now, let’s talk about what you need to take into consideration when building a deck or balcony and incorporating cantilevers into your design.

Thermal bridging in action

Thermal bridging is most pronounced with materials like steel (you’re probably thinking of beams and support, but fastening items are guilty too), although wood will also transfer heat. Basically, if you’re designing or constructing any element that projects from or enters the building, you need to pay attention to our points below in order to get energy efficiency right.

A cantilevered steel deck or balcony might as well be a case study for how thermal bridging works. Or, for that matter, a concrete slab (just look at multi-level apartment buildings). Decks and cantilevered design elements project out from their origins within the building, breaking through the building envelope and really quite efficiently conducting heat from (or into) the building.

Imagine these elements as giant radiator fins and you’ll start to get the picture of exactly how thermal bridging works!

However, with the right strategy and materials, you needn’t drop the trending cantilever look from your design toolbox. Stay with us as we get into some solutions and techniques to help you address this problem elegantly and efficiently.

Risks associated with thermal bridging

Heat leaks

Decks, balconies, cantilevered bump-outs, and concrete slabs are notorious for leaking heat. In the winter, you might notice that the interior floor near a deck feels colder to your feet – that’s poor design helping heat escape through the structure of your home.

Keep in mind this is not just about staying cozy: All of this wasted energy costs a homeowner money and impacts the environment.

Moisture issues

Let’s head back to grade school for a second. Remember what happens when warm air hits a cooler surface? You guessed (or Googled) it: Condensation. Now picture those beautiful decks, cantilevers, and balconies. Not only are they exposed to the elements, but when that warm summertime air travels into the AC-cooled building envelope thanks to thermal bridging, not only is condensation bound to happen, but you could soon have a serious mold problem on your hands. It’s not just a wintertime issue.

Working with a pre-built structure? Here’s how to tell if there’s a moisture problem: If you’re lucky enough not to find mold, you’ll see darkened areas where the moisture has attracted dirt.

One last thing to keep in mind here: having a vapor-open approach to the envelope assemblies is important. If moisture condenses with the envelope assemblies, it has to be able to migrate out of the assemblies or you will have mold issues.


Prevention & mitigation strategies

Ultimately, thermal bridging solutions are all about mitigating heat transfer – but let’s not forget air leaks. Use the following tips and tricks to help you “break the bridge.”

Good design

No surprise, preventing thermal bridging starts with good design. And the best way to get good design from the get-go? Tell your architects and structural engineers to work together and think “energy smart” first. (This may sound easier than it is!)

Ideally, good design doesn’t compromise the building envelope – which means you should try to construct your deck or balcony separately from the building and secure via load-bearing brackets to the walls or support independently. Even better, on its own foundation.

For decks:

So best-case scenario for a deck is an independently constructed structure on its own foundation. Otherwise, anywhere that a deck is attached to or penetrates the structure of the building, anticipate thermal bridging to occur. And if heat transfer is happening, you better believe moisture transfer is happening too.

You need a plan to keep air out of your walls, since air (or more precisely, the vapor in the air) is the primary culprit for moisture condensing within the wall assembly. You might consider installing enough continuous rigid exterior insulation so that the dewpoint occurs outside the envelope assemblies. Using a vapor-open approach will help ensure that if your walls do get wet, they can dry.

For balconies:

You might try supporting the outer corners of the balcony with steel rods or cables attached higher up the building – which can add visual appeal to your exterior design. Or, you might support the balcony with wooden brackets affixed to the building’s exterior. You may also be able to support the corners on independent posts, like you would for a deck.

If none of this possible or the design is already set in stone, using the right materials, insulating them, and creating an air barrier can significantly reduce or even eliminate thermal bridging issues. Read on for more about these strategies.

Structural thermal breaks

A thermal break is a material used to block the path of heat transfer. Incorporating structural thermal breaks (like specialized plates, pads, or foam) between a balcony and floor slab can reduce heat transfer by up to 75%. Bonus: This also improves condensation control.

You can purchase manufactured thermally broken balcony connectors from manufacturers such as Schock and Halfen.   

Air sealing & taping

Air sealing is an important step to making sure your building envelope is airtight. Don’t make the mistake of thinking you’ve covered your bases simply by insulating. Air can move around insulation, bringing higher/lower temperatures – and moisture. Since any penetration through the structure breaks the building envelope and creates the potential for airflow, you’ll want to make sure you have a plan for air sealing.

In fact, you should start the air sealing process even before you add any insulation by using a weather barrier system that is also an air barrier. Arguably, adding an interior air barrier can be a belt-and-suspenders approach. Learn about interior air barriers here.  

The Holy Grail here is an airtight, vapor-open building envelope. (There’s even a certification for that. Learn about Passive House.)

Insulation

Exterior insulation is often recommended and should be considered part of that building envelope you want to avoid penetrating. You’ll especially want to insulate around the highly conductive steel studs and structural framing. Here’s one exterior insulation we trust to do the job well.

Continuous rigid exterior insulation is used for wrapping the building structure. Ideally, you are using enough insulation to move the dewpoint out of the structural wall assembly and into the exterior rigid insulation. “Continuous” is the key word here – you want to install it without breaks. If you need to cut out the rigid insulation around penetrations (which would obviously short-circuit your attempts at preventing thermal bridging), taping and spray foam will be your friends.

Double stud construction: With double stud construction, the exterior studs will act as the structure, while the inner studs are used for chases and insulation with a gap between the two. Insulating the gap between the studs provides the thermal break. Decks and balconies can then be bolted to the structural exterior studs. Other cantilevered details like bump-outs are not recommended without an air barrier and a continuous rigid exterior insulation layer.

An educated crew

Ultimately, a well-informed crew (from architects to structural engineers to construction teams) will know what to look for and the steps they can employ to minimize thermal bridging while making the assemblies airtight.

Wrapping it up

We hope this post has helped underscore the importance of addressing thermal bridging and given you some strategies to make your design work. The good news: With these strategies and the right materials, you can significantly lower or eliminate the risk of thermal bridging in your deck, balcony, or cantilever design.

Serious about energy efficiency and want to get thermal bridging right on your next project? Talk to us.

Want to learn more about the impact of thermal bridging? Start with this post: What Are Construction Thermal Bridges in Buildings?