High-Performing Windows for High-Performing Homes

They say you’re the average of the five people you spend the most time with. If we, as a business, took stock of the top five brands we spend our time with, Alpen Windows would be at the top, and their recent evolutions only continue to affirm we’re surrounded by excellence.

AE Building Systems & Alpen Hig-Performance Products

At AE Building Systems, we work heavily with Alpen windows, and have for many years now. Alpen products align well with our pursuit of energy efficiency and Passive House design as they offer an incredible price/performance quotient for windows and doors. We also love the relationship we have with them as Alpen is, and has been since the 1980s, leading the US into the world of high-performance fenestration (windows and doors). Because they are in our backyard, we’ve been able to tour their facilities with our clients, enabling a unique perspective into a product line they don’t normally get. 

Where Credit Is Due

This past year, Alpen announced a few exciting things, including the Zenith line claiming a top spot in EnergyStar’s “Most Efficient” rating scale. While Passive House is more rigorous than EnergyStar, this recognition affirms their commitment to sustainability and efficiency. Now they have the accolade to prove it! Alpen windows have been featured in many award-winning projects by the PHIUS Passive House Conference. This has highlighted the role of windows in rigorous sustainable building approaches. 

Alpen is on the cutting edge of high-performance windows for high-performing homes. It’s exciting to be a part of their successes. To be able to provide our customers with a solid solution that provides so many benefits is the foundation of what we like about Alpen. 

What This Means For YOU

As a consumer, this means some nice tax incentives, on top of a solid product for your home. There are federal tax credits available that consumers can learn about here for windows and doors. There is also a $600 credit available until 2032 when using windows that meet Energy Star’s “Most Efficient” standards. NFRC labels are generally required to submit for the credit. Also, if you are eligible for assistance, EnergyStar even has some assistance options for upgrades. They’re worth checking out!  If you are looking for an incentive to invest in the best windows and doors you can put in a home, this is a great one to leverage. Bonus: if you are looking for tax incentives for your next project, make sure DSIRE is on your radar to search for any current options! 

We know upgrading windows on a home or adding new ones into a new project can feel a little overwhelming. There are many factors to consider from looks and design to construction and materials. That’s why we’ve done the legwork to only carry the top lines for homeowners and contractors who care about the best performance and energy savings over time. We know the ins and outs of high performance windows and are happy to help you find the right pick for your project! 

Watch Todd’s explainer video to learn more about glass, frames, spacers, gas, and panes. 

The Yeti is in the Details: Window Spacers

You may have heard the devil is in the details, but when it comes to ice buildup on a cold window, we know it’s probably more fitting for the abominable snowman. Have you ever wondered why ice forms around the edges of your windows on a cold day first? You may look at a window and not even realize the spacer inside of the window is playing such a large role. The spacer is the thermal bridge in the insulated glazing unit (IGU) and overall window, and therefore, the material choice for this often overlooked part is extremely important.

What Role Does a Window Spacer Play?

A spacer is the piece within the IGU that holds the panes of glass apart from each other. A double-pane window will have just one spacer between the two panes of glass, while a triple-pane window has two spacers. There are even quad-pane windows that will have three spacers with four panes of glass. The window spacer should be analyzed in order to prevent condensation (or ice) from forming on the edge of the glass, as well as decrease in performance of the window or door. 

The Weak Link: Window Spacer

Window spacers are the thermal bridge between the glazing and the rest of the window. While it may seem like a small, insignificant part, it can be a weak link in the overall window design. In the past, lower-cost windows have used aluminum or galvanized steel spacers as these are relatively inexpensive, but if you think about how metal feels in the cold temperatures, you can easily see how these materials aren’t helping with insulation! Surprisingly, these materials are still very prevalent in low-cost window brands today. So, while you may get a better deal upfront, you end up paying more in the long run with higher energy bills. 

A Stronger Option: Warm Edge Spacer

A smarter window choice will utilize a better insulating material for window spacers. Thermally-broken spacers are often referred to as “warm edge spacers.” Our friends at Alpen use a product referred to as a “super spacer,” which is a composite material with enhanced condensation resistance compared to the more traditional metal spacer. These include edge-seal durability, superior argon gas retention, and low conductivity. They use high-quality silicone and a highly breathable flexible foam matrix to improve performance. We’ve done a quick demo showing the difference between a metal spacer and these composite options that explains the difference in a simple manner. 

If you’re looking for an energy-efficient window choice, you can be as educated as possible on the various spots where thermal bridging can occur within your window. It pays to get some broad information about the products you are considering so you can compare what one brand says compared to others. Pay attention to what brands aren’t talking about too! The best way to know what they’re not telling you about is to talk to a few different competitors, or talk to energy nerds like us at AE Building Systems who can break down all the various things to be watching out for if your goal is to get an energy-efficient window option. 

When it comes to energy-efficiency, sometimes the smallest part of a design can have a BIG impact. That’s the case when it comes to window spacers and why we’re so passionate about the tiny details in the products we carry at AE Building Systems. We’re all about providing products that have the same passion for quality and energy-efficiency. It’s core to who we are and how we do business! 

Options for Large Windows in High Wind Load Areas

“It is the great north wind that made the Vikings.” – Scandinavian Proverb

If the great north wind helped make the epic, strong Vikings, it’s no wonder that the wind impacts some of the recent innovations to create better, stronger construction practices! We’re seeing it happen day in and day out with new approaches for fenestration – windows and doors. 

The Challenge

Homeowners increasingly want larger and larger expanses of glass in their homes.  At the same time, municipalities, including Boulder, CO, have realized that due to climate change, wind speeds have increased. As a result, Building Departments have increased the required Design Pressure (DP) ratings for windows and doors. The DP rating represents a building component’s ability to withstand a given amount of wind load.

And the challenge is not simple because the wind loads vary based on numerous things including: is the component closer to the edge of a wall or higher up on the building – e.g. multi-story buildings. In short, wind loads are a bit of a moving target across the building facade.

Additional Challenges

With large glazing assemblies, often windows are mulled together creating hinge points which are weak points in the window assembly. Also, as the size of the assembly increases, the DP rating generally suffers – decreases.  There are ways to increase the strength and DP rating of window assemblies which include adding structural mullions, thicker glass, and/or frame reinforcements.  However, these methods help only so much and eventually additional approaches must be considered – especially since homeowners are increasingly requesting entire window walls. The question becomes … How do we create a window wall with high performance and well insulated assemblies without having to use generally lower performance, more costly, commercial focused, structural storefront, curtain wall and ribbon window technologies?   

Consider Steel Tube, LVL or Lumber posts between the windows and doors

While we are not structural engineers here at AE Building Systems, we have been able to help our customers manage the new DP rating requirements necessary for code by suggesting solutions like leveraging steel tube, LVL, or lumber posts at the breaks in the window assemblies. You might think that it’s going to greatly reduce the performance due to thermal bridging and you’re right. Insulating those posts is critical.

Overview of the Steel Tube/LVL/Lumber Assembly: 

Insulate Strategically

Good design that withstands higher wind loads is possible with this steel tube/LVL/Lumber window surround or vertical posts. In the assembly diagrammed below, double LVL’s are used and then insulated with a block of insulation.  The insulation is then wrapped in break metal.  While a double 2x could also be used, LVLs and steel tube are stronger and more dimensionally stable than say a double 2×4. The use of steel tube and LVL helps minimize the bulkiness/width of sight lines, and these are done on the vertical as vertical posts. Keep in mind that windows at the edge of walls or near corners typically have higher DP or wind-load requirements than those in the center of the wall. Also keep in mind that the width of the steel tube or LVL is an important consideration as ideally the window screw flange (often referred to as nail fin) doesn’t overlap.

Especially if you use the steel tube option, you will have significant thermal bridging, so it’s vital to insulate strategically. The image above shows a fairly small thermal break proud (to the bottom) of the LVLs.  We would suggest a deeper block of insulation and then the brake metal wrap should be designed accordingly. Some builders have used fairly thick blocks of insulation outboard of the LVLs or steel tube – e.g. 3” of foam. As mentioned above, you generally do not want to overlap the screw flanges (nail fins). One option might include increasing the RO just enough to accommodate the flanges without overlapping them. 

Benefits: 

  • Large assemblies or even “window walls” using this vertical post approach are possible and meet the wind-load requirements. 
  • Steel Tubes and LVLs can help reduce the bulkiness of vertical posts. 
  • Vertical posts can help reduce the required header size generally required for large expanses of glass.
  • Allows for more design freedom to build creative elements into the design of the home, while still sticking within code parameters. 
  • Allows for smaller glazing assemblies which can more readily be transported without heavy equipment, reducing cost.

Cons: 

  • Requires insulation as the use of the steel tube or heavy lumber can be a significant source of energy loss. It is critical that the design includes an insulation component, and more is better. 
  • This assembly can be more costly and require more labor to build. 

If you find yourself working on a project with tight constraints around wind-load parameters, consider an approach like this. Our team is more than happy to talk through how this works in real life and what considerations you may want to have as you design out this assembly! 

Disclaimer: Please consult your structural engineer when using these concepts.

The Same, Yet Different: The Key Differences in Window & Door Design from Europe to the United States

So much of our life in the United States is heavily influenced by and similar to Europe. However, one area that has some pretty significant differences is in the design and construction of windows and doors. When you look at how life in Europe evolved and has more mixed-use, urban influences to residential design, as well as some of the climate factors, it makes sense that the focus around window and door design would vary some. 

Window Differences: How European Windows and American Windows Vary

Materials in Windows

While materials are often the same (e.g. wood, vinyl, aluminum, fiberglass, and, of course, glass), the construction of the windows and doors are often different. One of the main differences between European and American windows is thermal breaks and insulation used within the construction. In Europe, windows are typically made from wood, aluminum, or uPVC; these materials are generally more durable and energy-efficient, and they allow for a variety of design options. The “u” in uPVC stands for “unplasticized” which means that the PVC doesn’t expand and contract as much. 

Also, Europeans, and increasingly here in the US, design lots of chambers within the profile that increase structural integrity while reducing conductivity and convection currents with the assembly. The structural stability increases and the sizes can be larger. In European Aluminum windows, the thermal breaks tend to be more substantial and more effective at reducing conduction through the assembly. In contrast, American windows are often made from standard PVC or fiberglass, have less or no insulation, and have smaller, less effective thermal breaks in the aluminum systems. In addition, the spacers are often different. In Europe, they often use a composite spacer between the glass which has lower conductivity whereas in the US, highly conductive metals like aluminum or galvanized steel are often used. While materials might be less costly, many US products are not as energy efficient or as versatile in terms of design.

Installation of Windows

Another key difference between European and American windows is the way they are installed. In Europe, windows are typically installed from the inside of the building with anchor brackets vs. nail fins (preferably called screw fins). This allows for a more secure and energy-efficient installation, as the window can be sealed tightly against the frame. This also allows the windows to “sit” in the middle of the insulation layer boosting the overall wall performance to a small degree. In America, on the other hand, windows are typically installed from the outside of the building. This allows for easier installation, but it can result in gaps around the edges of the window and allows for wind-washing which cools the window and impacts energy efficiency.

Going In or Out

Another difference between European and American windows is their opening and closing. In Europe, windows are often designed to be opened in a variety of ways, including hinged and casement. European casement-style windows often tilt/turn inward with a dual action. See the video below by Todd demonstrating this window operation. This allows for greater flexibility and ventilation. In the United States, on the other hand, windows are typically designed to be opened by sliding or tilting. This is a simpler and more cost-effective design, but it can limit ventilation options. When US casement windows are designed, they typically open outward with a crank handle. 

Focus on Efficiency

Finally, the energy efficiency of European and American windows can vary greatly. In Europe, windows often have a higher focus on energy efficiency, with typically 3 panes of glass and advanced air sealing technology – multipoint locking. This helps to keep heat in during the winter and out during the summer, reducing energy costs and improving the building’s overall energy efficiency. In America, on the other hand, windows are more cost-effective and simple in their design. Sustainability and energy efficiency is growing in popularity but is still working hard to catch up to the efforts that have been standard in much of Europe. 

Come and Knock on My Door

Door design also has a few striking differences between US design and construction compared to European design. 

Sash Clearance: US entry doors have a higher sash clearance at the threshold, whereas European doors have a much smaller sash clearance. Designers should keep the clearances in mind if homeowners want  ¾” wood floors, and then throw rugs. In these cases, the door will need to be installed higher so the door will open.  

Frame/Jambs: US door frames/jambs typically use a 1X for the jambs. Compare this with the European style, which can be bulkier and have a clear opening that is much smaller than US doors. 

Balcony Doors: These style doors are much more common in European design. They typically do not have a low threshold that you might find with an entry door, and, instead have a window frame at the threshold. It’s a more cost-effective way to create a larger opening and allows a large window to act like a door. It’s not ideal in high-traffic areas, but with more compact city living in Europe, you’ll see them on balconies and low-traffic areas. 

Sliding Doors: European sliding doors include a lift slide design, where the handle of the door is actually a lever that lifts the entire sliding portion of the door off of the threshold while pushing rollers down to lift the door. European-style sliding doors also come in a style that includes a tilt/slide but has a high threshold similar to balcony doors. Also, similar to balcony doors, these don’t work well in high-traffic areas. 

We’re starting to see more lines blurred between US and European design. Many of the European features are starting to cross over and impact designs here in the United States. As a result, we’re seeing greater efficiency and performance, lower barriers to entry in cost and availability of designs, and greater ease to build a house with Passivhaus principles! 

At AE Building Systems, we’re devoted to providing the highest quality products, especially when it comes to windows and doors. We’re seeing the trends as they’re changing, and know the differences to help contractors and homeowners make the right decisions when it comes to their product selection. Got questions? We’re always happy to help! 

Passive Window Design for Optimal Performance

You thought windows were really simple and easy, right? Well, think again, my friends! When you pair high-efficiency windows with high altitude and differing sun exposures, you soon discover there are many possible ways you can not only optimize your window performance, but also set yourself up for failure!

Thin Air

Altitude is no joke, and you can literally feel it when you come from lower lands or sea level to visit a state like Colorado. The locals will all tell you to drink lots of water and if you try to go for a light jog, you may feel like you actually just attempted a marathon instead. The altitude has a real and major effect on the body. The same is true with windows. 

Why Does Altitude Matter?

High-performance windows today are equipped with triple and even quad glazing to form insulated glazing units (IGUs). IGUs have an airtight seal around the perimeter and trap the gas between the panes. Typically, gasses like argon and krypton are used. 

IGU’s perform best when they are assembled at the altitude where the final installation is. When IGUs are transported from a factory at sea level to a place with high elevation like we have in Colorado, it’s a recipe for disaster. When the altitude delta exceeds 1,600 feet, it becomes problematic because the barometric pressure varies enough to create complications. For example, when going up to 5,000 feet in elevation, the atmospheric pressure is much lower than at sea level. Think about what happens to a bag of potato chips. Most mainstream companies don’t gas fill and insert a capillary tube so the glass doesn’t break or even blow up in transit. Alpen HPP uses breather tubes and balloons to regulate barometric pressure of the gas used in their windows. There are other ways to manage barometric pressure to include pressure release valves as well as pre-pressurizing in the factory to the average barometric pressure for the installation location.

Hello, Mr. Sun!

If you’ve ever been in Colorado on a sunny day in the winter when it’s around 50 degrees, you may have experienced some hot flashes in your car where you scurry to get your air conditioning going. Wait a second! In the winter?? Yes, my friends, the sun is that intense here at higher altitudes and especially when it’s streaming through the glass of our cars. 

Now, let’s apply that to our homes. Solar heat gain coefficient (SHGC) is the fraction of solar radiation admitted through a skylight, door, or window, whether directly and/or absorbed. That radiation manifests as heat within the home. 

A lower SHGC window reduces solar heat and provides greater “shading” essentially. Glazing products with low SHGC ratings are more effective at reducing cooling loads during the summer by blocking some of the heat gain from sun radiation. Even up in the mountains, low SHGC glass is often used on the west elevation of a home to reduce summer overheating.  A glazing product with a high SHGC allows more solar heat gain which is great in colder months. Your home’s climate, orientation, and shading will drive the optimal SHGC for each window, often depending on the elevation or which side of the building the windows and doors are installed.

Please do not mistake SHGC with UV; these are different things. That said, one of the benefits of Alpen’s High Performance glass is it protects against up to 99.5% of UV rays. UV rays are damaging to virtually everything, including our skin. Related to windows, UV rays can damage nearly every finish in our homes and UV protection keeps interior finishes, wood, and furniture from getting damaged and discolored.  

Where Higher SHGC is Helpful:

In colder, heating-dominated northern climates, both SHGC and a window’s U-factor should be taken into account for energy efficiency. In heating climates where heating is a bigger concern than air conditioning, a higher SHGC in the range of 0.30 to 0.60 can be helpful especially on our south windows. During the winter months, the sun is lower in the south sky and the solar heat that is gained from the sun helps warm our homes.

Where Lower SHGC is Ideal:

In the Southern and Central states, where the climate can get extremely warm and air conditioning is used extensively throughout the majority of the year, a lower SHGC is ideal and desired. This equates to less heat gained from our windows. 

With most of our projects, we tune the windows by the elevation (North, East, South, West).  There have been rare occasions that windows even on the same elevation might have different SHGCs.  A north-facing window is going to behave differently than an east, south, or west-facing window simply based on the position of the sun throughout the day and the seasons. If you “tune” each window to be a specific value, make sure that each window is tagged properly and that the contractor pays attention to where each window needs to be installed, which is critical if you have a lot of the same sized windows. 

Of course, specifying this level of detail on each window is as much a science as it is an art. Note that SHGC levels generally run parallel with the visible transmittance of natural light.  While not noticeable by most people, there are slight hue differences with different SHGC glass. We know that every home’s windows are not just built to function well, but also to enhance a view and afford us natural light. In the mountains, we have some pretty spectacular views! Often, it’s a real-world balance to get the best performance while considering natural light in the home. [NOTE: it’s recommended to consult with an energy modeler in the process.]

So, those simple windows don’t seem so simple anymore, eh? There’s actually a whole lot more going on to make sure they will work optimally for your home. When you put this level of attention into your window design, you really can achieve some amazing results in performance, and as fans of sustainable, efficient homes, we love that! Love the idea of high-performing windows in your home too? Not sure where to start? Let us help you break down some of the basics and how they might apply to your home’s strategy.

Anatomy of a Window: Basics for High-Performance Windows

It’s time to get up close and personal with windows! We usually just focus on the scene we can see through the window, but what looks so simple can actually be very complex. 

There are three main sections to the overall anatomy of a window: frames, spacers, and glass. While we often focus on the shiny, pristine look of the clear glass, we understand that ALL parts of the window are vital for overall performance and ultimately providing better thermal performance for any house. 

Window Frames:

We often focus on the glass performance, but the frames are quite literally what holds so much integrity for the window performance. Not only do they offer structural support, but they are huge opportunities to preserve energy efficiency. Most companies don’t insulate the frames, but high-performance manufacturers will use various types of insulation. These can vary from EPS, wood fiber, and Polyurethane. 

At AE Building Systems, we’re big fans of:

  • Tyrol, Tyrol PH+ Windows, with either EPS or Graphite for insulating support
  • Zenith Windows (with Polyurethane), which offers higher insulation value per inch 
  • Smartwin by Advantage offers wood fiber and XPS insulation options
  • Advantage Mira, not insulated much, as it’s made of mainly wood (R-1 per inch)

Window Spacers:

Spacers are a vital part of every window’s anatomy and help provide structural integrity of the glazing unit while promoting a thermal and moisture seal. Spacers are usually made with either aluminum, steel, stainless steel, warm-edge, or composite. When a high-quality spacer is used along with gas filling and low-e-coated glass, the overall energy-efficiency of the window is improved.

Window Glass: 

Simplicity is the ultimate sophistication. – Leonardo Da Vinci

While it may look like just a simple, clear pane you look through, what’s going on is actually pretty sophisticated. There are so many factors to think of when it comes to insulated glass. Insulated glass is insulated with gas, such as Argon or Krypton, and the cost for these gasses varies based on the current market price. Elevation also plays a factor in expansion levels for gas, and with our team based in Colorado, we are highly aware of ensuring that windows are manufactured appropriately based on the elevation they will be used at. To quote our friend Leonardo, insulated glass is highly sophisticated, but can appear so simple to the untrained eye! 

Below are some of the most common options for residential window glass:

Double-Pane Windows:

A double-pane window has two panes of glass set into each window frame. The two glass panes have a small space between them, which creates an air pocket to provide a small level of insulation. If you’ve ever felt a single-pane window on an antique window or in an older home, you know that there’s minimal insulation and the glass is going to be very cold or very hot depending on the season. However, many homes historically have leaned toward double-pane windows, which will still be warm or cool to the touch, but not as drastic. While more cost-effective upfront, double-pane windows can cost you more in the long run as they aren’t nearly as efficient for insulation and energy transfer as other options available today. 

Euro Triple-Pane Windows: 

European windows are well known for their high energy efficiency. Their design allows less heat to pass through from your house when it is cold outside. Triple-pane windows are better thermally because of the added pocket depth for argon gas between the window panes. They ultimately have the potential to reduce energy costs, reduce noise, increase comfort, and even reduce the size and wear on HVAC equipment.  

Quad-Pane Windows: 

Quadruple Pane Windows, or Quad Glazed Windows, include four high-performance layers of glass with three gas-filled sealed air spaces in between. With an added pane of glass, they are a solid solution in terms of insulation, heat transfer, and other aspects as well. Think of all the benefits of double-pane and triple-pane windows but with an additional pane. Of course, any time you add material, you add weight, cost, and complexity. For many residential situations, triple-pane ends up being the nice winner for an all-around solution that supports energy-efficiency, more common construction practices, and construction budgets. 

Thin Glass vs. Thin Film Windows

Thin Glass and Thin Film are like cousins, who are similar, but just not completely the same product. They also are very similar to triple-pane windows in a high-level concept. Thin Film has been Alpen’s go-to for many, many years, and will still be available for many of their lines, such as Zenith and Tyrol. However, Alpen recently released Thin Glass, which acts like a triple-pane window at a double-pane’s weight. Of course, it’s much more complex than that. You can read up on more of the details to these innovative options here, where we break down how they’re similar and how they differ.  

Innie vs. Outie Window Construction

In construction, this great debate has been going on for some years and it can be confusing to know what the right solution is for your project. Each style has been used in various ways over the years, but if you’re like us and are concerned about thermal performance and energy savings, you will want to read our detailed blog

Windows are one of the most important features in a home, especially if you love where you live (like we do here in Colorado)! You want to let the local scenery and the sunshine in, but you also don’t want to sacrifice thermal efficiency. That’s why it’s so important to get the window purchase right when you’re building or upgrading a home. Some window options will be better for you than others and that’s where our team is here to help! Let us help you find the best high-performance window to meet your needs. We’re here to answer any and all questions; email info@aebuildingsystems.com. 

Form AND Function Win Out When it Comes to European Windows & Over-Insulating

Get a Little Help From Our Friends!

We can learn a thing or two from seeing how things are done in other places. In the case of window and insulation design, European Windows with the combo of over-insulating is one of these smart solutions we glean from our European friends. The combination of this window design plus this technique in window insulation is a smart, practical solution that also provides some great aesthetic designs as well. We’ve seen it applied for so many reasons, but in the end, homeowners absolutely LOVE the way this combination functions, as well as how it looks!

A Passive House Win!

European windows have become a common practice in the Passive House movement, or for those that want a Darn Good House as we call it. They are often seen as a more sustainable option from the perspective of energy loss. Passive House projects are focused on increasing efficiency and in these cases, every little bit of energy reduction matters greatly. We see many Americans employing this style of window in their home even though it’s not the common practice around the country. Those that build Passive House buildings know that European Windows are one of the best-kept secrets that pay off big time! 

European Windows & Over-Insulating

European windows are often triple-paned, or even quad-paned, making for even greater energy efficiency. They also open inward, rather than cranking open to the exterior. As a result, they lend themselves easier to over-insulating techniques. The over-insulating techniques and materials are a natural fit for this style of window. 

The over-insulating can be applied to the head and legs/jambs, but not to the sill. The sill typically has weep holes that cannot be covered. 

American-Style Windows & Over-Insulating

The more common US-style windows are only double-pane, and often open outward or are casement windows. Because they open outward, casement windows are generally not designed to be over-insulated. You can’t cover the operable window sash, so the amount of insulation on the exterior surface of the window is limited. You simply don’t see over-insulating done with most US-style windows. So, for many of our customers, they really only think about over-insulating with European windows and often in the situation where they’re building with Passive House/energy-efficient practices as the main focus.

Function AND Form!

Not only are European Windows ideal for over-insulating from a function standpoint, but they look good too. Over-insulating makes the frames of the windows appear smaller and lower profile from the outside of the structure. This gives a more sleek, modern aesthetic, which is quite popular in today’s design. In the case of over-insulating with European Windows, form AND function are equally the winners!

Putting It Into Practice:

SmartwinÂŽ by Advantage Architectural Woodwork is a popular choice for Passive House windows, with their innovative, slim frame. They feature a flush-mounted sash internally and an all-glass look to the outside eye. These windows were designed from the start to be over-insulated. 

It’s pretty safe to say that if you’re considering a Passive House, or just a Darn Good House, that works as efficiently for you as it can, the windows matter. And, because the windows matter so much, you should also consider over-insulating European Windows. Not sure where to start as you discover the right window design for your home? Talk to our team. We LOVE sharing ideas and research around the latest and greatest options.

Adventures in High-Performance Windows & Building Envelope Construction

When we moved into our home, it was an adventure! As we got to know the neighbors, we’d hear stories about the former owner. One such story included how the elderly woman would go away for a week on vacation and leave all of the wooden crank windows wide open so that her cats could come and go as they pleased. What did this mean for us? Well, for one thing, you could literally see the light streaming through the frame because the wooden window frames were so warped from the elements all season long. 

Needless to say, one of the first projects we tackled was replacing ALL windows to high-performance windows. We know we’re not alone here! Most homeowners come across energy loss from their windows after moving into a new home. Often, they blame it on drafts in the home, or simply settle for the fact that stratification and convection currents are part of their lives. But, it doesn’t have to be this way!

Why do high-performance windows and high-performance building envelopes matter? 

  1. Conserve Energy: High-performance windows and building envelopes simply don’t waste resources. But when you have major thermal bridging, stratification, etc. you are paying to heat/cool a space as well as the outdoor space surrounding your home. You’re literally wasting energy every single day. (And, sadly, we see this in both new builds AND retrofits too.) 
  2. Running Out of Resources: Our world is quickly burning through common energy resources. In a few hundred years, we will largely deplete our in-the-ground energy which was created over hundreds of millions of years. Much of the coal, oil, and natural gas derives from decomposed plants (photosynthesis) and animals from long ago. We hear people refer to that energy as prehistoric solar energy.
  3. A Mess For Future Generations: Do we care about how we’re leaving the earth for our childrens’ children and beyond? Literally burning through resources does nothing to help our future generations. 
  4. Climate Change: Stay with us here…whether you have given into the politicized side of this or not, our climates are changing around us and there’s scientific proof to back it up. Using less energy resources to heat and cool our homes is a simple way we can help make a dent. 
  5. Save $$$: If you’re not convinced already, maybe saving a ton of money will help get your attention. Using less energy to heat or cool a home by using high-performance windows and building envelopes means less money you’re spending each month. Some parts of the country and world experience this more than others. For example, homeowners in the Northeast spend roughly 1.5-2.5 times more in energy costs than residents in Colorado! Of course those numbers are changing constantly, but it’s a good picture of how smart building systems can make a difference!
  6. Future Savings: As energy costs increase (which they regularly do and will continue to do as traditional energy sources deplete), your costs can stay more normalized. The more energy-efficient your home is, the less you flux when prices change in energy. High-performance windows/building envelopes are kind of a hedge, if you will, against rising energy costs. The 625 windows will help as well, but 925 will help even more. 
  7. Peace and Quiet: The higher the efficiency of your windows and envelope, the greater privacy and “peace and quiet” you’ll have in your home. Whether you have a baby sleeping, work from home, or just love some silence, high-efficiency windows can make a great impact. 
  8. Greater Comfort: Most importantly, your house will be more comfortable. You will have fewer drafts which are actually more often convection currents. Also, you will be able to read a book next to a window in the winter in a t-shirt without feeling the cold as much. There are a lot of factors that go into a “comfort quotient” and you can go into intense detail if you want on this. The main thing is that if you build for energy efficiency, your home will have less drastic temperature swings from zone to zone and you’ll be more comfortable while in it. 

Ready to help improve your life AND help out our world’s energy problems? Building with high-performance windows and building envelope strategies is just one simple way. It’s a win-win for all. It’s an investment on so many levels. If you’re considering this kind of construction, we’d love to help you find the perfect materials for your project.

For additional reading, check out this recent blog post on “Eco-Friendly Ways to Prep Your Home for Winter”

7 Value Engineering Tips for Window and Door Design

Have you or your clients had significant sticker shock when the window and door bids are provided? It is pretty common… but there are ways to reduce cost without sacrificing much and often while improving performance.   By Value Engineering (VE), you’ll help save money with your project and there are several concepts to consider to make it happen.  

Value Engineering is often an untapped resource in projects that can save costs on a project without necessarily compromising quality and often while improving performance. Experts in Value Engineering can help identify opportunities to create a more efficient setup, especially when it comes to windows. Since we, at AE Building Systems, are always concerned about energy efficiency, we are proponents of anything that improves performance first and foremost. 

Considering performance vs. cost savings, in the window world, they often go together.  Whether you’re looking at many window manufacturers or options within the same manufacturer, there are a number of VE options that can actually save you a ton of money, and improve energy efficiency at the same time. The homeowners will pay less at the front end while saving money down the road in energy costs. That’s why we’re big fans of Value Engineering around here. 

Worried you might be spending too much on windows and doors? You might consider some of these options:

  • Consider the location/region: The best way you can design effective opening is to design for the homeowner’s climate zone. The product someone needs in San Francisco (e.g. double, triple or quad-pane) are going to be drastically different than what you would want in Anchorage, Alaska. The best way to think through this is to look at the glass performance and how many panes and what type of gas-fill you’re needing. In Colorado, the front range (climate zone 5) can generally use a different glazing package than some of the colder mountain locations (often climate zones 6 and 7).
  • Note the purpose of the space: What is the opening used for? Windows for a kitchen or bedroom are going to need higher performance compared to that of an unconditioned garage or three-season porch. You can get by with lower performance windows in some spaces. If the garage is conditioned which is often the case in mountain areas of Colorado, this might not apply.
  • Selected fixed units where you can: Any time you have operable windows, you increase costs compared to fixed windows. They’re just more complex than a fixed window and fixed or picture windows also perform better – not only do they perform better thermally, they are tighter – reducing air infiltration. If it’s feasible that the homeowner is never going to open the window – go fixed. On the performance side… sliding or hung windows also open you up to greater air infiltration through the unit over casements, awnings and tilt/turns. Comparing hungs and sliders to fixed or casement units is a night and day difference. If you don’t need an operable unit in the space, opt for the fixed unit and save your money now and in the future. If you need an operable – try to go casement, awning or tilt/turn rather than hung or sliding due to the air infiltration rates. 
  •  Overlooked the materials: The materials your units are made from can make a huge impact. Wood and aluminum are often more costly than vinyl and fiberglass. If wood is the look you need, different species of wood can vary in price. Keep this in mind as you determine what material you really need.
  • Use fewer IGUs if you can: Consider various diagrams of the unit and how many Insulated Glazing Units (IGUs) you really need. In the high-performance arena, frames are a known culprit of energy performance. If you can consolidate windows within an assembly, you’ll get better performance and lower initial cost simply because you have less frame material and less labor.  The second window below is one IGU with simulated divided lights (SDLs) where the first unit below has 6 IGU’s. The price difference on these two units is significant and using 6 IGU’s can more than double the price of a window assembly.  
  • Be mindful of the hardware (generally door hardware): We often think about the framed unit itself, but hardware costs can add up quickly too. Decide if you really need to go fancy with your hardware. If you really need something custom, be willing to pay for it. Otherwise, the standard fixtures can save you greatly! Keep in mind that painted finishes on hardware can often cost much less than metal finishes. Also, custom door hardware can be very expensive. Depending on the look you’re going for, these simple choices can help you save quite a bit! 
  • Mind the threshold as well: Don’t stop at windows; consider how your door design can benefit your budget. With doors, consider that a balcony threshold can be beneficial compared to a traditional swing door with a low-threshold. Adding multi-point locking on doors can be helpful for performance (air-tightness), but often adds costs. Other considerations for doors include a basic one-panel swing vs french vs sliding vs lift-sliding vs bifold and others that all impact the price and the performance in different ways. Don’t forget to chat about both price and performance with your suppliers. Check out this threshold example from our Instagram feed. 

On any project, budget is generally a difficult discussion and an important one. We want our clients to be happy about the investment they’ve made, but we also want to deliver high-performing products for them. Value Engineering is a simple way to make smart decisions to maximize performance while reducing costs. We know that windows and doors are often zones in a home where lots of money is spent and we want to see it spent wisely. If you, or your clients, have specific questions about how they can best maximize their opening design for a more efficient home, our team would love to talk. We’ve seen a lot and would love to help you design a happier, more efficient space.

High-Performance Windows & Air Infiltration

Generally speaking, windows are the weakest link in our building envelopes. When evaluating windows, often the insulative specifications (R-value / U-factor) are the primary focus. Just as important are the air infiltration rates. Code-built homes often lose 20 to 40% of the heat in the home through air infiltration. Windows and doors are a significant source of this heat loss. 

For windows and doors, air infiltration is defined as a volume of air (cubic feet per minute) divided by the window area (in square feet) when subjected to a 25mph wind (blowing perpendicular to the window) – Cubic feet per minute per square foot at 25mph windspeed.  As of 2017, window manufacturers were only required to report air infiltration numbers if the windows were to be labeled Energy Star. 

An Energy Star Compliant window allows air infiltration to be as high as 0.30 cfm/sq ft

Now some quick math for a 10sqft window:

0.30cfm/sqft x 10sqft = 3.0cfm total air infiltration allowed. 

To think about this another way: A basketball has a volume of 0.26 cubic feet. 

3.0cfm / .26 cubic feet = 11.5 basketballs per minute or 690 basketballs per hour from a single window. Imagine how much air this equals for a typical home of many windows. 

Now let’s compare an Advantage or Alpen High-Performance windows to an Energy Star compliant unit:

While we can’t prevent a basketball from being thrown through a window, let’s talk about how Advantage and Alpen prevent these air infiltration “basketballs”.

  1. Gaskets & Seals – While fixed units have the best infiltration rates, operable units must also be considered. Any sliding window uses a friction type gasket material to seal the window for air and weather. Over time this material can break down and will not perform as well as a compression seal. Consider awnings, casements, and tilt-turns which use compression seals rather than hung or sliders that use a friction type gasket. We always recommend against sliders and hungs and for fixed, casements, awnings, and tilt-turns. 
  2. Hardware – Consider the window hardware used to seal the windows. With a friction fit, there isn’t a practical way to better seal a window other than applying slight pressure or replacing the weatherstripping. With a compression style, minor hardware adjustments can be made to place more or less pressure on the seals, and while weatherstripping can be replaced, typically minor adjustments are all that is required to achieve an excellent air seal. 

High-Performance windows help create comfortable, quiet, high-performing homes conserving energy for future generations. We are burning through our fossil fuel resources rapidly and bad windows and doors are a primary source of wasted energy use.   If you have any questions about air infiltration or other aspects of high-performance windows, please call us at 720.287.4290 or send us an email. info@aebuildingsystems.com

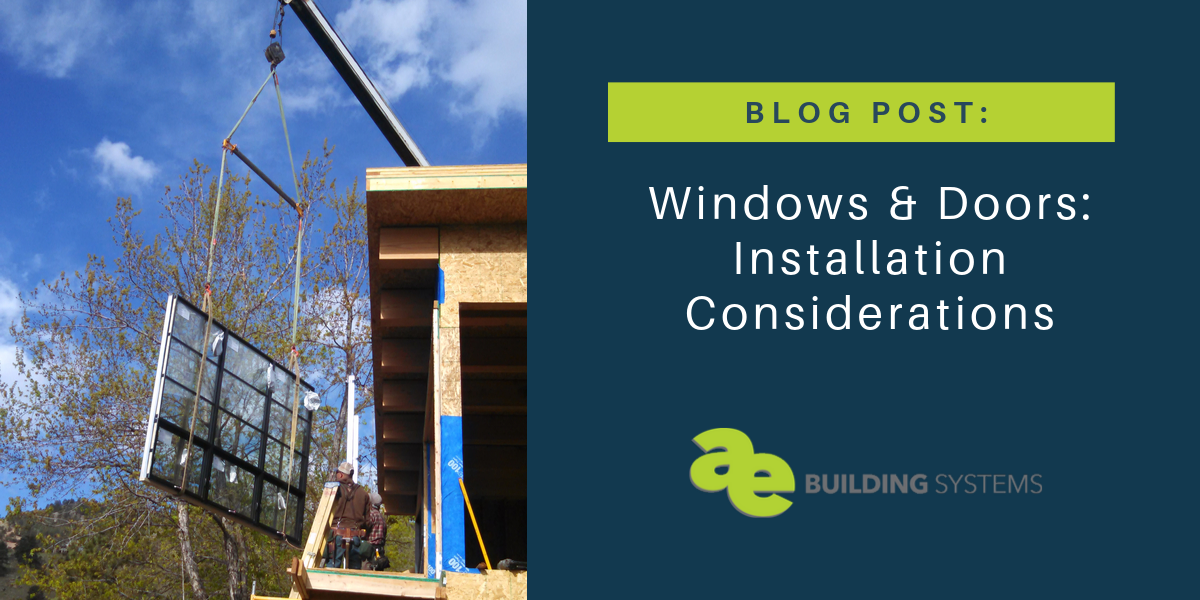
Windows and Doors: Installation Considerations

In this post, we’ll go over a few key tips for installing windows, sliding doors, and swing doors. Whether you’re updating windows in your home to modernize the look or increase energy efficiency, or you’ve got a new build going up, we hope the information we’re about to drop gives you some insight to the highlights of installation. NOTE: Any window or door you purchase should come with an installation guide, which you’ll want to read thoroughly. If we provide information here that is not in your instructions, please confirm with the manufacturer before proceeding.

While it may seem intimidating, installing a door or window is completely doable for everyone from the DIY-er to the seasoned builder. If you need a refresher on the various types of windows and doors, head back to our last post. Otherwise, grab your ‘driver, level, and some shims – here we go! 

Installing windows

There are many different kinds of windows, but the approach is generally the same. The basic steps are 1) Flash 2) Frame, 3) Install, 4) Seal, and 5) Trim. You’ve got this!

A few rules to live by:

  • Do it right the first time.
  • Measure, measure, and measure some more.
  • If the opening is wider than 3 feet, use temporary supports.
  • Moisture is your enemy.

We’ll assume you’ve already done your measuring and have prepped your framing, including checking for any water damage and replacing any wood that’s not up to the task at hand. Better to do it right at this point than to tear out all that hard work later.

Prep and preflash

First things first, prepare your opening by protecting the wood. There are a number of products you can use, but we won’t get into all the options here. Here’s a brief document that shows how to prepare an opening. However, if you’re doing a retrofit and working with replacement windows, getting the situation to look like this is not likely. You’ll just prepare and protect the opening as well as you can. 

Plumb, level, and square

Next, you’ll “dry fit” your window – pop it into place and add a few screws at the top to hold it there temporarily. Grab a couple shims and make sure the window is plumb (level along the jambs), level (from the sill), and square (corners are perfectly 90༌) on both the sash and the frame. 

A trick for measuring plumb: Measure the diagonals of the windows, and if the numbers are equal each way, you’ve arrived at plumb. The longer the level you use, the more accurate you can be.

Don’t put away your level and framing square yet – you’ll be checking and re-checking each piece throughout the whole process.

Nail flanges

Many windows will have a nail or screw flange (also called a fin), that attaches to the window jamb. Not only do they make installation pretty simple, they also do a great job keeping moisture out. While you will hear folks call these nailing flanges, do we really want to swing hammers near our windows? Screws are also a much better fastener for the long run.

You can screw right through these flanges to attach the window frame to the jambs, but first, you’ll need to cut the siding and slip in weather barrier behind the siding, wrapping around the framing for weather protection.

Next, you’ll caulk all around the opening where the flange will attach. Before you tilt the window into place, be sure you have some shims handy so you can shore up level, plumb, and square once again. Then drive your screws through the flange. 

Anchor brackets & through-frame install 

Another option that is increasingly used and very common with Euro windows is anchor bracket install. Generally installed to the interior, anchor brackets are metal strapping that is attached to the window and then fastened with screws into the jamb.  All the usual guidelines – plumb, level and square – apply. Anchor brackets are often used to install windows in thick walls like double stud walls and in high performance situations where we want the window in the middle of the insulation layer. 

Through-frame, sometimes referred to as a block-frame install, is just that – screwing through the frame to fasten the windows. Note that this is more common with operable windows like casements and tilt/turn windows. If using a through-frame approach, make sure you communicate that to your sales representative as special accommodations might be necessary with the windows. Using through-frame is less common with fixed windows as it generally means you have to remove the glazing and then re-glaze after the frame is installed. 

Fastener frequency

Always refer to the manufacturer’s instructions related to frequency of the fasteners. Also, pay special attention to fastener frequency when in high wind-load areas. More fasteners are often necessary where the wind loads are higher.

Interior jamb and sill extensions 

If your jamb turns out to be flush with the drywall inside once you’ve installed the window, lucky you. For the rest of us (especially when retrofitting an older home), jamb extensions may seem like a good option.

A jamb extension is the piece that extends the jamb (the frame of the window) along the inside depth of the wall. Not only does this clean up the window framing, it gives you a clean edge to attach the casing. 

Sill extensions build out the sill area and give you a smooth line, whether you’ve opted for a deep window frame or not. If you’ve chosen not to have a substantial window sill, this may only extend to the edge of the window trim; otherwise, it can be as deep as you’d like it.

Pro tip: We recommend against interior jamb and sill extensions because it limits access to the rough opening gap for insulation and air sealing. If you do go for it, it is often easier to build and install these extensions onsite. Also, we recommend taping the interior all the way around to the jamb to complete the air barrier. Please contact us for more information on this. 

Exterior finishing

On the exterior of the building, you’ll add your exterior casing, fasten that into place, then caulk all the way around. Install your drip cap over the window with some caulking, slipping the top edge just beneath the siding. Secure that drip cap to the top of the window casing.

Inside, fill any gaps between the window jambs and framing elements with loosely packed fiberglass insulation or a window foam. Then you’re on to a final caulk (and ideally tape) on the flange and painting.

Exterior frame extensions and sill are also available, which create a different look but also help to improve the performance of the wall overall. Passive House would say to put the window in the center of the insulation layer to get the best overall wall performance (window and walls collectively). An “innie” install makes things a bit trickier for detailing. Exterior sills and frame extensions help reduce some of the brain damage of these details. Again, please contact us for more information on these options. 

Installing sliding doors

Sliding doors are great. All that added light, plus they don’t require the interior clearspace a traditional swing door needs to swing open. What’s not to love? 

When installing a sliding door, the key pieces to pay attention to are where and how the door meets the floor and getting everything super duper leveled up to keep that sliding action smooth for years to come. If you’re doing your project with us, we’ll talk through all the micro details up front so the installation process is as seamless as possible.

There are a couple options related to the floor detail, and specifically to the threshold. Give us a call to discuss options like FASTrack where the sliding door actually embeds into the concrete floor providing a super clean look. Note that there are thermal bridging considerations related to these types of systems. 

Plumb, level, and square

Just as with your windows, taking the time to get plumb, level, and square straight will save you a host of headaches down the road. Since sliding doors are usually bigger than windows, small degrees add up and can mean your door will sag, stick, or even drift open and closed. 

We’ll add another term to this: “True.” True is your double confirmation: If plumb, level, and square are right on one side but ever so slightly sloppy on the other, you’re not true. Both sides of the door need to be plumb, level, and square to be true.

Installing swing doors

If we haven’t hammered this home enough yet, plumb, level, and square are operative words when it comes to doors, too. When installing a door, shims will start to feel like your right hand. This is most important on the hinge side of the door. One key thing to keep track of is how high off the ground the door hangs – you don’t want your crew arrive to install flooring and find out said flooring is taller than the bottom of the door sash/slab, making the door impossible to open.

Euro doors: The sash condition

It is very important to remember that European doors have very little clearance between the bottom of the sash of the door and the bottom of the threshold – generally less than a half inch. What that means is wood flooring installed after the door at ¾” will prevent an inswing door from opening. Make sure to accommodate the finished floor height relative to the door when selecting and installing doors.  

Brick mould and other trim considerations

Pre-hung exterior doors often have brick mould attached – an additional piece of exterior trim (wood, vinyl, whatever your door frame is made of) designed to cleanly overlay a brick exterior and produce a finished look. It doesn’t matter whether or not you actually have a brick exterior – this is just the name the piece comes with. 

Because brick mould makes it difficult to access the rough opening gap, to insulate and air/weather seal around the doors, we often recommend against using it and instead finish the door trim in the field. 

A quick note on installing Euro balcony doors

Balcony doors are essentially a window installation. What sets a balcony door apart is that you have to lift your feet to step over the bottom of the frame – the threshold is not flush with the floor. Not great for high-traffic areas, but it can save you a few bucks where it counts (more here). Plumb, level, square, weatherproofing, and off you go.

Wrapping it up

We hope you found some answers to your burning questions about installing windows and doors in your building. There’s a lot of information out there, and the specific product you get will come with its own installation guide. We’re here to help point you in the direction of some of the tried-and-true products we recommend (like our windows & doors or weather barriers), and we’re always happy to chat about your project. You can get in touch with us here.

A Primer on Windows and Doors

Knock knock.
Who’s there?
Harry.
Harry who?
… Harry up and answer the door so we can talk about that big hole in your building!

There are lots of things we geek out about over here, and gaping spaces in buildings get our full attention. First-world countries have come a long way since the Three Little Pigs style of building, and we’ve learned a few things about thermodynamics. 

If you were to take a gander at the headlines for some of our other blog posts, you might guess (correctly) that we’re a little bit obsessed with thermal performance. Keeping heat in and out – consistently – is a big deal no matter whether we’re talking about a hotel, an office complex, or your own home. Of course, it goes beyond comfort: maintaining temperatures the right way can have a big impact on your wallet.

If you’re putting in the effort (and money) to insulate your home well and mitigate heat loss and thermal bridging, it sure makes a lot of sense to peer into the situation created by your windows and doors. 

Let’s look in to windows first.

Windows

Windows occupy, on average, 20% of wall space. But they’re responsible for more heat transfer per square foot than any other surface in your home. So if you’ve been patting yourself on the back for a job well done with insulation and think you can make sacrifices on the windows, sorry folks – windows are worth the investment.

There needn’t be a battle between letting the light in and settling for a closed-in space. Fortunately, there are some great products out there that let you create both Instagram-worthy spaces and the cost savings of a well-insulated environment.

Here are a few things to ask yourself when shopping for windows:

  • Given your objectives and climate zone, how much thermal performance and how airtight do you need your windows to be?
  • Do you want the windows and doors to open to the inside or outside? 
  • Would you like dual-action windows, meaning they can swing AND tilt open?

Let’s fling open the sash, shall we?

US windows vs. European windows

We’ll just get this out of the way first: If you’re new to window shopping, you may be confused by the whole US- vs. Euro-style window thing. In Europe, energy costs a whole lot more, so their windows tend to be extra energy efficient. This is accomplished in many ways, from high-performance frames and glass, to a higher quality and attention to detail. Even the way they open is designed to maximize energy efficiency.

European-style windows are…

  • Certified using ISO standards
  • Generally more energy efficient
  • Sometimes more expensive
  • Growing in appeal in the US
  • Starting to be made right here in North America

American windows are…

  • Certified using NFRC standards
  • Easier to install thanks to a nailing flange/fin – some Euro windows have nail fins as well
  • Have operation options commonly found in the US

Here at AE Building, we’re partial to European-style windows that are made in the USA

Types of windows

Functionality and durability should be considered right up there with energy efficiency. That includes the material used, how the window will open, and what you need the window to do for you (let the light in, let air in, or even potentially let people out).

Fixed / Picture Windows

These windows are called fixed because – surprise surprise – they don’t open. If you want light but don’t need airflow, these windows are a simple (and less costly) way to go. Fixed windows usually perform better than operable windows as well, both thermally and in terms of air infiltration.

Benefits of fixed windows:

      • Let the light in when you don’t need airflow

      • Can be many different shapes

      • Perform better than operable windows

      • Are less costly

      • Sometimes have more glass even with the same overall opening size

Tilt and Turn Windows

These dual-functioning windows have hinges both at the bottom (so you can tilt it open at the top) and the side (to swing the window open). They’re more thermally efficient, so they’re popular in Europe, and can be more expensive. Note that the turn/swing function is to the inside and not to the outside like typical US-style casement windows with a crank handle. 

Benefits of tilt and turn windows:

      • Lets heat out the top for ventilation during the summer

      • Blocks strong breezes

      • Easy to clean from inside the building

      • Multipoint locking makes them more secure and airtight

      • Tilt function enables venting with security

Casement Windows

Casement windows are usually rectangular windows that are tall and narrow. They are hinged on one side of the frame and the other side has a cranking mechanism to open the window for ventilation. They open outward.

Benefits of casement windows:

      • Multipoint locking available

      • Tight seal against heavy outside winds

      • Open outward, which means they won’t take up room in your interior spaces

Hopper 

Hopper windows have a hinge on the bottom that allows the top edge to tilt or open into the room a few inches. They’re usually opened with a handle at the top of the sash and can be difficult to reach on tall windows.

Benefits of hopper windows:

      • The opening is at the top and blocks rain from coming inside

      • Opens about 4-5” at the top for ventilation

      • Common for bathrooms

      • Great for schools

Awnings

Awning windows are similar to hopper windows, except the hinge is on the top and they open to the outside from the bottom of the sash.

Benefits of awning windows:

      • Nice solution for airflow in rainy climates

      • Wind won’t blow them open

      • Great option for baths and showers

Horizontal sliding windows

Sliding windows slide open on a horizontal track. We generally steer our clients away from sliders and hungs because their air infiltration rates tend to be not as great (due to the open seam around the operable portion of the windows). However, there are times when sliders and hungs are a better choice. Talk to us if you need help deciding!

Benefits of sliding windows:

      • Fewer moving parts and hardware = less maintenance

      • Can be advantageous where a casement would open out on a deck and a tilt-turn would open into the space intruding on your interior space – like over a kitchen sink where the window might hit the faucet

Single-Hung vs. Double-Hung

Where a double-hung window lets you open both sashes, top and bottom, a single-hung window only opens on the top or bottom. Here again, we try to avoid these due to the air infiltration rates, although hung windows can be advantageous where you don’t want a tilt/turn intruding into your space or a casement window opening out to a deck. There are also historical considerations with hung windows as they were the primary option for operation in older buildings.

A few definitions

NFRC = National Fenestration Rating Council

This independent, third-party certification agency assigns specific energy efficiency measures to complete window system, from frame to glass. (“Fenestration” has to do with windows and doors – if you skipped fifth grade or Shakespeare class, “defenestration” is to be thrown out of a window). 

U-factor / U-value

U-factor measures how well a window prevents heat from moving through the window’s materials – in or out. The lower the U-value, the less heat is lost in winter. These ratings generally fall between 0.20 and 1.20, with the higher rating being, say, a single-glazed window with aluminum frames, while a triple-glazed window might get a rating of 0.20 and even lower depending on the gas that used within the glass unit. These days, you can get quad pane glass which can run even lower – into 0.10 +/- U-values.

Visible Transmittance (VT) 

This one’s simple enough: Visible Transmittance measures how much natural light is able to pass through the window. It’s influenced by the number of panes and glass coatings.

Solar Heat Gain Coefficient (SHGC)

A number between 0 and 1, the SHGC looks at solar radiation transmitted through a window or door. The lower the number, the less solar heat it transmits (= more shading). Some people rely on a center-of-glass or glass-only SHGC, which will give a higher number. Full window values include the frame, which has no solar heat gain. The direction your window faces, whether or not it’s shaded, and your climate zone will drive the optimal SHGC for your windows. For example, in colder climates, you want to collect solar heat on the south elevation of the home and block it on your west elevation to minimize overheating in the summer.

Energy Star Certification

Energy StarÂŽ bases its certification on U-factor and SHGC ratings for four different climate zones. Learn more here >


We feature:

Doors

Now that we’ve got a handle on windows, let’s cover the next gaping hole in your building. Entry doors, interior doors, wood, steel, vinyl, with glass or without, one lock or many… When it comes to doors, you’ve got options.

US doors vs. European doors

Notes on European doors:

  • For balcony doors, we can incorporate a tilting mechanism similar to tilt/turn windows which allows for additional ventilation options
  • Often, a thicker design makes for improved thermal and acoustic performance
  • Usually features multipoint locking which improves air infiltration rates and security

Notes on American doors:

  • Includes swing and sliding doors
  • Features multipoint locking, with locks generally at three points on the handle side of the door

Types of doors

Balcony swing doors 

Balcony doors are a popular choice for accessing exterior living spaces like… balconies (go figure, right?). Because they have a higher threshold, they are generally not used as main entry or in high-traffic doorways.

Benefits of balcony doors:

      • Weather-resistant access with ventilation-only (tilt) option

      • Don’t lock or unlock from the outside, making them more secure

      • Multipoint lock similar to Euro windows

Standard US-style and Euro-style swing doors with a low threshold

For a quick mental picture of a swing door, recall any old Western movie scene where a man with spurs and chaps bursts through the saloon doors. The in-and-out swing of those doors is what gives these hinged doors their name. Thankfully, we’re looking at much more elegant and airtight solutions these days (for starters: hinges, not springs).

Benefits of swing doors:

      • ADA-compliant options are often available

      • Multipoint locking options

      • Higher performance – thermally insulated options are available

      • Many hardware options

Lift and slide

You’re familiar with sliding doors, and the “lift and slide” door takes things to the next level. The “lift” action here utilizes a system of levers and wheels to lift the door up from its position flush against the floor/seal and move with little friction across an internal track. The lift function lifts the door out of an air seal and slides it open. Lift-slide doors generally seal better than typical US-style sliding doors.

For a closer look, check out our Advantage Classic or Mira lines, available as windows and doors.

Benefits of lift and slide doors:

      • Large, heavy panels move gracefully

      • Superior air infiltration over standard US-style sliding glass doors

      • Good for opening up large spaces

      • High storm rating protection

      • Strong forced-entry rating

      • Can use larger glass panels

      • Popular for window walls

Tilt and glide 

Tilt and glide doors slide open, with the added flexibility of tilting open at the top for ventilation. The advantage of this tilt is that it’s secure when tilted – kids stay inside, animals stay outside (or inside), and the door remains locked.

For a closer look, check out our Tyrol Line.

Benefits of tilt and glide doors:

      • Added ventilation option

      • Superior air infiltration over standard US-style sliding glass doors

A note on multipoint locking

As the primary point of entry for your building, doors generally have a higher security threshold than windows. Multipoint locks are more common in European doors and usually include a deadbolt, live latch, and several additional locking pins around the door sash.

Benefits of multipoint locking:

      • Helps prevent break-ins

      • When engaged, the locks aid in supporting the door and reducing wear on the hinges

      • Insurance often recognizes the added security

      • Additional ventilation option

Wrapping it up

Hopefully this primer has helped clarify some of your questions and given you some ideas about what kind of window or door is best for your unique scenario. We’re proud to provide made in the US, European-style windows and doors that are Passive House certified. We’re here if you have any questions, so don’t hesitate to reach out.

In our next post, we’ll get into installation methods. Stay tuned!


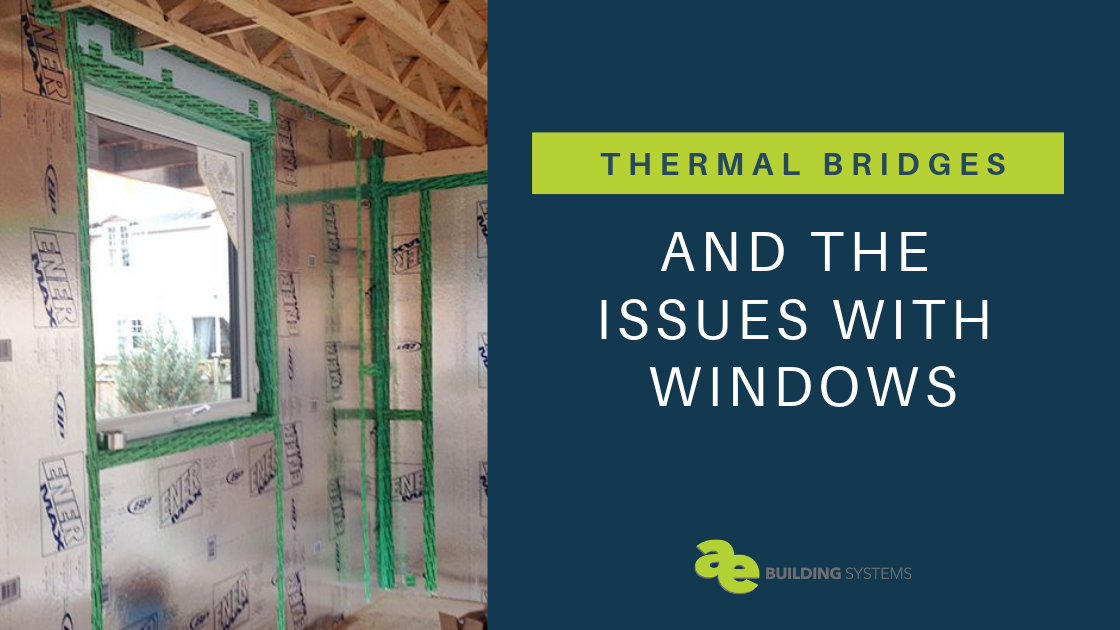
Thermal Bridging and Issues with Windows

As a homeowner, heat loss is or should be a big concern. Energy escaping through the building envelope (walls, roof, floor) means more energy is required to maintain a consistent temperature or better said – comfort -within your home. It also means higher utility bills whether you’re building a new home or looking to refurbish an existing home. One of the most significant considerations should be how to make your home more comfortable but also more energy-efficient – less costly to operate. Which leads us to the topic of Thermal Bridging!

What is thermal bridging?

In a heating climate and similar to air infiltration, thermal bridging results in heat loss and occurs when heat escapes from the inside of the building to the outside, via conduction and through the building envelope. If you’ve ever been in a house that has a “drafty” spot or just constantly feels cold, that’s likely the result of thermal bridging as much as or even more than air infiltration. Even airtight homes can have a heat-losses of 20 to 50 percent due to thermal bridges.

Types of Thermal Bridges

There are several types of thermal bridges that designers, builders, and homeowners should be aware of and the following are three common types:

  • Repeating or Systematic thermal bridges: A common cause of heat loss are repeating thermal bridges which are predictably found inconsistent breaks in the thermal envelope allowing heat to pass through easily. It’s important to keep these in mind during a building’s design. Common Examples include wood and steel studs, steel wall ties, ceiling joists, and insulated suspended floor joists.
  • Non-repeating thermal bridges: This method of heat loss doesn’t follow a pattern in the way that repeating thermal bridges do. A non-repeating thermal bridge tends to pop up in specific areas impacted by an interruption or break in the construction. Common culprits include things that penetrate the thermal envelope to include windows and doors, structural beams, pipes and cables, and cantilevers.
  • Geometrical Thermal bridges: Generally found where the building envelope changes directions and where the materials meet, Geometric thermal bridge examples include wall corners, wall to roof and floor junctions.  The more complex a building design is, the more geometric thermal bridging will be prevalent.

Regardless of the source, avoiding thermal bridges wherever possible is essential – and knowing where your home is losing heat can help you take the proper measures needed to reduce the problem.

Thermal Bridging and Windows

Often, it is windows that are a major culprit when it comes to heat loss and thermal bridging in the home. Standard or code minimum windows often represent a compromise. “We” accept their lower thermal performance because we enjoy the view, natural light, and ventilation they provide. However, when adding high-performance windows with higher R-values (lower U-values), windows become less of a concern for thermal bridging, especially when properly installed.

In an existing home, an expert can determine the state of a home’s windows by doing an inspection. They know what to look for in terms of damage, deterioration, and condition. Knowing a window’s age is a big help as well. Most older windows did not have high-performance glazing nor did manufacturers generally consider thermal bridging in the frames and spacers.

With new construction or existing homes, to reach your energy and comfort goals, it is important to consider high-performance windows. The thermal image below shows the thermal bridging – shown in blue/purple. This is likely why you have seen condensation on windows.

This image below shows the thermal bridging – shown in blue/purple.
The magic of thermal imaging!

Note also high-performance windows help with other variables to include sound attenuation. They reduce the sound coming from the busy street in front of your house for example.

Thermal Bridging Results in Condensation – and Mold

Four variables come into play with condensation: outdoor temperature, indoor temperature, your home’s humidity level, and the indoor surface temperature of an exterior building envelope component. Since outdoor temperatures are not something we have control over, we focus on what is in our control. Windows that have well-insulated frames, multi-panes of gas-filled glass and have higher performance spacers will help increase the interior surface temperature of the windows. Higher interior surface temperatures help to effectively prevent the condensation of moisture on your windows preventing mold from growing. This subsequently improves your air quality. We would be remiss if we didn’t also mention the importance of ventilation systems which improves indoor air quality.

Check out this SIGA Fentrim F for preventing condensation

How To Prevent Window Thermal Bridging

  • Glass: Pursue options that included triple or even quad glazing.
  • Gas: Gas filled glazing is no joke. Argon gas is cost effective and provides a good boost in performance over air-filled units. Krypton gas, while more costly, provides an excellent increase to performance.
  • Frames: Select frames made of low conductive materials. Aluminum frames without thermal breaks are a complete no-no for energy efficiency and comfort. Aluminum is a tremendous conductor of heat. Better options are wood, fiberglass, and PVC with insulating air chambers. These frames are even better if they are insulated. Note, thermally broken aluminum is a good option depending on how good the thermal break is.
  • Spacers: Selecting windows with better spacers can help prevent thermal bridging in the windows as well. These spacers separate the panes of glass and appear where there are divided lights. Avoiding spacers made of aluminum and steel, and selecting stainless steel and various composite materials are much better options. Warm Edge, Super Spacer, and Swiss Spacer are some of the composite spacers that are available.
  • Installation: Proper window installation including air sealing and insulation around the windows will significantly reduce the amount of energy loss. To reduce thermal bridging around windows, Thermal Buck is a great product for the installation.

Final Thoughts

Bringing awareness of thermal bridging to all of your construction partners will aid in your goal. An architect can design to minimize thermal bridges. By not paying attention to the details on the construction site or if there is a lack of training, reaching your goals will be difficult.

If you’re looking for ways to minimize thermal bridges and select high-performance windows for your project, contact us today.

High-Performance Windows

If eyes are the windows of the soul, then windows are the eyes of the energy-efficient home.

Generally, windows are the weak link in the walls of a home. “I love putting plastic on my windows to keep cold air out and warm air in,” said no one ever. That is why considering the brand and style of the windows in a home is just as important as deciding insulation and exterior materials.

The goal is comfort and operational cost saving, and the goal for builders and architects is providing both.

High performance windows are necessary in keeping with Passive Haus standards of efficiency: design, minimal thermal bridging, air tight, super insulated, optimized glazing, energy recovery ventilation and passive gains.

So we have learned that code built homes often lose 20 to 40% of the heat in the home through air infiltration, and windows and doors are a significant source of this heat loss.

To better grasp just how significant, imagine the volume of a basketball as our measure of air infiltration. According to the National Fenestration Ratings Council (NFRC), the maximum allowable air infiltration in a window, with the outside wind at 25 mph, is 0.3 CFM (cubic feet of air)/sq. ft. Air infiltration for a 10 sq. ft. standard window at the allowable maximum is 3.0 CFM or 11.4 basketballs per minute. At sixty minutes, one window allows in 684 basketballs per hour.

If you have (30) 10 sq. ft. windows, that equals 342 basketballs per minute or 20,520 basketballs per hour. That is a substantial amount of heat loss.

How do we reduce the basketballs?

Consider installing Alpen or Advantage Woodwork High-Performance windows. With a high-performance window, air infiltration at a 25 mph wind is <= 0.01 – 0.05 CFM (cubic feet of air). A 10 sq. ft. high performance window is at 0.10 CFM or .38 basketballs per minute or 22.8 basketballs per hour.

Therefore, (30) 10 sq. ft. windows equals 11.4 basketballs per minute or 684 basketballs per hour. We just went from 20,520 to 684 basketballs per hour. To summarize, that’s approximately a 97% reduction of air infiltration from what the NFRC says is acceptable.

The bad news is loss of air through a structure’s windows is like opening the windows and tossing our hard-earned money out of them. The good news is high performance windows fixes that problem.

The overall quality and performance of windows like Alpen or Advantage High-Performance windows is also superior. What makes these windows even more unique are their individual components, designed to combat heat losses (winter) and gains (summer):

  1. Frames – High performance windows have durable, low conductivity frames which generally include insulation. These frames offer better thermal performance. The R-value of most standard frames is r-2 to r-3.5. High performance window frames are r-4 and up to r-7, 8, and 9.
  2. Seals – High performance windows generally have multiple seals, which promote not only weather tight but also air tight seals.
  3. Glazing – IGUs (insulating glass units). Glazing can have double, triple and even quad glass. High performance IGUs have special coatings that high performance window manufacturers leverage to optimize heat gain from the sun in colder months and reduce heat gain and over-heating in the warmer months.
  4. Spacers – Depending on the material used, the spacers in between the IGUs can help increase the interior surface temperature of a window up to 15 degrees. For example, a galvanized steel spacer in a fixed high profile Alpen 525 window is rated R-5.9, whereas a stainless-steel spacer in a fixed high profile Alpen 625 window is R-6.7. Also, high performance window spacers reduce condensation on the edge of the glass (which reduces opportunity for mold and rot) and increases the inside glass surface temperatures, therefore improving comfort.
  5. Gas – There is “gas between the glass,” as it is denser than air and a reliable barrier to heat loss. Argon or Krypton gases are often used. Argon is much less costly, but Krypton increases performance and is often used in Passive House projects.

While ROI (return on investment) is important, comfort and unnecessary energy use are the primary reasons people pursue high performance windows.

High-Performance Windows help create high performance homes which conserve energy for future generations.  We are “burning” through our energy resources (coal and oil) rapidly.  Why not own a comfortable, energy efficient home that is also super quiet and will likely last much longer than your neighbor’s home?   And … let’s conserve our resources for future generations.

Please do not hesitate to call us at 720.287.4290 to learn more.