Have you ever experienced a drafty spot in the living room? Perhaps, you have one room that just never stays warm? In our modern days, we’ve come to expect that houses simply are drafty or have cold zones. However, the truth is that we don’t have to settle for Arctic blasts inside our homes. There’s another alternative!
Passive House, or PassivHaus, is a remarkable construction strategy that allows us to build spaces that work for us, providing a naturally regulated system for heating and cooling. One major goal of a passive house plan is to reduce energy consumption required to heat a home, but it has many other positive impacts as well including healthier and quieter spaces, greater durability, and greater comfort for inhabitants. Passive House building focuses mainly on three areas: SuperInsulation, low air infiltration and minimizing thermal bridging. In a passive home, you don’t need to sleep in a parka just because your bed happens to be in a drafty corner! Pack up your parkas; there’s no need for one in a Passive House.
History of Passive House Building
The Passive House was highly developed in Germany, but has roots in North America as well. Now a global movement, the Passive House movement became an idea after the oil embargo of 1973 in the United States. Americans realized the need to be more self-reliant in energy, and the Lo-Cal house was designed. The Lo-Cal house in 1976 was created to be highly insulated and consumed 60 percent less energy than the standard house at that time.
In the late 1980’s the movement shifted over to Germany where Wolfgang Feist refined the passive house approacheven more. Dr. Feist eventually designed and built the first PassivHaus in 1991 with an annual heating demand of 15 kilowatt-hours per square meter of living space. Feist also founded the PassivhausInstitute (PHI) and created the Passivhaus performance standard, which is known as the highest standard for energy efficiency even to this day. Heating loads must meet 4.75 kBTU/sf/yr. Most existing and even some new homes are 40 to 70 kBTU/sf/yr. Also, airtightness must be below 0.60 ACH50. Most existing homes are 4.0 to 15.0 ACH50 and even worse.
Passive House Institute US (PHIUS) and Passivhaus Institute (PHI) are now the two leading organizations that set standards for passive homes in North America and in Europe. PHIUS has certifications available for properties that meet their standards and also has many collaborative partnerships with other organizations to promote better energy efficiency in the construction industry.
Why Invest In Passive House/Haus?
Passive House Buildings have strict standards. While many homes meet all the requirements, some also follow the guidelines but don’t get certified (we call these Darn Good Houses around here and you can see why we coined this phrasehere). Many homeowners and designers also work to retrofit existing builds along the passive haus ideas to help lower the energy load on an existing structure. There is also a retrofit standard separate from new construction. Regardless of the type of project and level of certification, there are numerous benefits to a Passive Haus building:
Comfort: Passive House Standards are focused on a superior level of comfort both during the cold months AND warm months. The design concepts work for both extremes of climate, including the extreme heat of the desert to the extreme cold climates. Multiple studies by passive home residents confirm these high levels of comfort year-round.
Quality: Passive House designs are known for high efficiency largely due to the high levels of insulation and airtight design. Any weak spots around the home are constructed to Passive House buildings standards. Special attention is put on the windows, doors, corners, and any other angles.
Sustainability: Passive House design is sustainable by nature, due to the dramatic energy savings in heating/cooling the home. They use very little primary energy, and any extra measures for building a house in the first place to these high standards pales in comparison to the amount of energy savings the house will have over the lifetime of the building. A Passive House requires as low as 10 percent of the energy used by typical Central European buildings!
Cost Savings: While Passive House buildings have some extra upfront costs, they truly are an investment, rather than an expense. Any additional budget items in the original build save a homeowner thousands upon thousands in the long run in energy costs.
Beyond The Residential Home
What began as a way to decrease the loads on residential homes, has now become a global movement for passive design at large. The applications are just as relevant for commercial designs for almost any type of space, from hospitals to schools, to commercial store buildings, offices, and more. The Passive House design principles have been adopted by architects, engineers, and contractors alike to make smarter spaces for our communities. If we can build smarter and more efficient buildings, why wouldn’t we? It’s simply the logical thing to do.
AE Building Solutions is proud to be a leader in the Passive House world, providing building envelope components and products that help designers and contractors meet Passive House Standard and certification requirements. We carry products like windows, weather/air barriers, ventilation systems, and insulation for comprehensive building construction. We’re devoted to increased thermal performance, reduced air infiltration, and reduction of thermal bridging to make more efficient homes.
Given we are burning through our natural resources rapidly, AE exists to help make a dent. Wanting to have an impact on our children’s energy and environmental future, setting our children up for a better tomorrow, and simply doing things more energy efficiently is all a part of AE’s mission.
Looking to get involved with other Passive House construction professionals?
Generally speaking, windows are the weakest link in our building envelopes. When evaluating windows, often the insulative specifications (R-value / U-factor) are the primary focus. Just as important are the air infiltration rates. Code-built homes often lose 20 to 40% of the heat in the home through air infiltration. Windows and doors are a significant source of this heat loss.
For windows and doors, air infiltration is defined as a volume of air (cubic feet per minute) divided by the window area (in square feet) when subjected to a 25mph wind (blowing perpendicular to the window) – Cubic feet per minute per square foot at 25mph windspeed. As of 2017, window manufacturers were only required to report air infiltration numbers if the windows were to be labeled Energy Star.
An Energy Star Compliant window allows air infiltration to be as high as 0.30 cfm/sq ft
Now some quick math for a 10sqft window:
0.30cfm/sqft x 10sqft = 3.0cfm total air infiltration allowed.
To think about this another way: A basketball has a volume of 0.26 cubic feet.
3.0cfm / .26 cubic feet = 11.5 basketballs per minute or 690 basketballs per hour from a single window. Imagine how much air this equals for a typical home of many windows.
While we can’t prevent a basketball from being thrown through a window, let’s talk about how Advantage and Alpen prevent these air infiltration “basketballs”.
Gaskets & Seals – While fixed units have the best infiltration rates, operable units must also be considered. Any sliding window uses a friction type gasket material to seal the window for air and weather. Over time this material can break down and will not perform as well as a compression seal. Consider awnings, casements, and tilt-turns which use compression seals rather than hung or sliders that use a friction type gasket. We always recommend against sliders and hungs and for fixed, casements, awnings, and tilt-turns.
Hardware – Consider the window hardware used to seal the windows. With a friction fit, there isn’t a practical way to better seal a window other than applying slight pressure or replacing the weatherstripping. With a compression style, minor hardware adjustments can be made to place more or less pressure on the seals, and while weatherstripping can be replaced, typically minor adjustments are all that is required to achieve an excellent air seal.
High-Performance windows help create comfortable, quiet, high-performing homes conserving energy for future generations. We are burning through our fossil fuel resources rapidly and bad windows and doors are a primary source of wasted energy use. If you have any questions about air infiltration or other aspects of high-performance windows, please call us at 720.287.4290 or send us an email. info@aebuildingsystems.com
In this post, we’ll go over a few key tips for installing windows, sliding doors, and swing doors. Whether you’re updating windows in your home to modernize the look or increase energy efficiency, or you’ve got a new build going up, we hope the information we’re about to drop gives you some insight to the highlights of installation. NOTE: Any window or door you purchase should come with an installation guide, which you’ll want to read thoroughly. If we provide information here that is not in your instructions, please confirm with the manufacturer before proceeding.
While it may seem intimidating, installing a door or window is completely doable for everyone from the DIY-er to the seasoned builder. If you need a refresher on the various types of windows and doors, head back to our last post. Otherwise, grab your ‘driver, level, and some shims – here we go!
Installing windows
There are many different kinds of windows, but the approach is generally the same. The basic steps are 1) Flash 2) Frame, 3) Install, 4) Seal, and 5) Trim. You’ve got this!
A few rules to live by:
Do it right the first time.
Measure, measure, and measure some more.
If the opening is wider than 3 feet, use temporary supports.
Moisture is your enemy.
We’ll assume you’ve already done your measuring and have prepped your framing, including checking for any water damage and replacing any wood that’s not up to the task at hand. Better to do it right at this point than to tear out all that hard work later.
Prep and preflash
First things first, prepare your opening by protecting the wood. There are a number of products you can use, but we won’t get into all the options here. Here’s a brief document that shows how to prepare an opening. However, if you’re doing a retrofit and working with replacement windows, getting the situation to look like this is not likely. You’ll just prepare and protect the opening as well as you can.
Plumb, level, and square
Next, you’ll “dry fit” your window – pop it into place and add a few screws at the top to hold it there temporarily. Grab a couple shims and make sure the window is plumb (level along the jambs), level (from the sill), and square (corners are perfectly 90०) on both the sash and the frame.
A trick for measuring plumb: Measure the diagonals of the windows, and if the numbers are equal each way, you’ve arrived at plumb. The longer the level you use, the more accurate you can be.
Don’t put away your level and framing square yet – you’ll be checking and re-checking each piece throughout the whole process.
Nail flanges
Many windows will have a nail or screw flange (also called a fin), that attaches to the window jamb. Not only do they make installation pretty simple, they also do a great job keeping moisture out. While you will hear folks call these nailing flanges, do we really want to swing hammers near our windows? Screws are also a much better fastener for the long run.
You can screw right through these flanges to attach the window frame to the jambs, but first, you’ll need to cut the siding and slip in weather barrier behind the siding, wrapping around the framing for weather protection.
Next, you’ll caulk all around the opening where the flange will attach. Before you tilt the window into place, be sure you have some shims handy so you can shore up level, plumb, and square once again. Then drive your screws through the flange.
Anchor brackets & through-frame install
Another option that is increasingly used and very common with Euro windows is anchor bracket install. Generally installed to the interior, anchor brackets are metal strapping that is attached to the window and then fastened with screws into the jamb. All the usual guidelines – plumb, level and square – apply. Anchor brackets are often used to install windows in thick walls like double stud walls and in high performance situations where we want the window in the middle of the insulation layer.
Through-frame, sometimes referred to as a block-frame install, is just that – screwing through the frame to fasten the windows. Note that this is more common with operable windows like casements and tilt/turn windows. If using a through-frame approach, make sure you communicate that to your sales representative as special accommodations might be necessary with the windows. Using through-frame is less common with fixed windows as it generally means you have to remove the glazing and then re-glaze after the frame is installed.
Fastener frequency
Always refer to the manufacturer’s instructions related to frequency of the fasteners. Also, pay special attention to fastener frequency when in high wind-load areas. More fasteners are often necessary where the wind loads are higher.
Interior jamb and sill extensions
If your jamb turns out to be flush with the drywall inside once you’ve installed the window, lucky you. For the rest of us (especially when retrofitting an older home), jamb extensions may seem like a good option.
A jamb extension is the piece that extends the jamb (the frame of the window) along the inside depth of the wall. Not only does this clean up the window framing, it gives you a clean edge to attach the casing.
Sill extensions build out the sill area and give you a smooth line, whether you’ve opted for a deep window frame or not. If you’ve chosen not to have a substantial window sill, this may only extend to the edge of the window trim; otherwise, it can be as deep as you’d like it.
Pro tip: We recommend against interior jamb and sill extensions because it limits access to the rough opening gap for insulation and air sealing. If you do go for it, it is often easier to build and install these extensions onsite. Also, we recommend taping the interior all the way around to the jamb to complete the air barrier. Please contact us for more information on this.
Exterior finishing
On the exterior of the building, you’ll add your exterior casing, fasten that into place, then caulk all the way around. Install your drip cap over the window with some caulking, slipping the top edge just beneath the siding. Secure that drip cap to the top of the window casing.
Inside, fill any gaps between the window jambs and framing elements with loosely packed fiberglass insulation or a window foam. Then you’re on to a final caulk (and ideally tape) on the flange and painting.
Exterior frame extensions and sill are also available, which create a different look but also help to improve the performance of the wall overall. Passive House would say to put the window in the center of the insulation layer to get the best overall wall performance (window and walls collectively). An “innie” install makes things a bit trickier for detailing. Exterior sills and frame extensions help reduce some of the brain damage of these details. Again, please contact us for more information on these options.
Installing sliding doors
Sliding doors are great. All that added light, plus they don’t require the interior clearspace a traditional swing door needs to swing open. What’s not to love?
When installing a sliding door, the key pieces to pay attention to are where and how the door meets the floor and getting everything super duper leveled up to keep that sliding action smooth for years to come. If you’re doing your project with us, we’ll talk through all the micro details up front so the installation process is as seamless as possible.
There are a couple options related to the floor detail, and specifically to the threshold. Give us a call to discuss options like FASTrack where the sliding door actually embeds into the concrete floor providing a super clean look. Note that there are thermal bridging considerations related to these types of systems.
Plumb, level, and square
Just as with your windows, taking the time to get plumb, level, and square straight will save you a host of headaches down the road. Since sliding doors are usually bigger than windows, small degrees add up and can mean your door will sag, stick, or even drift open and closed.
We’ll add another term to this: “True.” True is your double confirmation: If plumb, level, and square are right on one side but ever so slightly sloppy on the other, you’re not true. Both sides of the door need to be plumb, level, and square to be true.
Installing swing doors
If we haven’t hammered this home enough yet, plumb, level, and square are operative words when it comes to doors, too. When installing a door, shims will start to feel like your right hand. This is most important on the hinge side of the door. One key thing to keep track of is how high off the ground the door hangs – you don’t want your crew arrive to install flooring and find out said flooring is taller than the bottom of the door sash/slab, making the door impossible to open.
Euro doors: The sash condition
It is very important to remember that European doors have very little clearance between the bottom of the sash of the door and the bottom of the threshold – generally less than a half inch. What that means is wood flooring installed after the door at ¾” will prevent an inswing door from opening. Make sure to accommodate the finished floor height relative to the door when selecting and installing doors.
Brick mould and other trim considerations
Pre-hung exterior doors often have brick mould attached – an additional piece of exterior trim (wood, vinyl, whatever your door frame is made of) designed to cleanly overlay a brick exterior and produce a finished look. It doesn’t matter whether or not you actually have a brick exterior – this is just the name the piece comes with.
Because brick mould makes it difficult to access the rough opening gap, to insulate and air/weather seal around the doors, we often recommend against using it and instead finish the door trim in the field.
A quick note on installing Euro balcony doors
Balcony doors are essentially a window installation. What sets a balcony door apart is that you have to lift your feet to step over the bottom of the frame – the threshold is not flush with the floor. Not great for high-traffic areas, but it can save you a few bucks where it counts (more here). Plumb, level, square, weatherproofing, and off you go.
Wrapping it up
We hope you found some answers to your burning questions about installing windows and doors in your building. There’s a lot of information out there, and the specific product you get will come with its own installation guide. We’re here to help point you in the direction of some of the tried-and-true products we recommend (like our windows & doorsor weather barriers), and we’re always happy to chat about your project. You can get in touch with us here.
Knock knock. Who’s there? Harry. Harry who? … Harry up and answer the door so we can talk about that big hole in your building!
There are lots of things we geek out about over here, and gaping spaces in buildings get our full attention. First-world countries have come a long way since the Three Little Pigs style of building, and we’ve learned a few things about thermodynamics.
If you were to take a gander at the headlines for some of our other blog posts, you might guess (correctly) that we’re a little bit obsessed with thermal performance. Keeping heat in and out – consistently – is a big deal no matter whether we’re talking about a hotel, an office complex, or your own home. Of course, it goes beyond comfort: maintaining temperatures the right way can have a big impact on your wallet.
If you’re putting in the effort (and money) to insulate your home well and mitigate heat loss and thermal bridging, it sure makes a lot of sense to peer into the situation created by your windows and doors.
Let’s look in to windows first.
Windows
Windows occupy, on average, 20% of wall space. But they’re responsible for more heat transfer per square foot than any other surface in your home. So if you’ve been patting yourself on the back for a job well done with insulation and think you can make sacrifices on the windows, sorry folks – windows are worth the investment.
There needn’t be a battle between letting the light in and settling for a closed-in space. Fortunately, there are some great products out there that let you create both Instagram-worthy spaces and the cost savings of a well-insulated environment.
Here are a few things to ask yourself when shopping for windows:
Given your objectives and climate zone, how much thermal performance and how airtight do you need your windows to be?
Do you want the windows and doors to open to the inside or outside?
Would you like dual-action windows, meaning they can swing AND tilt open?
Let’s fling open the sash, shall we?
US windows vs. European windows
We’ll just get this out of the way first: If you’re new to window shopping, you may be confused by the whole US- vs. Euro-style window thing. In Europe, energy costs a whole lot more, so their windows tend to be extra energy efficient. This is accomplished in many ways, from high-performance frames and glass, to a higher quality and attention to detail. Even the way they open is designed to maximize energy efficiency.
European-style windows are…
Certified using ISO standards
Generally more energy efficient
Sometimes more expensive
Growing in appeal in the US
Starting to be made right here in North America
American windows are…
Certified using NFRC standards
Easier to install thanks to a nailing flange/fin – some Euro windows have nail fins as well
Have operation options commonly found in the US
Here at AE Building, we’re partial to European-style windows that are made in the USA.
Types of windows
Functionality and durability should be considered right up there with energy efficiency. That includes the material used, how the window will open, and what you need the window to do for you (let the light in, let air in, or even potentially let people out).
Fixed / Picture Windows
These windows are called fixed because – surprise surprise – they don’t open. If you want light but don’t need airflow, these windows are a simple (and less costly) way to go. Fixed windows usually perform better than operable windows as well, both thermally and in terms of air infiltration.
Benefits of fixed windows:
Let the light in when you don’t need airflow
Can be many different shapes
Perform better than operable windows
Are less costly
Sometimes have more glass even with the same overall opening size
Tilt and Turn Windows
These dual-functioning windows have hinges both at the bottom (so you can tilt it open at the top) and the side (to swing the window open). They’re more thermally efficient, so they’re popular in Europe, and can be more expensive. Note that the turn/swing function is to the inside and not to the outside like typical US-style casement windows with a crank handle.
Benefits of tilt and turn windows:
Lets heat out the top for ventilation during the summer
Blocks strong breezes
Easy to clean from inside the building
Multipoint locking makes them more secure and airtight
Tilt function enables venting with security
Casement Windows
Casement windows are usually rectangular windows that are tall and narrow. They are hinged on one side of the frame and the other side has a cranking mechanism to open the window for ventilation. They open outward.
Benefits of casement windows:
Multipoint locking available
Tight seal against heavy outside winds
Open outward, which means they won’t take up room in your interior spaces
Hopper
Hopper windows have a hinge on the bottom that allows the top edge to tilt or open into the room a few inches. They’re usually opened with a handle at the top of the sash and can be difficult to reach on tall windows.
Benefits of hopper windows:
The opening is at the top and blocks rain from coming inside
Opens about 4-5” at the top for ventilation
Common for bathrooms
Great for schools
Awnings
Awning windows are similar to hopper windows, except the hinge is on the top and they open to the outside from the bottom of the sash.
Benefits of awning windows:
Nice solution for airflow in rainy climates
Wind won’t blow them open
Great option for baths and showers
Horizontal sliding windows
Sliding windows slide open on a horizontal track. We generally steer our clients away from sliders and hungs because their air infiltration rates tend to be not as great (due to the open seam around the operable portion of the windows). However, there are times when sliders and hungs are a better choice. Talk to us if you need help deciding!
Benefits of sliding windows:
Fewer moving parts and hardware = less maintenance
Can be advantageous where a casement would open out on a deck and a tilt-turn would open into the space intruding on your interior space – like over a kitchen sink where the window might hit the faucet
Single-Hung vs. Double-Hung
Where a double-hung window lets you open both sashes, top and bottom, a single-hung window only opens on the top or bottom. Here again, we try to avoid these due to the air infiltration rates, although hung windows can be advantageous where you don’t want a tilt/turn intruding into your space or a casement window opening out to a deck. There are also historical considerations with hung windows as they were the primary option for operation in older buildings.
A few definitions
NFRC = National Fenestration Rating Council
This independent, third-party certification agency assigns specific energy efficiency measures to complete window system, from frame to glass. (“Fenestration” has to do with windows and doors – if you skipped fifth grade or Shakespeare class, “defenestration” is to be thrown out of a window).
U-factor / U-value
U-factor measures how well a window prevents heat from moving through the window’s materials – in or out. The lower the U-value, the less heat is lost in winter. These ratings generally fall between 0.20 and 1.20, with the higher rating being, say, a single-glazed window with aluminum frames, while a triple-glazed window might get a rating of 0.20 and even lower depending on the gas that used within the glass unit. These days, you can get quad pane glass which can run even lower – into 0.10 +/- U-values.
Visible Transmittance (VT)
This one’s simple enough: Visible Transmittance measures how much natural light is able to pass through the window. It’s influenced by the number of panes and glass coatings.
Solar Heat Gain Coefficient (SHGC)
A number between 0 and 1, the SHGC looks at solar radiation transmitted through a window or door. The lower the number, the less solar heat it transmits (= more shading). Some people rely on a center-of-glass or glass-only SHGC, which will give a higher number. Full window values include the frame, which has no solar heat gain. The direction your window faces, whether or not it’s shaded, and your climate zone will drive the optimal SHGC for your windows. For example, in colder climates, you want to collect solar heat on the south elevation of the home and block it on your west elevation to minimize overheating in the summer.
Energy Star Certification
Energy Star® bases its certification on U-factor and SHGC ratings for four different climate zones. Learn more here >
Now that we’ve got a handle on windows, let’s cover the next gaping hole in your building. Entry doors, interior doors, wood, steel, vinyl, with glass or without, one lock or many… When it comes to doors, you’ve got options.
US doors vs. European doors
Notes on European doors:
For balcony doors, we can incorporate a tilting mechanism similar to tilt/turn windows which allows for additional ventilation options
Often, a thicker design makes for improved thermal and acoustic performance
Usually features multipoint locking which improves air infiltration rates and security
Notes on American doors:
Includes swing and sliding doors
Features multipoint locking, with locks generally at three points on the handle side of the door
Types of doors
Balcony swing doors
Balcony doors are a popular choice for accessing exterior living spaces like… balconies (go figure, right?). Because they have a higher threshold, they are generally not used as main entry or in high-traffic doorways.
Benefits of balcony doors:
Weather-resistant access with ventilation-only (tilt) option
Don’t lock or unlock from the outside, making them more secure
Multipoint lock similar to Euro windows
Standard US-style and Euro-style swing doors with a low threshold
For a quick mental picture of a swing door, recall any old Western movie scene where a man with spurs and chaps bursts through the saloon doors. The in-and-out swing of those doors is what gives these hinged doors their name. Thankfully, we’re looking at much more elegant and airtight solutions these days (for starters: hinges, not springs).
Benefits of swing doors:
ADA-compliant options are often available
Multipoint locking options
Higher performance – thermally insulated options are available
Many hardware options
Lift and slide
You’re familiar with sliding doors, and the “lift and slide” door takes things to the next level. The “lift” action here utilizes a system of levers and wheels to lift the door up from its position flush against the floor/seal and move with little friction across an internal track. The lift function lifts the door out of an air seal and slides it open. Lift-slide doors generally seal better than typical US-style sliding doors.
For a closer look, check out our Advantage Classic or Mira lines, available as windows and doors.
Benefits of lift and slide doors:
Large, heavy panels move gracefully
Superior air infiltration over standard US-style sliding glass doors
Good for opening up large spaces
High storm rating protection
Strong forced-entry rating
Can use larger glass panels
Popular for window walls
Tilt and glide
Tilt and glide doors slide open, with the added flexibility of tilting open at the top for ventilation. The advantage of this tilt is that it’s secure when tilted – kids stay inside, animals stay outside (or inside), and the door remains locked.
Superior air infiltration over standard US-style sliding glass doors
A note on multipoint locking
As the primary point of entry for your building, doors generally have a higher security threshold than windows. Multipoint locks are more common in European doors and usually include a deadbolt, live latch, and several additional locking pins around the door sash.
Benefits of multipoint locking:
Helps prevent break-ins
When engaged, the locks aid in supporting the door and reducing wear on the hinges
Insurance often recognizes the added security
Additional ventilation option
Wrapping it up
Hopefully this primer has helped clarify some of your questions and given you some ideas about what kind of window or door is best for your unique scenario. We’re proud to provide made in the US, European-style windows and doors that are Passive House certified. We’re here if you have any questions, so don’t hesitate to reach out.
In our next post, we’ll get into installation methods. Stay tuned!
This post is part of a series on thermal bridging.
Warm air rises, so you can imagine roofs are kind of a big deal when it comes to thermal anything. Point of fact, your roofing system’s thermal performance is a major factor in your building’s overall thermal performance. And one sure-fire way to sabotage the whole deal is to ignore thermal bridging – the movement of heat through thermal-conductive materials.
Roofs top off your building’s thermal boundary or envelope. You may think that an attic provides an adequate barrier and insulating your ceiling is enough, but there are some serious reasons to intentionally address thermal bridging whether you’re smoothing out blueprints or staring down a renovation project.
Read on to discover how reducing thermal bridges can help you:
keep your energy costs from going through the roof (literally)
avoid extreme temperatures in your attic
prevent condensation problems
reduce the potential for ice dams
ensure the longevity of your roof
The good news: Thermal bridging is avoidable. As with any project, it’s possible to go overboard, so recognize the point of diminishing returns, stop there, and enjoy your energy savings.
Recap: What is thermal bridging?
Thermal bridging is the movement of heat through a material that’s more conductive than the air around it. Failure to mitigate can account for overall heat loss of up to 30% – so it’s not a thermodynamics lesson to be taken lightly. (Brush up on Thermal Bridging 101 here.)
When it’s cold outside, the heat inside your building will make its way through wood as much as three times easier than it will move through insulation (and steel is even happier to move heat). So insulation is a good move. But only part of the solution, because mitigating thermal bridging through structural elements and anything that penetrates your building’s envelope is key to building a more efficient building.
To be clear, improved energy performance and energy savings are great, but addressing thermal bridging means you’ll also get a more comfortable and durable building – both in terms of temperature and because you won’t find yourself dealing with fallout from moisture problems down the road.
We talk a lot about building envelopes, and the roof is part and parcel. The key principle here: Maintain a continuous thermal boundary to help prevent thermal bridging. But before you forge ahead too enthusiastically, take your pick from this list of challenges to make your design phase more exciting:
Pre-built challenges
Maybe the previous builders used too much heat-transferring wood to construct the roof joists (or worse, filled awkward spaces with wood). Maybe the angle of the roof slope leaves you gaps and tight spaces that make filling with insulation difficult.
Attic temperature control
In a perfect world, you want your attic to feel as close to outside temps as possible. And because hot air rises, clearly the top-most part of your building presents a special challenge. In cold seasons, you’re focused on keeping the warm air in. In warmer weather, it’s all about moving heat out to keep your interior cool. So there’s a balance to strike between venting and insulation when trying to encourage your attic to cycle heat and moisture up and out.
Venting
We won’t get into venting here to stay focused, but it’s worth a mention: you’ll probably want to consider ridge or gable vents that can quickly dissipate heat and maybe even draw cooler air in from outside.
Condensation
If you’re doing an exceptional job keeping your attic cool in summer, you may end up seeing condensation on the underside of the roof deck due to warmer, moister air outside. Any interior cold spots (think A.C. pipes or vents) can also lead to condensation, moisture damage (mold and mildew) and heat loss. And that moisture buildup can cause damage to your roof deck. In winter, the opposite scenario is relevant, with condensation forming on the underside of the decking.
Roof perimeters
Air sealing is an important part of building a strong building envelope. When air leakage happens at the roof perimeter, you’ll see issues like frost inside the attic (even snow blown inside), ice damming at the edge of the roof, condensation buildup on the fascia, and metal corrosion. You need airflow to help your attic cycle heat and moisture away.
Ice damming
Winter weather can be relied on for its inconsistency. Snow and sunshine are both hitting your roof from above, with the sun usually doing its job to melt the snow. Whatever the sun doesn’t melt, heat transfer from your warm attic will probably make short work of. Sounds great, right? Except these melt-freeze-melt-freeze cycles can put you in a real pickle when the melted snow has the audacity to re-freeze at the edge of the roof where it’s colder, backs up, and then dams under your roof shingles. Great.
Skylights and other penetrations
Structural elements that penetrate the roof (remember, the roof is part of your building envelope) create a thermal bridge. Chimneys, railings, vents, plumbing stacks, skylights – all potential penetration perpetrators. Yes, skylights generally have poor thermal performance. But are they wonderful? They sure are. Traditional installations tend to forgo thermal breaks in the frame, so significant thermal bridging tends to be common around the perimeter of skylights. There are ways to mitigate energy loss, such as wrapping the framing in insulation and ensuring thermal continuity throughout the skylight support.
Roof-to-wall transitions
Flashing, blocking, and structural supports all decrease R-value. But sealing the roof-wall connections is critical. Do what you can to select non-conductive flashing materials that will minimize thermal bridges and mitigate the rest with spray foam and other insulation products.
Support framing
Wood framing directly conducts heat and cold. If you’re using steel studs, well, then thermal bridging becomes an even bigger deal. And you’re almost certainly using metal fasteners – maybe even hundreds of them across the entire roof. One solution to the fasteners issue is to use a low-density foam to adhere the insulation, but there’s a better way overall… read on for a straightforward solution to many of these roofing woes.
For an even better visual take a look at these thermal images.
Mitigation strategies
The roof has one job: Keep the weather outside. But because weather can be crazy (and seems to be getting crazier), tasking the roof with keeping the peace between inside and out can be more challenging than it seems. There are two approaches to roofing strategy, and it all comes down to whether it makes more sense in your climate to keep your roof warm or cool.
Warm roof vs. cool roof
Cool roof
A cool roof is:
Traditional (most existing buildings likely use this approach)
Vented
Utilizes insulation placed above the ceiling to maintain temperatures
Has an advantage for warmer climates because venting allows heat to escape faster
Insulation is placed between and hopefully above the rafters or joists with (sometimes) extra insulation underneath, along the ceiling. Now, if you’re retrofitting an existing building, this could get tricky real fast. You may have to open up the roof from the outside or even underneath by taking down the ceiling to add insulation, and you may lose ceiling height inside the room. Plus, when you’re cutting the insulation to fit in each nook and cranny, you have to be pretty precise to get the coverage right.
On the upside, a well-insulated, ventilated roof can help to control or prevent condensation and the formation of ice dams by allowing heat to escape through the roof in the winter months.
Warm roof
Instead of insulating between the rafters, the warm-roof approach relies on insulation placed OVER the roof deck. In this case, rigid insulation is simply installed on top of the existing surface. This ensures the entire roof structure is insulated – which lends itself to being more energy efficient.
A warm roof is:
Usually not ventilated
Rigid foam insulation is attached directly over the roof deck
Heat is contained in the attic space or there is no attic (in the case of vaulted ceilings or low slope roofs)
Growing in popularity for new builds
With the insulation placed outside, if water or air ducts are run through your attic space, they’ll be less likely affected by extreme temperatures, saving you money on utility costs.
This approach is not terribly difficult to implement when retrofitting an existing building, with one note: By putting insulation over the existing roof level, you will add extra height to your roof that may require reviewing your local code as well as making adjustments to your exterior design details (fascia board, decorative trim, and so on).
Exterior rigid insulation
In keeping with our aim to create an unbroken building envelope, wrapping your building with exterior rigid insulation (warm roof) is the best strategy across the board. Be sure to use materials that are less conductive, like fiberglass, mineral wool, cellulose or high-strength foam – or our favorite, Rockwool. Continuous rigid insulation is so effective that some builders are actually foregoing interior insulation because it’s unnecessary at that point!
But wait, isn’t cavity insulation just easier? You might think so. You could use a dense-pack, blown-in cellulose or fiberglass insulation (preferred over trying to squeeze hand-cut batts into cavities) or a more expensive closed-cell spray foam, but you will inevitably find some tight spaces where it’s tricky at best to get the needed amount of insulation stuffed in – usually where the roof slope approaches the exterior walls. For this, there’s a great solution called the raised-heel truss which we’ll get into in just a minute…
Continuous insulation
Having a continuous insulation layer is critical– especially if you’re using any metal framing. Any supports for the insulation layer should be low-conductive or thermally broken. Sure, the support system is bound to have some negative effect on your R-value, but the overall performance advantages still give continuous insulation an advantage over cavity insulation options.
When you’re installing continuous insulation, your layers should be (from the outside): thermal control, water control, air control, vapor control. This should match up with the layers on the walls of your structure.
Seam taping / Air barriers
Seam tape (Majcoat, Fentrim F, and Wigluv for roofs) prevents air and moisture transfer where your rigid insulation boards join and at corners and joints. This helps to prevent condensation at the seams where air might travel through, bringing moisture with it. Seam tape is often used on foil-backed rigid Polyiso (closed-cell, rigid foam board insulation) which also acts as your WRB (water-resistant barrier). Another option is to make sure your WRB is airtight prior to installing the continuous rigid on the exterior. So many options!
Fascia boards
When baby it’s cold outside, and your attic is nice and cozy (or the A.C. is humming during a hot, humid summer), dew point along the fascia board is a real concern. What’s happening here is that moisture wants to drop out of the air onto a cooler surface – in this case, your fascia board. Continuous exterior insulation will help, but if you’re aiming for a cool roof or want to overprotect your fascia, you can also fill the space between the joists with insulation so it’s continuous through the ceiling to the point behind the fascia.
To insulate the joist gaps or not to insulate?
If you’re installing rigid exterior insulation, it’s probably overkill to insulate the joist gaps. If you can’t do rigid exterior for any reason, or are going for a cool-roof strategy, then absolutely insulate between the joists. A well-insulated, airtight ceiling (so make sure to add air and vapor barriers, too) will help reduce heat loss into the attic in the winter, and save you money in the summer. You can then add spray foam to enhance the air seal at the perimeter, where the walls meet the roof.
Raise the roof for raised-heel trusses
Where the roof slopes down to meet the wall there’s usually not enough room to install enough insulation. We’re talking 4’’ vs. 12’’ from the rest of the roof, and in an area where you’re probably going to lose more energy. So that’s not great. (Yes, if you’re doing rigid continuous exterior insulation you’ll still want to look at adding a little extra insulation to your roof-wall connection.) Here’s a great post from the Energy Vanguard blog (with pictures!) for more on this.
With new construction (or serious retrofits), the solution is to add raised-heel trusses (aka “energy heel trusses” or just “energy trusses”). The raised-heel truss approach adjusts the framing at the edge to add height, effectively raising the roof to give you all the room you need for installing insulation that won’t get compressed in that space. Voila, adequate (if not great) insulation over the exterior walls at the eaves. Bonus: You might solve some wind washing problems (air from outside circulating in your attic) while you’re at it.
R-values
It makes sense that since warm air rises, R-values should be higher for attics and cathedral ceilings vs. what you would need for a wall. Not to mention, energy code requirements for the R-value of roofing insulation are becoming more stringent, often requiring an increased thickness of insulation.
There’s no blanket answer for figuring out your target roof R-value. Start by considering your local climate and ideally use Passive House Modeling. Colder climates might necessitate R-values of 60 and even higher – R-100 is not unheard of for a Passive House. In milder climates, you might get away with more like R-30.
Compensating for poor design
Obviously, addressing thermal bridging is most effective when tackled at the design phase. But sometimes we don’t have that luxury, and there are solutions that can be applied during construction or renovation. In areas where you’re seeing thermal bridging, closed-cell spray foam or even aerogel products can come to the rescue. While probably not cost-effective compared to eliminating thermal bridging in the design phase, you should also weigh the cost of applying these solutions against simply accepting some minor heat losses.
“And now that you don’t have to be perfect, you can be good.” (Thanks for the permission, John Steinbeck.)
Wrapping it up
Exterior rigid insulation is a great solution for protecting your building envelope as you design your roof. But, it’s not the only solution — we’re going to cover another popular method, framing with double-stud walls, in a future post.
Serious about energy efficiency and want to get thermal bridging right on your next project? Talk to us.
This post is part of a series on thermal bridging.
Exposed concrete foundations are notorious for glowing yellow on thermal imaging. All that concrete acts as a highway for heat to leave the building, and should be given as much attention as windows, balconies, and the rest of the building envelope.
Let us join the chorus of builders in emphasizing that it’s not just about heat loss. When you have an uninsulated basement wall or slab, yes, you’ll certainly see lower interior temperatures. But the direct result of a lower interior temperature is not just a cooler space, it’s also an environment where condensation is likely to form. And no one wants a damp, dank, musty environment at the base of their building.
Recap: What is thermal bridging?
Thermal bridging (also called a cold bridge, heat bridge, or thermal bypass) is the movement of heat through a material that’s more conductive than the air around it. Thermal bridging can account for heat loss of up to 30%, so you can imagine the importance of addressing this when constructing your foundation! (Brush up on Thermal Bridging 101 here.)
Which materials act as heat highways, you ask? Steel, concrete, and wood (core construction materials) are prime offenders – and can’t really be avoided when building. But you CAN take into account some design considerations that will minimize thermal bridging, if not stop it in its tracks.
If you’ve ever had a basement, you may have noticed that any musty smell becomes stronger in the summer months. That’s because the warmer, more humid air is coming in contact with cooler surfaces that are below the dewpoint of the air inside (more on dewpoint in a minute). Particularly guilty are rim joists, as they tend to run colder.
In a two-story home, basements can account for 10-30% of the home’s annual heat loss in winter – more for a single-story building. Let’s take a look at what’s happening where.
Heat loss
All the cement, studs, and supports that go into shoring up a foundation are perfectly primed for thermal bridging if you don’t take the necessary steps to insulate and construct appropriately.
You might think, “heat loss, no biggie for a basement.” But it’s not just about reducing energy bills and keeping temps comfortable. As we mentioned, because thermal bridging also moves condensation and wetness along those pathways, enter the potential for expensive damage due to moisture and mold.
Moisture
Let’s do a little refresher on dew point.
When a thermal bridge whisks that heat out, you get cooler interior surfaces (good if you wanted a root cellar, not so good if you’re hoping for a cozy place to hang out). And those cooler interior surfaces invite moisture – the root cause of mold, mildew, and decay. Why? It’s all about dew point, the temperature at which the vapor in the air begins to condense.
To control moisture, it’s more or less a matter of properly insulating your foundation and installing vapor barriers. We’ll get to that in a minute.
Foundation-to-wall transitions
One particular area to keep in mind is where the foundation meets the rest of the house – a particularly problematic area for thermal performance. Foundations of course are still considered part of your building envelope, so wherever the concrete (slab, foundation, or foundation wall) meets the exterior wall will need extra attention because any insulation at those points is generally non-continuous.
Challenges for footers
Footers are typically poured concrete with rebar reinforcement and set just underground. Footers support the foundation and help prevent settling. You may also find yourself constructing a footer for a deck, pergola, wall, or garage.
While heat loss through footers can be reasonably low, if you’re going for Passive House, you’ll still need to address it.
Mitigation strategies
When it comes to thermal bridging, two things are critical to consider when constructing your foundation or footer: Insulation (interior, exterior, midlayer) and permeability (vapor and air barriers). Keep this in mind: Your goal is to keep the interior warmer than the exterior in the winter. However, condensation can also happen in summer when the air can hold more moisture.
Insulation
Foundations, basements, and crawl spaces can be insulated internally, externally, between layers of concrete, or both internally and externally. While exterior insulation is the most effective, interior insulation is more common – but it comes with more moisture problems.
Interior or exterior, you may want to check which materials are recommended for your climate zone, as your insulation needs will depend on temperature and humidity ranges in your region.
Exterior insulation
Let’s cover exterior insulation first.
In a perfect world, the best solution is to wrap the exterior of your entire building envelope with rigid insulation, including the foundation.
For below-grade foundations, select an insulation material that can withstand conditions underground, which means it should hold up to moisture, freezing, and thawing. If your insulation will be in direct contact with the soil, extruded polystyrene (XPS) holds up well and will retain most of its original R-value. However, XPS has some reasonably concerning environmental drawbacks (global warming!). Higher-density, rigid mineral wool board is a more environmentally considerate choice.
Heat loss tends to be greatest at the corners of a building (where more material is in contact with the soil which absorbs more heat away from the walls). So, it helps to overlap the insulation at corners – including recesses for doors and windows.
Bonus: Insulation installed outside the foundation wall, as a wing or straight down vertically, can help prevent or absorb some of the effects of frost heaving (for those of you blissfully in warmer climates, frost heaving is the upward swelling of the soil as it freezes). Contact us if you would like more information on this.
Interior insulation
Interior insulation is designed to protect the interior air in the basement or crawlspace from contact with cold surfaces (the concrete and framing).
At one point or another, you’ve probably stuffed insulation into framing cavities and called it good. It’s easy, it’s cheap… but you’re not stopping thermal bridging through the studs and cold hard concrete floor.
Several options for insulating your stud cavities:
ROCKWOOL or fiberglass batts. While a touch more costly, ROCKWOOL is our top choice for several reasons (which we’ll likely explore in a blog post down the road).
Open and closed-cell spray foam insulation. Closed-cell spray foam rings in with a high R-value rating. Note that these spray foams act as a vapor barrier at around 2″ thickness. The downside: This creates an impermeable layer which you’ll want to avoid if you have an impermeable layer on the exterior, too. Open-cell spray foam diffuses moisture and can completely fill cavities. The downside: This creates a lot of waste when trimmed. Also, note also the environmental impacts of urethane foams as well as the duration of the air-sealing of urethane. These are likely for another discussion.
Flash and batt or flash and fill is a hybrid approach to insulation that combines closed-cell spray foam insulation (to create an air seal) with fiberglass batt (usually, or blown fiberglass, blown cellulose, or sprayed cellulose) insulation.
Whatever you use, aim for an insulation layer with a permeance rating that allows for drying – this will lower the risk of moisture accumulation. (Rule of thumb: The greater the permeance, the greater the drying capability.)
Above-grade foundation insulation
While you’re probably used to seeing exposed concrete meeting the siding, you can imagine this is an undesirable scenario when it comes to thermal bridging.
But the laws of physics are on your side. Simply installing an R-10 insulation from siding to footing can cut heat loss by about 70% (for a heated basement). Applying a protective “board” or coating over the foundation insulation above grade will help protect it from damage due to the trades, sunlight, pests, and … weed whackers. There also are boards and coatings that can be colored and textured so as to add to the building’s visual appeal.
Notes for footers and foundation walls
While many kinds of rigid foam insulation have a good compressive strength higher than most soils, you may still want to consult with a structural engineer to verify the likelihood of “creep” – slow compression of the insulation under the footings. One option that is getting more recognition is foam glass. It can be costly but has great compressive strength.
Insulation on the interiors of any stem walls and a horizontal layer of continuous rigid foam or mineral wool under the slab can help address thermal bridging. A lesser-known option for insulating under the slab is perlite, a naturally occuring, expanded volcanic rock that has similar properties to glass. Contact us to learn more about perlite below slabs.
Retrofitting
If you’re retrofitting a building, focus on insulating the top half or top third and save yourself some digging. Warm air rises!
Vapor & air barriers
Make sure you get a vapor barrier beneath the slab to prevent moisture from rising up through the concrete. A sheet polyethylene will work well for this purpose, as well as a capillary break between the footing and the perimeter of the foundation wall.Then you can use tapes or sealant to seal the basement wall to the slab.
Be very cognizant of the ramifications of using interior vapor barriers as you’ll want to allow drying. The general idea here is to keep the moisture out (obviously). We talk more about vapor barriers and breathing inthis post.
Wrapping it up
Hopefully, this post has helped give you some insight into how to properly address thermal bridging as you construct your foundation or building footers. Now that you know what to look for, you won’t be able to un-see all the uninsulated concrete poking up around your neighborhood!
Serious about energy efficiency and want to get thermal bridging right on your next project? Talk to us.
This post is part of a series on thermal bridging.
Have you been charged with designing an energy-efficient deck or balcony? Or maybe you’re looking at blueprints with cantilevers that has your gut telling you something’s not quite right. Perhaps you’re a homeowner itching to start a project, but the term “thermal bridging” stopped you in your tracks. Whatever you’re working on, we hope this entry helps clarify what thermal bridging is, why you can’t afford to ignore it, and how to address it appropriately when constructing a deck, balcony, or cantilever.
Recap: What is thermal bridging?
Thermal bridging, quite simply, is the movement of heat through a material that’s more conductive than the air around it. Anytime a thermal-conductive material like steel, concrete, or wood penetrates the building envelope, it creates a highway for heat to exit (or enter) the building. Don’t think it’s worth taking seriously? Consider that this can account for heat loss at a rate of up to 30%! (Want to learn more? Read our 101 here.)
The inefficiencies created by thermal bridging not only reflect poor design, but can result in high energy bills and discomfort for the homeowner. Worse, because these materials move condensation and wetness along with temperature differences, thermal bridging introduces the potential for expensive damage due to moisture and mold. Just think about the havoc persistent moisture within your walls could wreck!
We’ve already covered how windows are a prime offender for thermal bridging in your home. Now, let’s talk about what you need to take into consideration when building a deck or balcony and incorporating cantilevers into your design.
Thermal bridging in action
Thermal bridging is most pronounced with materials like steel (you’re probably thinking of beams and support, but fastening items are guilty too), although wood will also transfer heat. Basically, if you’re designing or constructing any element that projects from or enters the building, you need to pay attention to our points below in order to get energy efficiency right.
A cantilevered steel deck or balcony might as well be a case study for how thermal bridging works. Or, for that matter, a concrete slab (just look at multi-level apartment buildings). Decks and cantilevered design elements project out from their origins within the building, breaking through the building envelope and really quite efficiently conducting heat from (or into) the building.
Imagine these elements as giant radiator fins and you’ll start to get the picture of exactly how thermal bridging works!
However, with the right strategy and materials, you needn’t drop the trending cantilever look from your design toolbox. Stay with us as we get into some solutions and techniques to help you address this problem elegantly and efficiently.
Risks associated with thermal bridging
Heat leaks
Decks, balconies, cantilevered bump-outs, and concrete slabs are notorious for leaking heat. In the winter, you might notice that the interior floor near a deck feels colder to your feet – that’s poor design helping heat escape through the structure of your home.
Keep in mind this is not just about staying cozy: All of this wasted energy costs a homeowner money and impacts the environment.
Moisture issues
Let’s head back to grade school for a second. Remember what happens when warm air hits a cooler surface? You guessed (or Googled) it: Condensation. Now picture those beautiful decks, cantilevers, and balconies. Not only are they exposed to the elements, but when that warm summertime air travels into the AC-cooled building envelope thanks to thermal bridging, not only is condensation bound to happen, but you could soon have a serious mold problem on your hands. It’s not just a wintertime issue.
Working with a pre-built structure? Here’s how to tell if there’s a moisture problem: If you’re lucky enough not to find mold, you’ll see darkened areas where the moisture has attracted dirt.
One last thing to keep in mind here: having a vapor-open approach to the envelope assemblies is important. If moisture condenses with the envelope assemblies, it has to be able to migrate out of the assemblies or you will have mold issues.
Prevention & mitigation strategies
Ultimately, thermal bridging solutions are all about mitigating heat transfer – but let’s not forget air leaks. Use the following tips and tricks to help you “break the bridge.”
Good design
No surprise, preventing thermal bridging starts with good design. And the best way to get good design from the get-go? Tell your architects and structural engineers to work together and think “energy smart” first. (This may sound easier than it is!)
Ideally, good design doesn’t compromise the building envelope – which means you should try to construct your deck or balcony separately from the building and secure via load-bearing brackets to the walls or support independently. Even better, on its own foundation.
For decks:
So best-case scenario for a deck is an independently constructed structure on its own foundation. Otherwise, anywhere that a deck is attached to or penetrates the structure of the building, anticipate thermal bridging to occur. And if heat transfer is happening, you better believe moisture transfer is happening too.
You need a plan to keep air out of your walls, since air (or more precisely, the vapor in the air) is the primary culprit for moisture condensing within the wall assembly. You might consider installing enough continuous rigid exterior insulation so that the dewpoint occurs outside the envelope assemblies. Using a vapor-open approach will help ensure that if your walls do get wet, they can dry.
For balconies:
You might try supporting the outer corners of the balcony with steel rods or cables attached higher up the building – which can add visual appeal to your exterior design. Or, you might support the balcony with wooden brackets affixed to the building’s exterior. You may also be able to support the corners on independent posts, like you would for a deck.
If none of this possible or the design is already set in stone, using the right materials, insulating them, and creating an air barrier can significantly reduce or even eliminate thermal bridging issues. Read on for more about these strategies.
Structural thermal breaks
A thermal break is a material used to block the path of heat transfer. Incorporating structural thermal breaks (like specialized plates, pads, or foam) between a balcony and floor slab can reduce heat transfer by up to 75%. Bonus: This also improves condensation control.
You can purchase manufactured thermally broken balcony connectors from manufacturers such as Schock and Halfen.
Air sealing & taping
Air sealing is an important step to making sure your building envelope is airtight. Don’t make the mistake of thinking you’ve covered your bases simply by insulating. Air can move around insulation, bringing higher/lower temperatures – and moisture. Since any penetration through the structure breaks the building envelope and creates the potential for airflow, you’ll want to make sure you have a plan for air sealing.
In fact, you should start the air sealing process even before you add any insulation by using a weather barrier system that is also an air barrier. Arguably, adding an interior air barrier can be a belt-and-suspenders approach. Learn about interior air barriers here.
The Holy Grail here is an airtight, vapor-open building envelope. (There’s even a certification for that. Learn about Passive House.)
Insulation
Exterior insulation is often recommended and should be considered part of that building envelope you want to avoid penetrating. You’ll especially want to insulate around the highly conductive steel studs and structural framing. Here’s one exterior insulation we trust to do the job well.
Continuous rigid exterior insulation is used for wrapping the building structure. Ideally, you are using enough insulation to move the dewpoint out of the structural wall assembly and into the exterior rigid insulation. “Continuous” is the key word here – you want to install it without breaks. If you need to cut out the rigid insulation around penetrations (which would obviously short-circuit your attempts at preventing thermal bridging), taping and spray foam will be your friends.
Double stud construction: With double stud construction, the exterior studs will act as the structure, while the inner studs are used for chases and insulation with a gap between the two. Insulating the gap between the studs provides the thermal break. Decks and balconies can then be bolted to the structural exterior studs. Other cantilevered details like bump-outs are not recommended without an air barrier and a continuous rigid exterior insulation layer.
An educated crew
Ultimately, a well-informed crew (from architects to structural engineers to construction teams) will know what to look for and the steps they can employ to minimize thermal bridging while making the assemblies airtight.
Wrapping it up
We hope this post has helped underscore the importance of addressing thermal bridging and given you some strategies to make your design work. The good news: With these strategies and the right materials, you can significantly lower or eliminate the risk of thermal bridging in your deck, balcony, or cantilever design.
Serious about energy efficiency and want to get thermal bridging right on your next project? Talk to us.
As a homeowner, heat loss is or should be a big concern. Energy escaping through the building envelope (walls, roof, floor) means more energy is required to maintain a consistent temperature or better said – comfort -within your home. It also means higher utility bills whether you’re building a new home or looking to refurbish an existing home. One of the most significant considerations should be how to make your home more comfortable but also more energy-efficient – less costly to operate. Which leads us to the topic of Thermal Bridging!
What is thermal bridging?
In a heating climate and similar to air infiltration, thermal bridging results in heat loss and occurs when heat escapes from the inside of the building to the outside, via conduction and through the building envelope. If you’ve ever been in a house that has a “drafty” spot or just constantly feels cold, that’s likely the result of thermal bridging as much as or even more than air infiltration. Even airtight homes can have a heat-losses of 20 to 50 percent due to thermal bridges.
Types of Thermal Bridges
There are several types of thermal bridges that designers, builders, and homeowners should be aware of and the following are three common types:
Repeating or Systematic thermal bridges: A common cause of heat loss are repeating thermal bridges which are predictably found inconsistent breaks in the thermal envelope allowing heat to pass through easily. It’s important to keep these in mind during a building’s design. Common Examples include wood and steel studs, steel wall ties, ceiling joists, and insulated suspended floor joists.
Non-repeating thermal bridges: This method of heat loss doesn’t follow a pattern in the way that repeating thermal bridges do. A non-repeating thermal bridge tends to pop up in specific areas impacted by an interruption or break in the construction. Common culprits include things that penetrate the thermal envelope to include windows and doors, structural beams, pipes and cables, and cantilevers.
Geometrical Thermal bridges: Generally found where the building envelope changes directions and where the materials meet, Geometric thermal bridge examples include wall corners, wall to roof and floor junctions. The more complex a building design is, the more geometric thermal bridging will be prevalent.
Regardless of the source, avoiding thermal bridges wherever possible is essential – and knowing where your home is losing heat can help you take the proper measures needed to reduce the problem.
Thermal Bridging and Windows
Often, it is windows that are a major culprit when it comes to heat loss and thermal bridging in the home. Standard or code minimum windows often represent a compromise. “We” accept their lower thermal performance because we enjoy the view, natural light, and ventilation they provide. However, when adding high-performance windows with higher R-values (lower U-values), windows become less of a concern for thermal bridging, especially when properly installed.
In an existing home, an expert can determine the state of a home’s windows by doing an inspection. They know what to look for in terms of damage, deterioration, and condition. Knowing a window’s age is a big help as well. Most older windows did not have high-performance glazing nor did manufacturers generally consider thermal bridging in the frames and spacers.
With new construction or existing homes, to reach your energy and comfort goals, it is important to consider high-performance windows. The thermal image below shows the thermal bridging – shown in blue/purple. This is likely why you have seen condensation on windows.
The magic of thermal imaging!
Note also high-performance windows help with other variables to include sound attenuation. They reduce the sound coming from the busy street in front of your house for example.
Thermal Bridging Results in Condensation – and Mold
Four variables come into play with condensation: outdoor temperature, indoor temperature, your home’s humidity level, and the indoor surface temperature of an exterior building envelope component. Since outdoor temperatures are not something we have control over, we focus on what is in our control. Windows that have well-insulated frames, multi-panes of gas-filled glass and have higher performance spacers will help increase the interior surface temperature of the windows. Higher interior surface temperatures help to effectively prevent the condensation of moisture on your windows preventing mold from growing. This subsequently improves your air quality. We would be remiss if we didn’t also mention the importance of ventilation systems which improves indoor air quality.
Glass: Pursue options that included triple or even quad glazing.
Gas: Gas filled glazing is no joke. Argon gas is cost effective and provides a good boost in performance over air-filled units. Krypton gas, while more costly, provides an excellent increase to performance.
Frames: Select frames made of low conductive materials. Aluminum frames without thermal breaks are a complete no-no for energy efficiency and comfort. Aluminum is a tremendous conductor of heat. Better options are wood, fiberglass, and PVC with insulating air chambers. These frames are even better if they are insulated. Note, thermally broken aluminum is a good option depending on how good the thermal break is.
Spacers: Selecting windows with better spacers can help prevent thermal bridging in the windows as well. These spacers separate the panes of glass and appear where there are divided lights. Avoiding spacers made of aluminum and steel, and selecting stainless steel and various composite materials are much better options. Warm Edge, Super Spacer, and Swiss Spacer are some of the composite spacers that are available.
Installation: Proper window installation including air sealing and insulation around the windows will significantly reduce the amount of energy loss. To reduce thermal bridging around windows,Thermal Buck is a great product for the installation.
Final Thoughts
Bringing awareness of thermal bridging to all of your construction partners will aid in your goal. An architect can design to minimize thermal bridges. By not paying attention to the details on the construction site or if there is a lack of training, reaching your goals will be difficult.
If you’re looking for ways to minimize thermal bridges and select high-performance windows for your project, contact us today.
Do you have a random “cold spot” in your dining room or perhaps in an area where a sweater is always needed, no matter how high the thermostat is set? Thermal bridges may be at play.
If you don’t work in or around construction, you may have never heard the term “thermal bridging”–but you’ve likely felt its effects. In a nutshell, it’s the movement of heat across an object that is more conductive than the materials around it.
Thermal bridging not only causes a loss of heat within the space, it can also cause the warm air inside to cool down. As we approach the coldest season of the year, this means higher utility costs and potentially uncomfortable shifts in temperature inside your home or building.
Keep reading to find out exactly how thermal bridging works and what you can do to stop it:
What is thermal bridging?
When heat attempts to escape a room, it follows the path of least resistance. Likewise, the same process occurs during the summer, only in reverse, allowing heat to enter your otherwise cool building.
Thermal bridging happens when a more conductive material allows an easy pathway for heat flow–usually where there is a break in (or penetration of) the insulation. Some common locations include:
The junctions between the wall and the floor, roof, or doors and windows.
The junction between the building and the deck or patio
Penetrations in the building envelope to include pipes or cables
Wood, steel, or concrete envelope components such as foundations, studs, and joists
Recessed lighting
Window and door frames
Areas with gaps in insulation
Impacts and risks assumed due to thermal bridging
What does all of this mean for you? In addition to poor climate control, there are several other lesser-known (but still serious) effects caused by thermal bridging.
Thermal bridges can increase the risk of condensation on internal surfaces, and also cause condensation within the walls. Both can lead to mold growth, which in turn can cause unpleasant odors, poor air quality, and most importantly long-term health problems. Additionally, unchecked condensation may eventually cause rot and structural damage.
Thermal Bridging in windows
Thermal bridging can have a significant effect on the energy efficiency of windows. The frames and spacers are the primary culprits. Spacers are the, typically metal, “strip” that goes between and separates the glass on double and triple pane windows. Different materials have different conductivity and impact the performance of the windows differently. Condensation on a double pane window is generally due to the spacers.
With retrofit situations, knowing exactly how old a window is, as well as the component materials, can provide you with a general idea of its efficacy. Unfortunately, if your windows are rather dated or just poorly made, it isnearly impossible to add thermal breaks into an existing framing system.
Issues with roofs and foundations
By their very nature, roofs and foundations present a large number of challenges in terms of maintaining a thermal boundary. Drains, vents, and holes for pipes and wires (amongst other things) create unavoidable penetrations in the building envelope and insulation. Heat transfers from the building into the ground or from the building into the air are often inevitable, though they can be minimized.
Strategies and methods to reduce thermal bridges in buildings
Bottom line? In new construction, design it right which a whole topic in itself. With existing homes, if you suspect there is thermal bridging occurring in your space, you need to eliminate or reduce the effects as much as possible.
Proper planning, design, and construction can help remedy thermal bridges in new structures. However, if you live in an older home, there are still steps you could take. These strategies include:
Performing an energy audit to identify thermal bridges in your home
Installing double or triple pane windows with argon or krypton gas, better spacers and insulated frames
Updating and/or adding insulation to your home – ideally adding a continuous insulation layer.
Installing storm doors (especially if you have metal doors)
The ultimate remedy is to complete a deep energy retrofit that addresses everything and more than mentioned in this blog
Studies show that in an otherwise airtight and insulated home, thermal bridges can account for a heat loss of up to 30%. Whether you’re building a new home or retrofitting an existing structure, care should be taken to avoid unnecessary breaks or penetrations so that the possibility of thermal bridging decreases.
If you’re looking for ways to minimize thermal bridges in your next project or existing home, contact us today.
Let’s start by clearing up a misconception about building envelopes:
Buildings need to breathe, walls don’t.
If you want a building to be energy efficient and comfortable, you can’t have leaky walls. If you want a resilient building without mold issues, you can’t have walls that trap moisture. With a continuous insulation strategy, however, you can have your cake and eat it too.
ASHRAE 90.1, Energy Standard for Buildings Except Low-Rise Residential Buildings, defines continuous insulation (CI) as “Insulation that is continuous across all structural members without thermal bridges other than fasteners and service openings.”
Continuous insulation greatly reduces the movement of heat through a building’s walls. Done correctly, CI greatly improves a building’s efficiency and comfort. Not everyone is gung-ho about CI, however, so we’ll address some common concerns.
Objections
One objection to using CI and air sealing is the misguided notion that “Walls need to breathe” to prevent mold and mildew. A CI strategy can indeed cause problems if vapor closed materials are used because they trap moisture. There are instances where this has contributed to mold, rot and indoor air pollution. Let’s be clear about breathing – walls do not need breathe, and instead need to enable moisture to migrate out. This is a fine but very important distinction.
Also, too little CI can fail to move the dew point outside of the wall assembly, which can contribute to similar problems. If the dew point is within the CI layer, the risk of mold formation is much lower. These risks, however, can easily be further reduced, as we’ll discuss shortly.
Strategy and risk mitigation
There are three core elements of a CI strategy:
Airtightness
Vapor open materials
Thickness or total R-value
Generally, you want all three. However, if you have air tight and “thick enough” insulation, vapor open is less important. Likewise, if you have air tight and vapor open, the thickness while impacting thermal performance is not as important related to mold issues. And finally, if you have vapor open and “thick enough”, air tightness is arguably less of an issue. We’ll begin by touching on each element in isolation.
Airtightness: Air tightness can be compared to the zipper on a down jacket. On a mountain top, the down jacket is essentially worthless if the zipper is not zipped. We can easily lose 30 – 40 percent of our homes’ energy through leakage, making airtightness essential to comfort and energy performance. Air sealing is also advisable because leaky walls let air and moisture into the exterior wall assemblies, creating the risk of condensation and mold. An airtight building envelope also improves indoor air quality by preventing allergens like dust, pollen and other contaminants from entering the home.
Again, the idea of constructing an airtight envelope flies in the face of conventional wisdom that “walls need to breathe.” The reasoning is that buildings that don’t leak trap indoor air pollution and excess moisture. This concern, however, is easily addressed with a good mechanical ventilation strategy. Vapor open walls is the key not “leaky” walls. Walls need to be able to dry not “beathe”.
Vapor open materials: Insulation and air sealing products that are vapor open to the exterior ensure that if moisture does condense inside the wall it will dry to the outside, rather than remaining trapped. That mitigates the risk of mold and mildew and is indicated by a product’s perm (permeability) rating. Therefore, you want CI materials with a high perm rating. Note also, that moisture within our walls generally dries to the outside more readily in heating climates – climates where the heat load is greater than the cooling load.
Thick insulation: CI is essentially the down in a down jacket – for your home. A thicker insulation layer will move the dew point—the point where moisture in the air condenses into water—outside of the wall assembly. All things equal, the higher the R-value, the less condensation will occur within the wall assembly itself. Instead, it will occur towards the exterior surface and within the CI layer – and ideally where there is no food source for mold.
Please note that we aren’t talking about Passive House standard here—we’re talking about an extra couple of inches of vapor-open insulation. Over a building’s lifespan, continuous insulation is highly cost-effective because it reduces energy bills and the risk of defects. It also improves occupants’ level of comfort.
Implementation
Having made the case for continuous insulation, we’ll delve into materials and methods.
Materials—insulation. We tend to recommend rigid mineral wool insulation because it’s vapor open, highly permeable, inflammable, contains no food source and is well-suited to Colorado’s climate. Mineral wool is, in a word, robust. Mineral wool products by ROXUL, recently rebranded to ROCKWOOL, for instance, outperform foam insulation in terms of vapor permeability and sound attenuation. It’s also a fire retardant with no flash point and melts at 2150 degrees (House fires burn at a range of 1200 – 1400-degrees).
Placement. CI is generally applied to the exterior of a building envelope. In most cases, exterior application is easier and more effective than an interior CI strategy. It helps move the dew point outside the wall assembly and it doesn’t require the detail work of fitting it to joists and other structures.
Foams generally have extremely low perm ratings, meaning they do not allow moisture to migrate through the material. By contrast, mineral wool is very permeable (vapor open). It enables moisture to pass through like a good pair of wool hiking socks. Also, it is made of “rock” and there is no food source in Rockwool preventing mold from growing.
Finally, mineral wool is more environmentally friendly than foam insulation because it requires few virgin materials to manufacture. Roxul Rockwool is made from 85 percent recycled slag from steel processing and 15 percent raw basalt.
Materials—air/weather barriers. A good, vapor open air/weather barrier is essentially Gortex for your house because it helps keep both moisture and air out of your wall. (e.g., it keeps the rain out and allows “sweat” to dry). There are a variety of products available.
If you’re doing a deep energy retrofit, you’ll want to replace felt paper with Majvest or another air/weather barrier with a high perm rating (Majvest’s perm rating is 68). Add CI when feasible (you may be surprised how often this is the case) and tape all Majvest seams to prevent air infiltration.
New builds. The best approach for a new home is to use continuous insulation, air sealing and high-performance windows for an all-around robust envelope.
We recommend thick, well-insulated walls to reduce heat transfer, which in turn reduces condensation, as previously noted. Apply mineral wool CI products such as ROCKWOOL Comfort Board 80 or Comfort Board 110.
In short, continuous insulation makes code compliance easier, improves building comfort, reduces defects and results in more resilient, longer lasting homes. It’s a great approach for retrofits as well as new builds.
P.S. – For a fascinating demonstration of how ROCKWOOL mineral wool’s fire and heat resistance, check out this 90-second video. We don’t want to give too much away, but it involves chocolate.
When building an energy efficient home, High Performance wall assemblies are critical components, and can be grouped into a couple of categories: 1. Built on-site advanced wall assemblies and 2. Prefabricated walls, to include SIPs.
Note that this blog post is largely dedicated to Polyurethane SIPs.
ICFs, Insulated Concrete Forms, are a good option and are manufactured by several companies. Faswall and Nexcem have an interesting woodchip product. There are pros and cons for ICFs, and it is important to understand both.
Advanced Wall Assemblies
The goal is to improve the wall construction of conventional, stick built homes with advanced wall assemblies to include double stud, stagger stud or continuous insulation walls.
Double stud walls consist of two stud-framed walls set up next to each other to form an extra thick thermally broken wall cavity that can be filled with insulation. Because the interior and exterior framing are separated by insulation, thermal bridging is reduced or, ideally, eliminated.
Stagger stud walls use top and bottom plates that are normally 2×6 (5.5”) – 2×12 (11.25″). Vertical 2 x 4 studs are then staggered alternately on each side of the plates. This is a good option for extra insulation, reduced thermal bridging and sound-proofing of spaces as well.
Another option is standard construction with a Continuous Insulation (CI) layer. In CI, builders add a continuous layer of insulation across the exterior of all structural members to reduce or eliminate thermal bridges, except for fasteners and service openings. Insulation is installed generally on the exterior of the building and is an integral part of the building envelope. Comfortboard 80 is an excellent vapor open product that can be used for a CI approach. Mineral Wool is generally favored, as foam tends to have low perm ratings and generally the desire is for our walls to dry to the outside. Often folks using a CI approach do not use enough insulation to move the dew point outside of the wall assembly. It is critical to have a vapor open approach if the dew point falls within the stud cavity.
Prefabricated Walls
Prefabricated walls are built in a factory, transported to the building site and craned into place. Manufacturers of these types of walls include:
Phoenix Haus, which designs and produces open sourced housing templates for walls that save energy, provide better insulation and allow homes to be more efficient with or without solar energy.
Build SMART simplifies the process of building a high-performance, energy-efficient structure with factory-manufactured modular components. Continuously insulated panels come with pre-installed, energy-efficient windows and doors and are delivered to the building site.
SIPs – Structural Insulated Panels. There are several types of SIPs out there. Generally, the difference between SIPs is the insulation. Most are made with OSB (oriented strand board) skins, but some SIPs have different skins to include metal or MgO (Magnesium Oxide) skins. Most often, the insulation is EPS or Polyurethane. However, there are some that are made with mineral wool, PolyIso (Polyisocyanurate)or XPS (extruded polystyrene).
Some SIPs are not considered structural (e.g. most metal SIPs), and they might be referred to as Sandwich Insulated Panels.
SIP panels made of EPS, XPS or PolyIso are glued together generally with Polyurethane adhesive. SIPs made with Polyurethane foam are adhered together with the foam itself creating a tremendous bond and a very strong wall panel solution.
Thermocore SIPS are made with polyurethane insulation core with interior and exterior skins of OSB. Panels are precisely and custom manufactured to the architectural drawings. Included in the SIPs are door and window bucks, headers, sub facia and electrical conduit boxes. Also, beam pockets and additional structure like 2x, LVL or steel posts can be built into the panels.
Construction with Thermocore SIPs is quicker than framed homes. The time from foundation to dried-in is significantly reduced. Labor costs are lower, which is ideal in places where available labor is scarce, costly, unreliable or poor quality. Thermocore SIPs are stronger than framed walls, with lower thermal bridging.
Thermocore SIPS often have higher material cost, the electrical requires pre-planning and can be considered less environmentally friendly due to foam, which is a petrochemical product.
The thermal performance values of SIPs and lower labor costs often make up for the initial cost and planning. SIPs help to achieve a more air tight building as well. In the Passive House and Zero Energy industry, where energy efficiency, comfort and clean air are the goals, Thermocore SIPs are an optional building solution.
For more information on SIPS, call us at 720-287-4290.
Sources: U.S. Department of Energy, Greenbuildingadvisor.com, Thermocore.com
Because High Performance buildings, like Passive Haus homes, are so air tight, the quality of the air within is a critical consideration. Whether we are at home, at work or in other public buildings, we are exposed to many indoor air pollutants. These pollutants can cause minor health issues such as headaches, eye irritation, allergies and fatigue, or major ones like asthma and different forms of cancer.
Gases such as carbon monoxide and nitrogen dioxide, known as combustion pollutants, originate from burning materials or improperly vented fuel-burning appliances such as space heaters, wood stoves, gas stoves, water heaters, dryers and fireplaces. Carbon monoxide cannot be easily detected, as it is colorless, odorless and tasteless. It’s a toxic gas which causes headaches, dizziness, weakness, and nausea; and at high levels it can be deadly, hindering oxygen delivery throughout the body. Nitrogen dioxide, another colorless and odorless gas, causes eye, nose and throat irritation, shortness of breath, and increased risk for respiratory infections. Cooking with natural gas emits high levels of Nitrogen dioxide.
Many high-performance homes are all electric and there is no “burning” of hydrocarbon products. However, other forms of air pollutants include volatile organic compounds (VOCs) which are defined as invisible toxic gas emissions from solid and liquid sources found inside our homes. These include paints, cleaning supplies, pesticides, building materials and office supplies such printers, glues, and permanent markers. Even a new sofa will off-gas VOCs. Levels of certain VOCs can be 10 times higher indoors than outdoors. Like other indoor air pollutants, VOCs can cause health problems, specifically respiratory and allergy issues in children.
It is crucial to combat all these indoor air toxins, but is there a way to have outdoor-quality air indoors?
We can improve our indoor air by:
1. Removing the source of the toxins in our homes and offices: not smoking indoors, by purchasing products that are less toxic, such as those made with natural ingredients, and using them according to the instructions.
2. Reducing the amount of air pollutants and VOCs indoors by cleaning the air with filtration. Electronic air cleaners and ion generators are effective in removing some airborne particles, but not gases or odors, and many of them can produce ozone that may irritate the lungs. Ion generators may remove small particles (tobacco smoke) from the indoor air.
3. Providing adequate ventilation through a system that brings fresh air into the home or building
Types of Ventilation Systems 1. Exhaust ventilation system: This system depressurizes the home by exhausting air from the house while make-up air infiltrates through leaks in the building shell and through intentional, passive vents. Exhaust ventilation is best for cold climates. In warmer climates with humid summers, depressurization can bring moist air into building wall cavities and cause moisture damage. It can also bring in pollutants we are trying to remove: radon and molds from a crawlspace, dust from attics, fumes from attached garages and flue gas from a fireplace or fossil fuel-fire water heater and furnace.
2. Supply ventilation system: A supply ventilation system uses a fan to pressurize our home, bringing outside air into the building while air leaks out of the building through holes, bath and range fan ducts and intentional vents. Drawbacks are they do not remove moisture from the make-up air before it enters the house and may contribute to higher heating and cooling costs. If the interior air is humid enough, the moisture in the air can condense and rest in the attic or cold parts of the exterior wall, causing mold, mildew and decay. This system is best for hot or mixed climates.
3. Balanced ventilation system: This system does not pressurize or depressurize our homes. Instead, it introduces and exhausts approximately equal quantities of fresh outside air and polluted inside air. A balanced system is appropriate for all climates but does not remove moisture from the makeup air before it enters the house. This can increase heating and cooling costs.
A Better Solution: Energy Recovery Ventilation Systems
The most efficient kind of ventilation systems are energy recovery ventilation systems, as they provide a controlled way of ventilating a home while minimizing energy loss. They reduce the costs of heating ventilated air in the winter by transferring heat from the warm inside exhaust air to the fresh (but cold) outside supply air. In the summer, the inside air cools the warmer supply air to reduce cooling costs. There are 2 types: Energy Recovery Ventilators (ERV) and Heat Recovery (or enthalpy-recovery) Ventilators (HRV).
Both types include a heat exchanger, one or more fans to push air through the machine, and controls. The main difference between a heat-recovery and an energy-recovery ventilator is the way the heat exchanger works. With an energy-recovery ventilator, the heat exchanger transfers a certain amount of water vapor along with heat energy, while a heat-recovery ventilator only transfers heat.
Because an energy-recovery ventilator transfers some of the moisture from the exhaust air to the usually less humid incoming winter air, the humidity of the house air stays more constant. This also keeps the heat exchanger core warmer, minimizing problems with freezing.
In the summer, an energy-recovery ventilator may help to control humidity in the house by transferring some of the water vapor in the incoming air to the theoretically drier air that’s leaving the house. If you use an air conditioner, an energy-recovery ventilator generally offers better humidity control than a heat-recovery system. Most energy recovery ventilation systems can recover about 70% to 80% of the energy in the exiting air and deliver that energy to the incoming air. However, they are most cost-effective in climates with extreme winters or summers, and where fuel costs are high. In mild climates, the cost of the additional electricity consumed by the system fans may exceed the energy savings from not having to condition the supply air.
There are some drawbacks: Energy recovery ventilation systems usually cost more to install and maintain than other ventilation systems. Also, energy recovery ventilation systems operated in cold climates must have devices to help prevent freezing and frost formation. Very cold supply air can cause frost formation in the heat exchanger, which can damage it. Frost buildup also reduces ventilation effectiveness.
However, the benefits of ERVs far outweigh the negatives. Clean, fresh indoor air is a commodity worth the investment, and the health of our families depends on it.
For more information about ERVs, call us at 720.287.4290 Source: ultimateair.com
What can we learn from the cactus related to building science? The cactus “skin” has essentially two perm ratings. The cactus absorbs vapor through its skin at night, and in the daytime when temperatures rise, that same skin prevents the moisture from escaping. The skin of the cactus allows moisture to migrate inward, but not outward.
SIGA has learned the answer to keeping walls dry by incorporating the unique characteristic of the skin of the cactus to collect and store water. In our buildings, we want the opposite to happen — prevent moisture from getting into our walls and allow it to migrate out. SIGA’s new product Majrex does just that.
While a cactus needs water to survive, our walls do not. In fact, moisture in our walls has the opposite impact — effectively “killing” our walls instead of nurturing them. So, the goal is the reverse of the cactus.
Humidity/moisture is higher inside our buildings due to such activities as cooking, showering and many other sources, even breathing. That moisture gets into our walls through a couple mechanisms, including air infiltration. With air infiltration, air and the moisture it carries travels from the interior of the building into the walls. That moisture within the air then condenses on cold surfaces in the interior of the walls — like a “sweaty” glass of ice water on a humid summer day. While it is best to keep the air out of our walls in the first place, some air will get in regardless carrying moisture with it.
At the point we have condensation in our walls, we absolutely need that moisture to dry or migrate out of the walls. Moisture in our walls causes mold, mildew and dry rot. In a typical home, if we were to add up all the cracks in the walls, corners and around the windows and doors, we have a hole equal to a 3-foot by 3-foot window open 24 hours every day of the year. Not only does this make us cold, but it also empties our pockets. Most importantly, it enables moisture to get into our walls with air as its transport mechanism.
SIGA patented its unique, one directional moisture transport and named it Hygrobrid technology. With this technology, SIGA developed Majrex, a “smart” interior membrane. Majrex has two different perm ratings. The perm rating from interior of the building to the interior of the walls is less than 0.097. In the other direction, from the interior of the wall to the interior of the building, the perm rating is greater than or equal to 4.25. Unlike other “smart” membranes that react to humidity and become more permeable to moisture, Majrex is essentially vapor open one way and nearly vapor closed the other. Combined with the SIGA Majvest air and weather barrier on the exterior with its 68-perm rating, we can effectively keep air and moisture out of our walls and effectively enable our walls to dry to the interior or to the exterior.
Majrex offers the benefits of:
1. Making our walls airtight so air and moisture cannot get in.
2. Making sure walls are vapor open, enabling moisture to migrate out of the walls.
Unfortunately, we often hear from building practitioners that walls need to breathe, and there is a very important distinction we would like to make. We do not want air going into our walls, because that very air is the culprit which brings moisture into our walls. We do not want them to “breathe.” Instead, we want them to be vapor open.
Simply put, Majrex is a directional membrane which allows moisture out of our walls and prevents it from coming in. Thanks to the cactus, SIGA has learned the secret to keeping our walls dry.
For more information or to order SIGA Majrex, call us at 720.287.4290
Fresh air is a commodity that everyone needs and wants. Who doesn’t like to breathe fresh air? Generally, the best source of fresh air is the outdoors. But since most of us don’t live outside, we can still supply fresh air to our homes by opening windows and doors. However, we all know it’s neither cost-efficient nor wise to leave our windows and doors open during the cold winter or hot summer.
Many older homes are leaky enough that fresh air enters through all tiny cracks and holes in the walls and around the windows and doors. With high-performance homes, the foundation is to build it air-tight and add ventilation. The catch phrase is, “build it tight and ventilate right.” But how exactly do we “ventilate right” in an airtight home when our objective is to keep cold air out in the winter and cool air in in the summer?
We must mechanically bring in fresh air. The Build Equinox CERV system does just that. The CERV recirculates air, brings fresh air in and removes stale air while offering both heat recovery and air filtration. Put simply, the CERV makes sure you have fresh, filtered air and keeps heat where it belongs, in or out based on the setting on the unit.
Designed with sensors to detect VOCs (Volatile Organic Compounds) and CO2, the CERV will “smell” the air and put itself into circulation or ventilation mode appropriately based on the sensor readings. The VOC and CO2 levels drive the demand of the unit based on the thresholds the owner programs on the unit.
A CERV returns air from rooms such as the baths, the kitchen and possibly other rooms that might have more “smells” or humidity such as workout rooms, laundry rooms, etc. It brings that air back to the unit to either simply filter/recirculate it or to replace it with fresh air from outdoors while exchanging the heat that is in the air. In the winter, it keeps heat in and in the summer it reverses the process and keep heat out of the building.
One of the more unique features of the CERV is that it uses a heat-pump to move heat to the incoming or exiting air stream. While it is not meant as a primary source of heating or cooling, the CERV actually provides a small amount of heating or cooling capacity.
Components of the CERV System:
Heat-Pump Module (A)
Module A of the unit heats, cools, dehumidifies and exchanges energy between incoming incoming(fresh) and exiting(stale) air streams, with no low temperature operation restriction. Most H/ERV’s require some kind of anti-freeze function or capability. This is not necessary with the CERV.
Fresh Air Control Module (B)
Module B of the CERV houses the electronics, integrated pollutant sensors (CO2, VOC, temperature and humidity) and damper, and this is where the CERV intelligently monitors air quality and activates fresh air ventilation. When fresh air is not needed, recirculation adds heating/cooling to unify comfort and indoor air quality. Also, the Fresh Air Control Module is fully insulated with no thermal bridges. It has a very user-friendly color touch screen controller with large print, easy to navigate control and status screens. The controller can also be placed anywhere in the house. In addition, it has an option to connect to the Internet, through the CERV-ICE Online Gateway, making it possible to control the system directly from a smart phone, tablet or computer.
Inline ECM Supply & Exhaust Fans
These are variable-speed ECM fans which balance air flow efficiently, supplying fresh air to the occupants and exhausting polluted air from house.
Inline Filter Boxes
These boxes remove air contaminants from incoming air to the home and are placed where fresh air enters. The CERV uses common filter sizes which can be purchased from several sources.
An important fact to consider in fresh air ventilation is the natural atmosphere CO2 (carbon dioxide) level of outdoor fresh air is 400 ppm (parts per million CO2). At more than 900ppm, a person’s mental performance, sleep quality, and productivity decreases. Currently, the indoor air quality ASHRAE standard for newly constructed homes is 1100ppm! If that is the standard, then we can clearly see why our air quality is a problem (source: https://ehp.niehs.nih.gov/1104789/). The good news is the current average indoor air quality level for homes in the CERV community is 686ppm.
Also note that some homes integrate various accessories that accomplish various objectives. For example, booster switches can be added to bathrooms and kitchens to help evacuate humidity and pollutants from those spaces. In addition, there are accessories that either help to pre-condition the air as it comes into the CERV from outside or to heat the air after it leaves the CERV. Please contact us for more information on these accessories.
In summary, as part of the high-performance home or any home for that matter, the Build Equinox CERV system makes good sense:
Fresh, clean air for the family
Recovers heat/doesn’t lose it
Provides health benefits of reduced CO2 levels (improved brain function, sleep quality and productivity), lowered pollutant/contaminant levels of things we bring into our home (i.e. off-gassing of new items we purchase, paint fumes, as well as pollutants created within the home, such as cooking odors, bathroom and laundry room odors or pet odors).
If fresher, cleaner air in our homes is the goal, then a Build Equinox CERV home makes next-to-outdoor fresh air in a home quite achievable.
For more information about the Build Equinox CERV, call us at 720.287.4290 or visit our website https://aebuildingsystems.com/product/build-equinox-cerv/.
If eyes are the windows of the soul, then windows are the eyes of the energy-efficient home.
Generally, windows are the weak link in the walls of a home. “I love putting plastic on my windows to keep cold air out and warm air in,” said no one ever. That is why considering the brand and style of the windows in a home is just as important as deciding insulation and exterior materials.
The goal is comfort and operational cost saving, and the goal for builders and architects is providing both.
High performance windows are necessary in keeping with Passive Haus standards of efficiency: design, minimal thermal bridging, air tight, super insulated, optimized glazing, energy recovery ventilation and passive gains.
So we have learned that code built homes often lose 20 to 40% of the heat in the home through air infiltration, and windows and doors are a significant source of this heat loss.
To better grasp just how significant, imagine the volume of a basketball as our measure of air infiltration. According to the National Fenestration Ratings Council (NFRC), the maximum allowable air infiltration in a window, with the outside wind at 25 mph, is 0.3 CFM (cubic feet of air)/sq. ft. Air infiltration for a 10 sq. ft. standard window at the allowable maximum is 3.0 CFM or 11.4 basketballs per minute. At sixty minutes, one window allows in 684 basketballs per hour.
If you have (30) 10 sq. ft. windows, that equals 342 basketballs per minute or 20,520 basketballs per hour. That is a substantial amount of heat loss.
How do we reduce the basketballs?
Consider installing Alpen or Advantage Woodwork High-Performance windows. With a high-performance window, air infiltration at a 25 mph wind is <= 0.01 – 0.05 CFM (cubic feet of air). A 10 sq. ft. high performance window is at 0.10 CFM or .38 basketballs per minute or 22.8 basketballs per hour.
Therefore, (30) 10 sq. ft. windows equals 11.4 basketballs per minute or 684 basketballs per hour. We just went from 20,520 to 684 basketballs per hour. To summarize, that’s approximately a 97% reduction of air infiltration from what the NFRC says is acceptable.
The bad news is loss of air through a structure’s windows is like opening the windows and tossing our hard-earned money out of them. The good news is high performance windows fixes that problem.
The overall quality and performance of windows like Alpen or Advantage High-Performance windows is also superior. What makes these windows even more unique are their individual components, designed to combat heat losses (winter) and gains (summer):
Frames – High performance windows have durable, low conductivity frames which generally include insulation. These frames offer better thermal performance. The R-value of most standard frames is r-2 to r-3.5. High performance window frames are r-4 and up to r-7, 8, and 9.
Seals – High performance windows generally have multiple seals, which promote not only weather tight but also air tight seals.
Glazing – IGUs (insulating glass units). Glazing can have double, triple and even quad glass. High performance IGUs have special coatings that high performance window manufacturers leverage to optimize heat gain from the sun in colder months and reduce heat gain and over-heating in the warmer months.
Spacers – Depending on the material used, the spacers in between the IGUs can help increase the interior surface temperature of a window up to 15 degrees. For example, a galvanized steel spacer in a fixed high profile Alpen 525 window is rated R-5.9, whereas a stainless-steel spacer in a fixed high profile Alpen 625 window is R-6.7. Also, high performance window spacers reduce condensation on the edge of the glass (which reduces opportunity for mold and rot) and increases the inside glass surface temperatures, therefore improving comfort.
Gas – There is “gas between the glass,” as it is denser than air and a reliable barrier to heat loss. Argon or Krypton gases are often used. Argon is much less costly, but Krypton increases performance and is often used in Passive House projects.
While ROI (return on investment) is important, comfort and unnecessary energy use are the primary reasons people pursue high performance windows.
High-Performance Windows help create high performance homes which conserve energy for future generations. We are “burning” through our energy resources (coal and oil) rapidly. Why not own a comfortable, energy efficient home that is also super quiet and will likely last much longer than your neighbor’s home? And … let’s conserve our resources for future generations.
Please do not hesitate to call us at 720.287.4290 to learn more.
Let’s face it. Life is hard.
Sometimes, pressures of work, family and bills can kick us in the teeth. And some days, we’re counting down the minutes to get home, kick off our shoes and chill. Maybe relax to some music or zone out with some Netflix. Better still, remove the confines of the day by removing our clothes – naked with no cares.
Reality, though, comes in the form of an uncomfortable and unhealthy home, as well as peeping Toms and unexpected visits from the in-laws. Just because you can relax in the raw, doesn’t mean you should!
As architects and builders, you may not be able give your clients peace of mind about walking around naked, but you can give them the comfortable sanctuary they crave in a cost-efficient home with clean air and ideal temperatures.
One excellent way to do just that is with mineral wool insulation, a building product made of rock that is heated and spun like cotton candy to create fibers, which are then put into batts and boards. It can be used in new construction or added to existing structures.
Environmentally friendly, it is composed of 85 percent recycled slag from the steel processing industry, and 15 percent raw basalt. Also, EPA testing confirms allergens and toxins are virtually non-existent.
That’s a major plus for all but especially for home owners with children.
Consider these additional, exceptional benefits of using mineral wool insulation:
Fire Resistance
The temperature range for house fires is 1200-1400 degrees F. Mineral wool insulation melts at 2150 degrees F. This means it will not catch fire. Because it is non-combustible, it doesn’t contribute to nor will it spread a fire. In addition, when heated it will not release toxic gases. Simply put, rock doesn’t burn. Designed to maintain its integrity when exposed to flames, mineral wool allows for escape in the event of a fire. Safety should be your number one concern for a client.
Sound Reduction
Mineral wool is an excellent acoustic insulation, because rock is a natural sound barrier. Due to its unique, non-directional structure, mineral wool is denser than conventional insulation and helps to absorb and minimize sound. Owners of concert halls and playhouses find it extremely effective for keeping sound within their buildings. On a smaller scale, your client will appreciate mineral wool keeping sound out for a quieter home.
Rot Resistance
Mineral wool insulation is permeable, allowing water and vapors to escape. Also, it is somewhat water repellent. And because mineral wool has no food source, it cannot grow mildew, mold or any bacteria. This is good news, not only for those with allergies and health conditions but also for you, the builder or architect, because it helps prevent lawsuits due to wall construction failure. Vapor open assemblies, especially to the exterior, present fewer risks.
Longevity
Mineral wool insulation does not shrink, change shape or crumble – despite temperature changes or humidity. It is maintenance-free and needs no replacement.
Mineral wool perhaps is most celebrated for its thermal properties. Because it contains tiny pockets of air trapped within its physical structure, mineral wool provides extraordinary insulation, creating the down blanket for homes in cooler climates and keeping heat out of homes in warmer climates. The obvious benefit is a reduction of heating/cooling costs. Reduction in energy use plus lifelong durability equals savings in your clients’ pockets over the long-run.
Sustainability
Recycled slag and raw basalt is plentiful, and mineral wool is recyclable. Therefore, resources aren’t drained in the production of mineral wool insulation.
Also, the energy saved from the installation of mineral wood insulation far surpasses the energy spent for its production. The money spent is minimal when compared to the long-term benefits.
The above are all benefits for your client, but there are some serious benefits to you as well. When it comes to new construction and existing buildings, your reputation and business are on the line. Any faulty building product or choice of building assembly can put your insurance premiums at risk. As building codes become more stringent, and wall assemblies become more complex, mineral wool insulation reduces your liability.
Mineral wool insulation is a deal maker, not a deal breaker.
While your clients might or might not enjoy their home naked, you can have peace of mind knowing you’re providing them the comfort to do so.
For more information, contact AE Building Systems. Source: Roxul.com
Passive House or PassivHaus – The Comfort of Energy Efficiency
Passive House (or PassivHaus in Europe) is an energy efficiency standard that was developed in Germany but has its foundation in North America. The goal of Passive House is to reduce the energy required to heat a building by 70-80%, relative to current code-built buildings. The same goes for reducing cooling energy use in a cooling climate like Phoenix, AZ. Three primary design considerations and several secondary principles are critical. Also, it is important to highlight that in addition to energy savings, Passive House Buildings offer a healthier, quieter and much more durable and comfortable building. In commercial buildings, let’s not forget how all these things convert into a productivity factor, which effectively contributes to the ROI. The Passive House approach is rigorous yet very feasible with the right attention to detail from design through construction. PassivHaus buildings in Europe and increasingly in North America are being certified every day. Parts of Europe have and will be making PassivHaus the required building code, as are parts of North America.
In the 1970s, Wolfgang Feist traveled to the US and Canada to learn about various buildings that were being constructed in response to the energy crisis. Some had Passive Solar Design approaches. Others were highly insulated and some included double stud wall construction. Still others, like the Saskatchewan Conservation House, had many of the principals found in today’s Passive House buildings. However, the Passive Solar Design approach often suffers from overheating even in the winter. Many of the super insulated and double stud homes had issues related to moisture, such as rot and mold in the walls. From his studies and the practical application of what he learned, Dr. Feist eventually developed the PassivHaus standard and built the first PassivHaus in 1991. The standard has two primary objectives. The first is heating loads must meet 4.75 kBTU/sf/yr. Most existing and even some new homes are 40 to 70 kBTU/sf/yr. The second is air tightness must be below 0.60 ACH50. Most existing homes are 4.0 to 15.0 ACH50 and even worse.
The three primary design considerations are SuperInsulation, low air infiltration and minimizing thermal bridging. The insulation levels are generally based on the specific climate for the project and can vary due to many circumstances. It is not unusual to have below grade foundation and slab and above grade wall insulation in the r-40 to r-60 range. Roof/ceiling insulation can often vary from r-65 to over r-100. Air infiltration rates are a standard and are tested or commissioned at 0.60 ACH 50. This is very tight and very achievable with proper attention to detail. Finally, thermal bridging often requires eliminating or reconfiguring cantilevers, insulating footers and rethinking some of the designs like balconies and bump outs that we see in many North American homes.
For several years, AE Building Systems (AE) has been bringing this mindset to a wider audience. Basic principles such as increased thermal performance, reduced air infiltration, and reduction of thermal bridging are keys to providing efficiency and comfort. AE has brought together separate building envelope components into a cohesive system that can meet these efficiency requirements and provide comfortable, durable and healthy buildings.
Most people do not understand why they are uncomfortable. We know we are cold or hot but not entirely why. There are several reasons and following are a couple examples. A standard window with a u-value of 0.30 is considered energy efficient. However, on a 7-degree F day, the indoor surface temperature on the u-0.30 window will likely be below 60 F. With a cold surface, our bodies are literally robbed of its heat due to radiation. Heat travels to cold and our bodies radiate heat to the cold surface making us feel cold. In addition, cold windows and walls often create convection currents within the building to include our living rooms and bedrooms. Air next to a cold wall or window drops and warm air in the space rises creating a very local convection current or microclimate that most believe are drafts. A similar condition is stack effect where warm air rises to the upper levels in a building while cold air drops to the lower levels. In some homes, there is often a 10 to 15 degree temperature variance between lower and upper levels. Higher performance windows and walls will increase the interior surface temperatures to levels that reduce the potential of the walls and windows to literally “suck” the heat off your body. At the same time, improving the interior surface temperatures will reduce the potential for convection currents and stack affect or microclimates within the building.
Several secondary considerations are important. First, high performance windows are crucial. Windows are the weak spot in our building envelopes. Windows with u-values as low as u-0.11 (r-9) are often necessary for achieving the Passive House standard. Passive Solar or solar heat gain is important, but it is also important to optimize and not maximize south facing glazing – to minimize the potential for over-heating. Also, it is critical to incorporate mechanical ventilation. Most leaky homes get fresh air through the cracks and holes in the walls. This is not where you want to get fresh air. Energy Recovery Ventilation (ERV) systems bring in fresh air and transfer the heat to the incoming fresh air effectively keeping the heat where it belongs while filtering the air. Also, a shoebox design is often incorporated with Passive House. Bump outs and corners invite thermal bridging and air infiltration. These feature, while they have aesthetic benefits, do not contribute to energy efficiency and comfort. Moisture management is also critical. Moisture most often enters walls in the form of vapor or humidity in the air. When the walls are cold, the vapor condenses on the interior of the wall. While Passive House buildings are largely air tight and have minimal thermal bridging, it is important to pay attention to how walls might have condensation and more importantly how they will dry. Also, “House” is a literal translation of Haus. Haus in German means “place of inhabitation” and Passive House applies to schools, office buildings, etc. Existing buildings are not excluded and passive house applies to retrofitting buildings. The retro-fit requirements are not as stringent, but achieving them can be quite rigorous depending on the building conditions. Finally, spec homes or homes built to be sold can pay off. Having a realtor who knows how to market this type of special building is extremely beneficial.
AE Building Systems has been delighted to have had the opportunity to provide products to several Passive House projects as well as other standards or objectives, including Zero Energy buildings. There are several important considerations, and we do our best to help our clients through the process.
The focus of AE Building Systems over the years has been the building envelope. We have concentrated on this specific part of the building with the conviction that most issues related to green building start with a well designed and executed wall assembly. In fact AE has predicated its entire business on this basic idea. While most of our focus has been energy efficiency and comfort, the idea that a building should be healthy has always been assumed. Recently, a couple of events have brought this very important issue to the fore of AE’s thinking. Specifically the idea that occupant comfort is not just related to air temperature, but also the specific content of the air they breathe and the indoor air quality.
The Virtue of Health
A few months ago Jackie Burnett contacted AE, because of her interest in building a Passive House. She was moving from Vermont to Fort Collins and was searching for some land on which to build. In meeting with Jackie it became apparent that her goals of this project were slightly different than the majority of our customers. While energy efficiency and longevity were important, the healthiness of this new home was of most importance. Jackie, like many people, suffers from the debilitating effects of toxic environments. Mold, mildew, high VOC contents, all contribute to symptoms that can leave her bedridden. Jackie’s home not only needs to be free of these poisons, but needs to remain so for the life of the building. Jackie came to AE with very specific needs. She wanted factory produced wall assemblies, products that had little to no VOC content, and systems that provided a healthy indoor air quality. Jackie has helped educate the whole AE staff on the virtues of a healthy building and their effects on occupants. Fortunately AE is in a position to help and we are looking forward to continuing this journey with Jackie.
The Healthy Air Equation
Jackie Burnett feels the real effects of poor indoor air quality and came to AE primarily because of her interest in the CERV (Conditioning Energy Recovery Ventilator). Recently, AE invited Ty Newell from Build Equinox to give a presentation on the CERV. Ty specifically spoke about the benefits of good IAQ. As we build tighter and more energy efficient “a critical shift in thinking from a goal of indoor environments that are acceptable to the occupants to those that are truly healthy and productive” must take place. (Bill Bahnfleth 2013-14 ASHRAE President). We have spent many years researching and perfecting wall assemblies that are air tight, with high insulation values, but can also dry to the outside. This was the obvious solution to homes that were failing do to moisture penetration, resulting in the development of mold and decay. Not only were our construction techniques resulting in short building life cycles, they were also placing building occupants at risk. Tightening a building helps reduce the amount of VOC content allowed to infiltrate a building. Increasing insulation levels help to reduce energy loss and increase comfort. But, without a way to continuously eliminate VOC build up and manage moisture, we are setting a course for continued building failure and risking the long term health of our clients.
The goal of the CERV is to manage these these risks in an energy efficient manner. The CERV continuously monitors indoor air for both CO2 and VOC content. Through it’s interface occupants can set both levels to meet their desired comfort. Taking a hourly sample, the CERV will only bring in fresh air when one or the other of these levels is exceeded. It can’t be overstated the importance of appropriate CO2 levels. Recently, Berkley Labs conducted a study on elevated indoor CO2 levels. They discovered that contrary to previous thought, decision making impairment can start as low as 1,000 PPM of CO2, with significant impairment beginning at 2500 PPM.
The primary source of indoor CO2 is humans. With the adverse effects of CO2 becoming clear and the increased air tightness of buildings being mandated, designing an efficient mechanical fresh air system is now critical to any building plan. Likewise, with VOCs, a precise plan must be made. VOCs can range from smells produced in a home from cooking and other activities, to off gassing of building materials, furniture and even humans. Keeping these toxins at an appropriate level is key to a healthy indoor environment.
The building industry has understood for a while that keeping the humidity levels between 35 and 50% was optimal for building performance. As it it turns out is is also optimal for occupant health. Humidity levels below 25% lead to drying of the mucous membranes and chapping of the skin. Higher humidity levels increase the development of mold and fungi. The CERV maintains humidity levels at those 35 to 50% levels all year around as seen by the graph below.
A healthy building starts with good design and product selection. Making your building tight and with high insulation levels is a good start. In order to maintain the health of the building and the health of the occupants a good fresh air system is critical for the long term functionality of the building. Selecting base building materials and furnishings with low VOC content and low levels of toxins is also a critical point in providing a healthy indoor environment.
AE Building Systems is now providing a variety of mechanical fresh air products that meet the standards discussed above. We are actively researching products to round out our current offerings and expect to offer design services in the near future. By providing a complete Indoor Air Quality package, along with our other products, AE can offer an energy efficient and healthy building envelope. Contact AE Building Systems for more information.
Just last week Elon Musk announced that Tesla would be producing the next great advancement in battery storage. Until now, battery storage for Photovoltaic Systems were costly, unreliable and required a large amount of space. That has all changed with the Powerwall. For only $3500 anyone can now purchase a 10kw storage system that will allow off grid operation of a home or building. As Musk stated in his announcement, this could be as revolutionary as the cell phone and as ubiquitous as the smart phone. We will no longer need wires to bring power to the world, and we will no longer rely on fossil fuels for our power sources.
What exactly does this have to do with high performance building? Generally, we building science geeks tend to focus on ways in which we can eliminate waste and reduce the amount of energy required to operate a building. We design and construct building envelopes that reduce air infiltration, and manage our heat with high levels of insulation. Squeezing out every last BTU in our designs until we can comfortably heat with a blow dryer. These are all noble goals and once critical mass is met will help significantly reduce the amount of fossil fuels we consume. Ultimately, however, no matter how efficient we become, we are consumers. In order for a Passive building or a near Passive building to be net zero energy it must produce power. Combining the two technologies would be a powerful force that could literally convert the world to only renewable energy production.
In Musk’s presentation he pointed out several astounding facts that make the previous statement more real than we might think. Musk explained the the surface area required to power the United States completely using solar was equivalent to a square the size of the northern Texas handle and that the area of battery required to mange this production was a tiny dot in the middle of it all. The United States would need 160 million 100kw Powerpacks, (Tesla’s utility grade battery system), to transition entirely to renewable energy. While this is quite impressive there is a key variable that gets ignored in Musk’s presentation that would make this transition faster. Status quo ruled Tesla’s assumptions as it related to the worlds energy consumption. As we all know the majority of the that energy is consumed by buildings. What if we combined Tesla’s world vision with the continued proliferation of Passive House?
Passive House seeks to reduce the total required energy to run a facility by up to 90%. This type of construction is becoming more prevalent and in some cases required throughout the United States and the World. This reduction in energy consumption would make adding renewables more obtainable. Individual buildings would require significantly less PV and fewer batteries in order to operate entirely off the grid. Less money spent on the renewable side of the equation would mean more money for energy efficient strategies and materials. Combined with more aggressive governmental policies reducing carbon use, like we see in Fort Collins, flattening the Keeling Curve becomes more realistic.
AE Building Systems is proud to be part of a global movement to be better stewards of our planet. Make no mistake, that while we tout the personal benefits of building more efficient, we have a clear vision of making the world a better place. Leaving a cleaner environment for our children. By providing education and product that reduce building energy consumption we approach the problem from the opposite side of Tesla. Soon we hope to meet in the middle.
AE Building started out with the simple idea of filling a void in the building industry by providing high performance, energy efficient building products. Since that time we have expanded our reach by becoming building envelope experts, consulting with our clients on the many decisions required to develop a high performance wall assembly. We have seen a maturation in the market where owners are increasingly demanding better performance and architects and builders are responding. AE Building has responded as well. We have been ahead of the curve with many of the products and technologies that we promote and have found it necessary to provide appropriate training to many of our customers and installers. A more recent example of this type of collaboration is with our excellent installation partners Efficiency Matters. AE has always been impressed with their attention to detail and fine craftsmanship, but wanted to be sure they understood the intricacies of a Alpen window installation using SIGA air sealing products. AE partnered with Nicholus Holbus from SIGA and Riley Dennig from Alpen to develop a joint workshop. Efficiency Matters crews received hands on training in regards to the application of SIGA tapes and membranes as they relate to window installation. Riley then walked them through a best practices training on an Alpen window install as well as making appropriate adjustments to the windows for optimal operation. They finished with an Alpen factory tour. This type of training ensures that AE and Efficiency Matters can continue to service their clients in the very best way possible.
A good example of how this training helped with a customer comes from Matt Bruckner of Bruckner Construction. Matt couldn’t be happier with the products and service he received from both AE and Efficiency Matters. AE put together a wall assembly for Matt for the McNaughton residence that included air sealing, windows, and exterior insulation in an integrated package. AE also suggested that Efficiency Matters would be an excellent choice for installing the systems. When we spoke with Matt he was excited to point out how seamless each component of the system worked together and the attention to detail that Efficiency Matters displayed in installing the system. Not only does the finish product look fantastic, but we know that the owners will be pleased with the resulting comfort and energy savings.
AE is continually looking for opportunities to collaborate in this manner with owners, architects and builders. Recently we participated in the Energy Smart Contractors Expo speaking on deep energy retrofits. We are working with several architects, helping them to develop new “go to” wall assemblies. When is comes to wall assemblies we will go anywhere and speak to anyone that is interested.

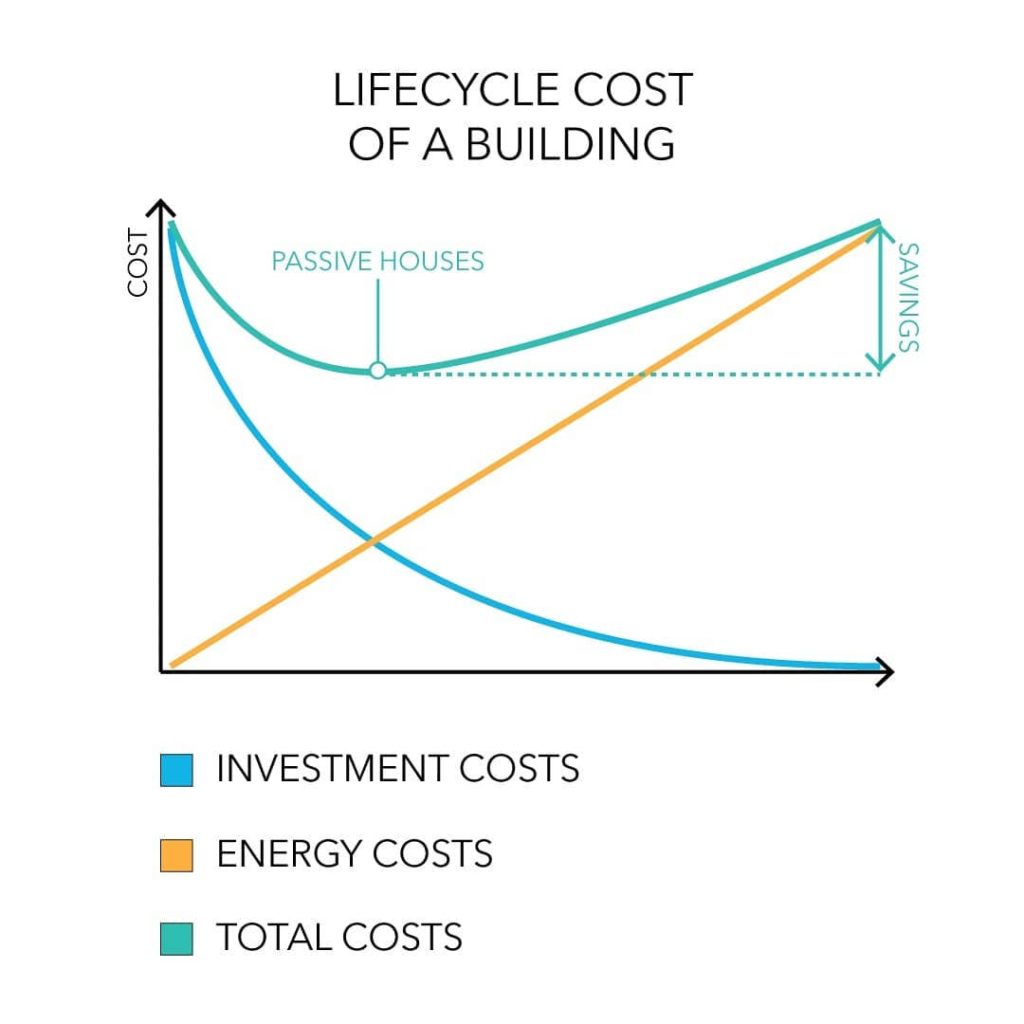
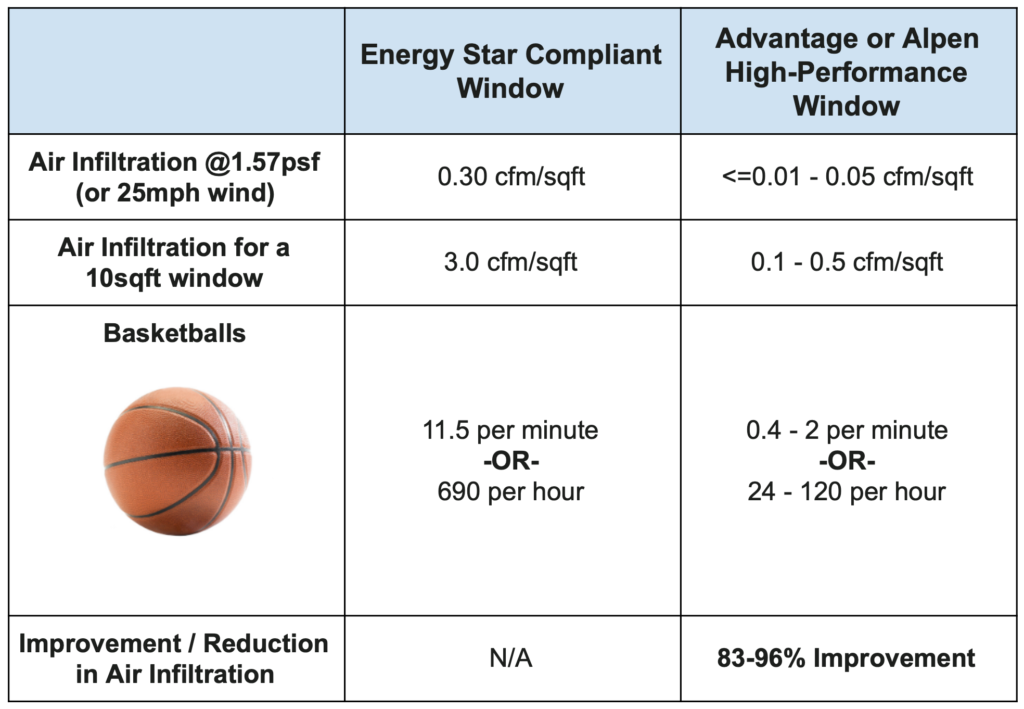

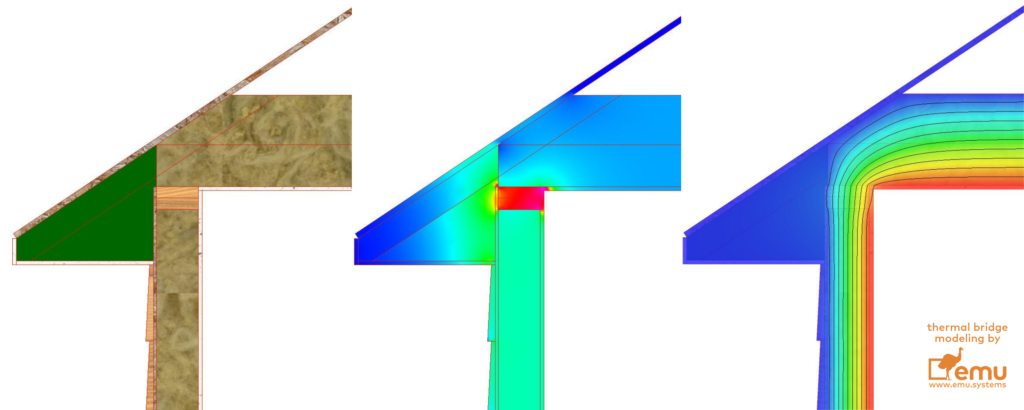

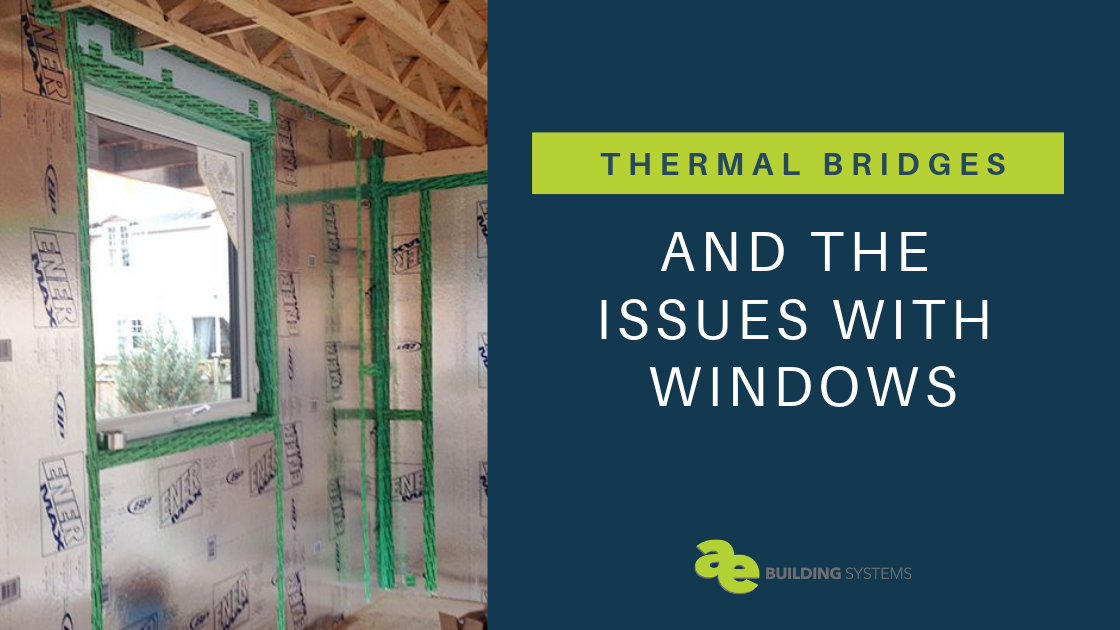
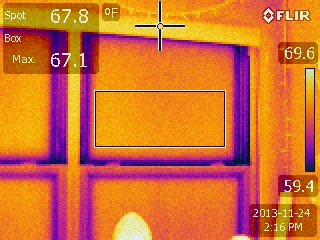
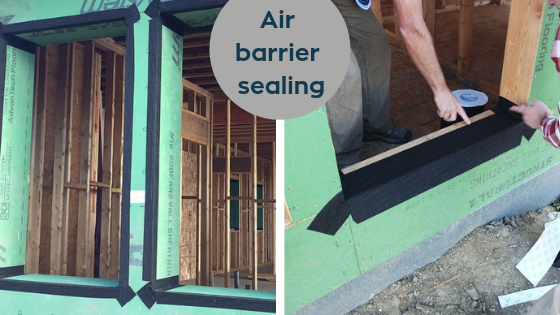

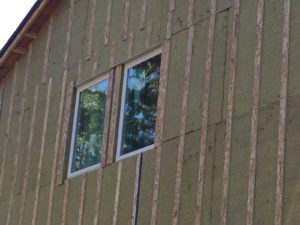
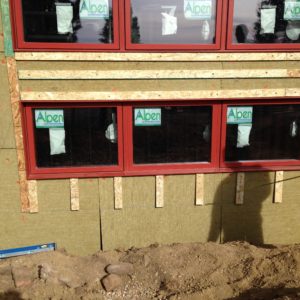
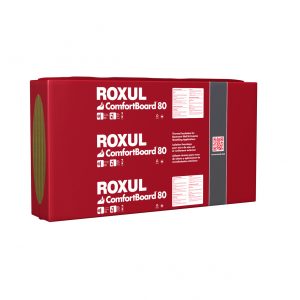
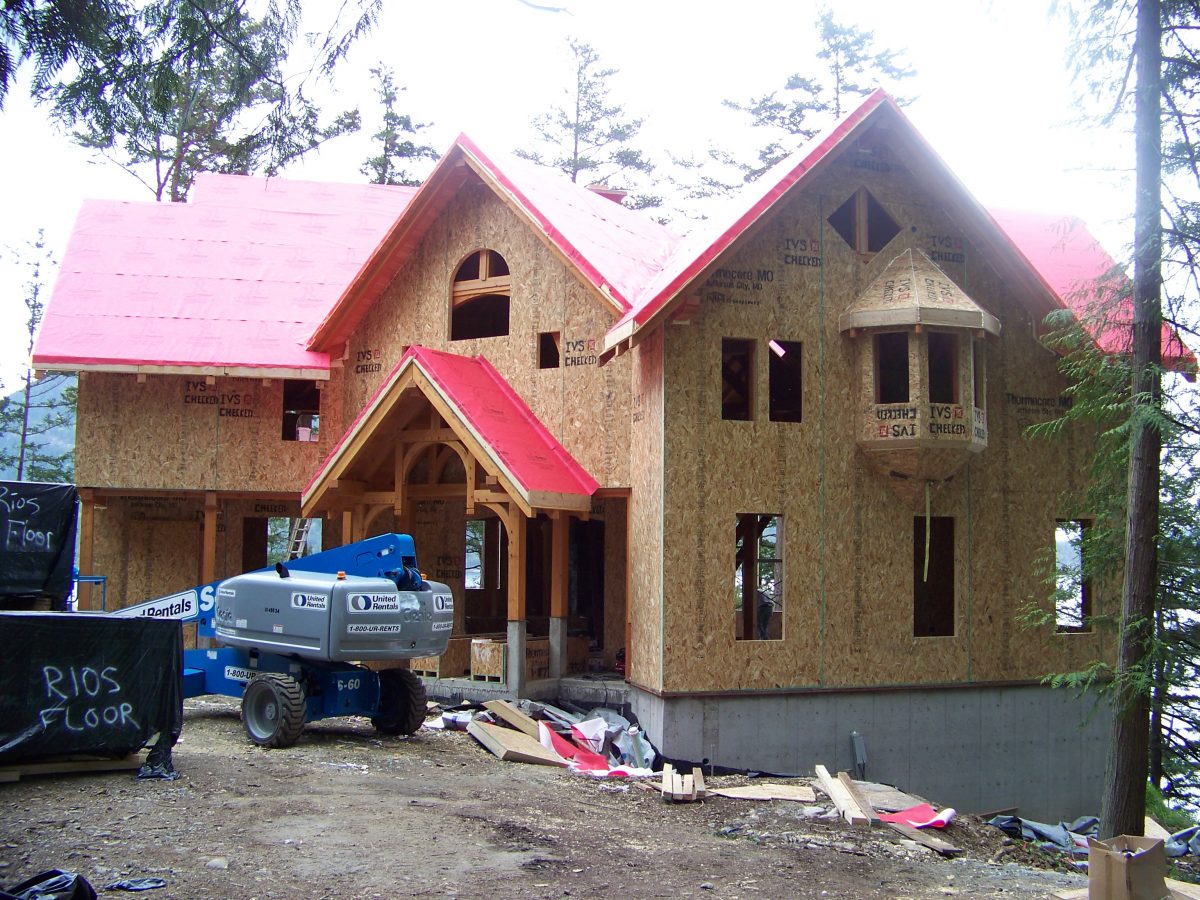
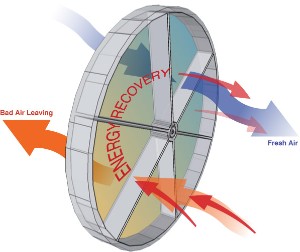


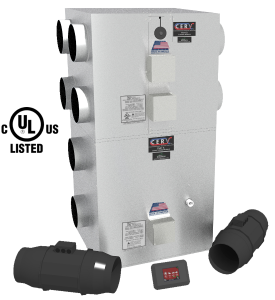

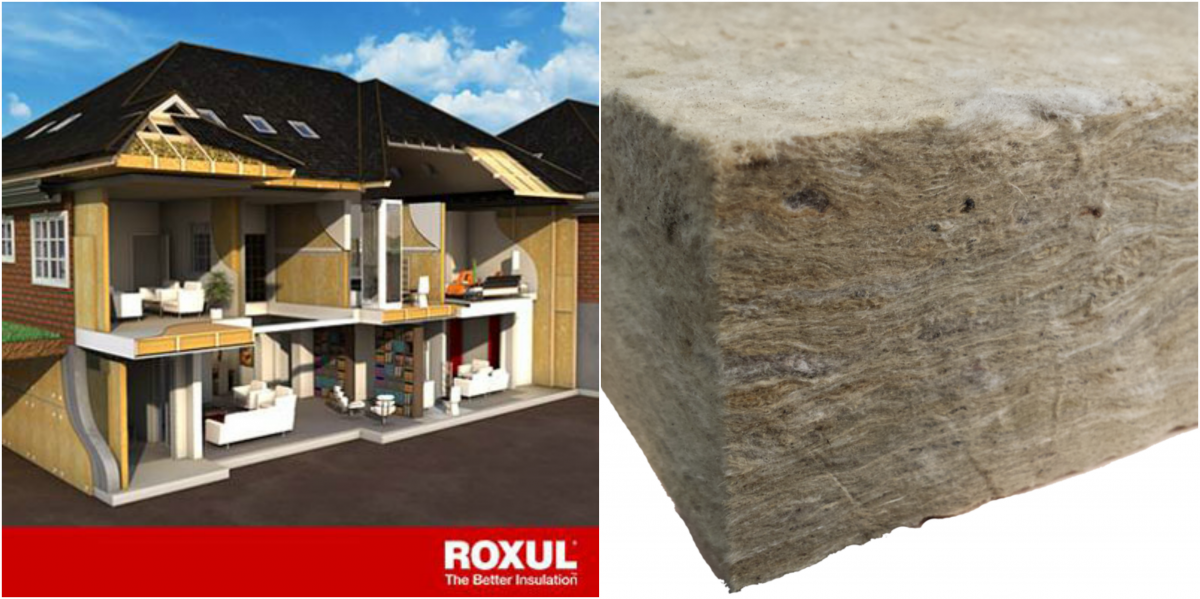
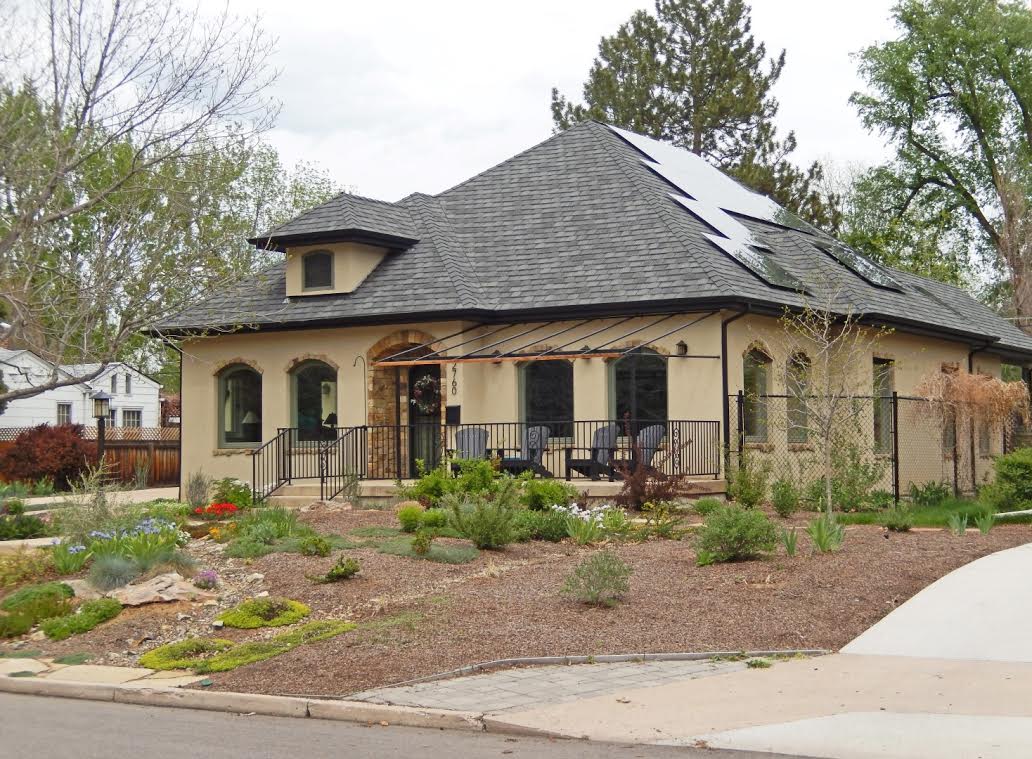
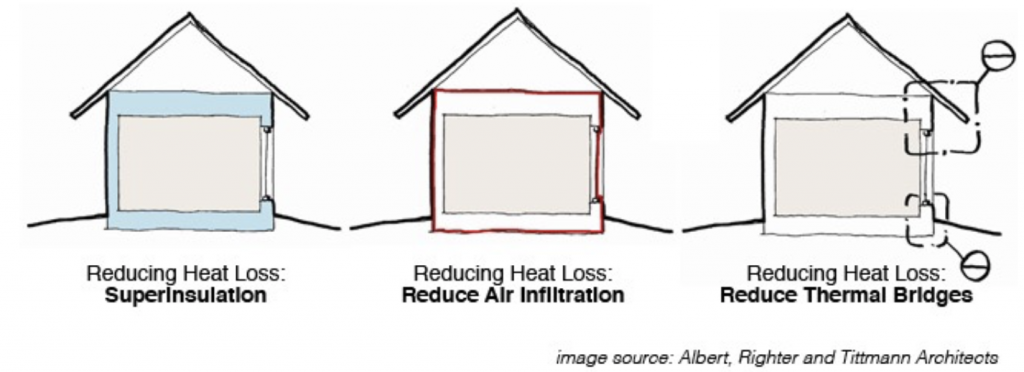
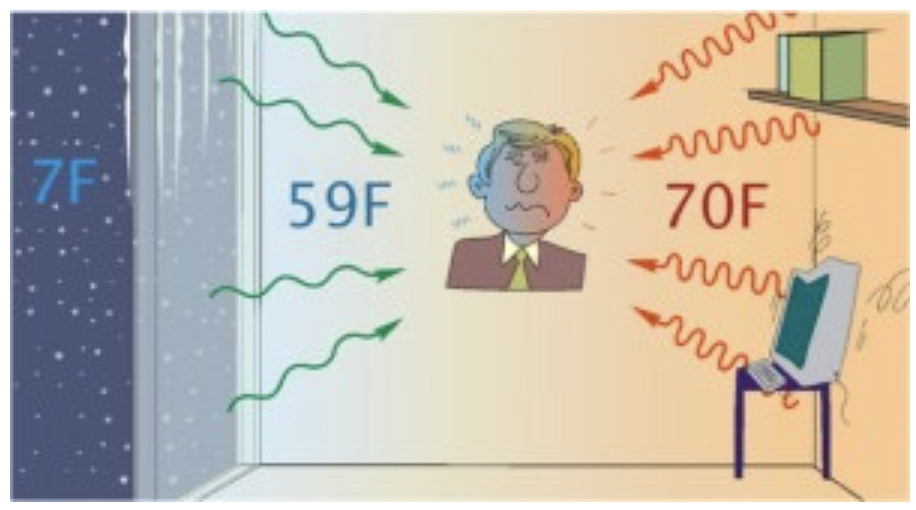
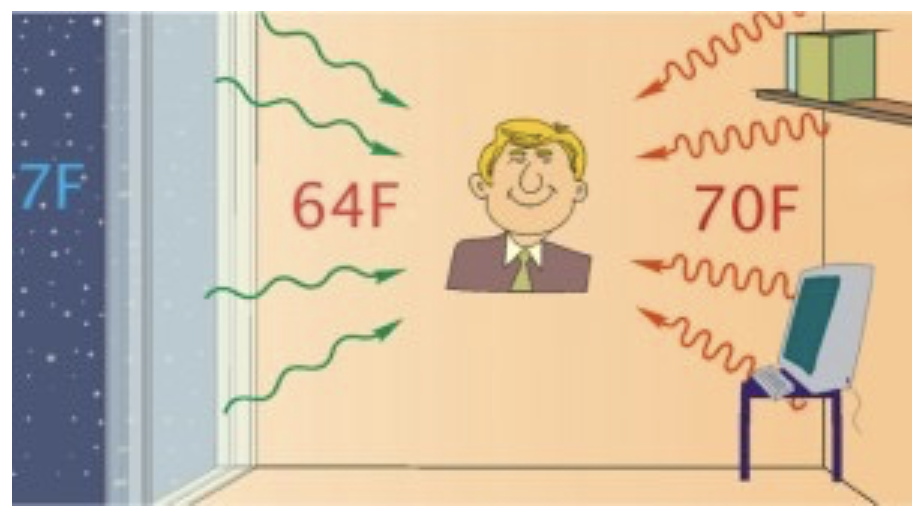
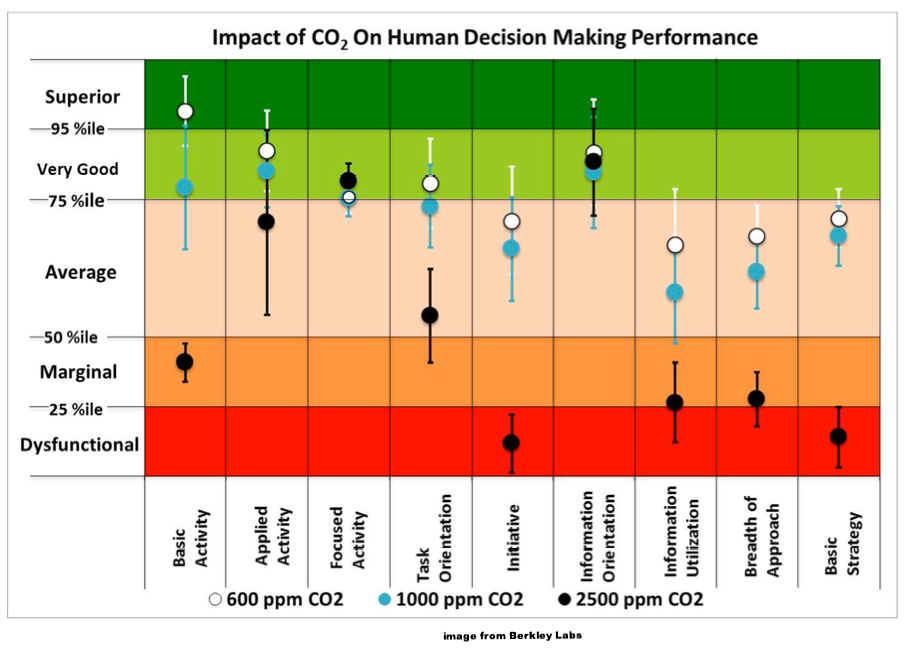


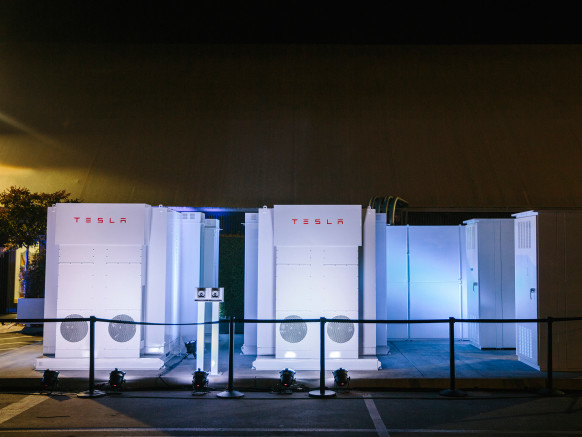
 Just last week Elon Musk announced that Tesla would be producing the next great advancement in battery storage. Until now, battery storage for Photovoltaic Systems were costly, unreliable and required a large amount of space. That has all changed with the Powerwall. For only $3500 anyone can now purchase a 10kw storage system that will allow off grid operation of a home or building. As Musk stated in his announcement, this could be as revolutionary as the cell phone and as ubiquitous as the smart phone. We will no longer need wires to bring power to the world, and we will no longer rely on fossil fuels for our power sources.
 What exactly does this have to do with high performance building? Generally, we building science geeks tend to focus on ways in which we can eliminate waste and reduce the amount of energy required to operate a building. We design and construct building envelopes that reduce air infiltration, and manage our heat with high levels of insulation. Squeezing out every last BTU in our designs until we can comfortably heat with a blow dryer. These are all noble goals and once critical mass is met will help significantly reduce the amount of fossil fuels we consume. Ultimately, however, no matter how efficient we become, we are consumers. In order for a Passive building or a near Passive building to be net zero energy it must produce power. Combining the two technologies would be a powerful force that could literally convert the world to only renewable energy production.

 northern Texas handle and that the area of battery required to mange this production was a tiny dot in the middle of it all. The United States would need 160 million 100kw Powerpacks, (Tesla’s utility grade battery system), to transition entirely to renewable energy. While this is quite impressive there is a key variable that gets ignored in Musk’s presentation that would make this transition faster. Status quo ruled Tesla’s assumptions as it related to the worlds energy consumption. As we all know the majority of the that energy is consumed by buildings. What if we combined Tesla’s world vision with the continued proliferation of Passive House?
 Passive House seeks to reduce the total required energy to run a facility by up to 90%. This type of construction is becoming more prevalent and in some cases required throughout the United States and the World. This reduction in energy consumption would make adding renewables more obtainable. Individual buildings would require significantly less PV and fewer batteries in order to operate entirely off the grid. Less money spent on the renewable side of the equation would mean more money for energy efficient strategies and materials. Combined with more aggressive governmental policies reducing carbon use, like we see in Fort Collins, flattening the Keeling Curve becomes more realistic.
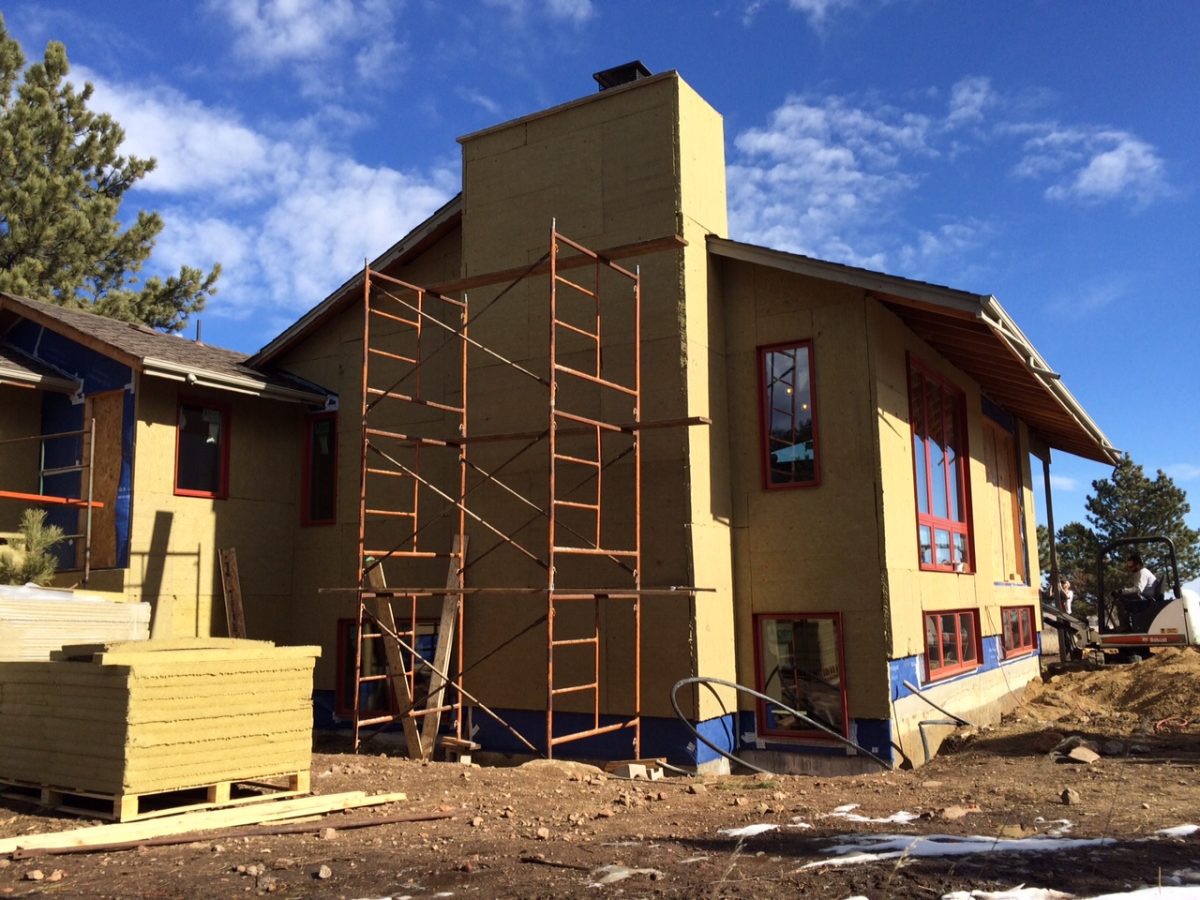
 responding. AE Building has responded as well. We have been ahead of the curve with many of the products and technologies that we promote and have found it necessary to provide appropriate training to many of our customers and installers. A more recent example of this type of collaboration is with our excellent installation partners Efficiency Matters. AE has always been impressed with their attention to detail and fine craftsmanship, but wanted to be sure they understood the intricacies of a Alpen window installation using SIGA air sealing products. AE partnered with Nicholus Holbus from SIGA and Riley Dennig from Alpen to develop a joint workshop. Efficiency Matters crews received hands on training in regards to the application of SIGA tapes and membranes as they relate to window installation. Riley then walked them through a best practices training on an Alpen window install as well as making
  appropriate adjustments to the windows for optimal operation. They finished with an Alpen factory tour. This type of training ensures that AE and Efficiency Matters can continue to service their clients in the very best way possible.
 AE is continually looking for opportunities to collaborate in this manner with owners, architects and builders. Recently we participated in the Energy Smart Contractors Expo speaking on deep energy retrofits. We are working with several architects, helping them to develop new “go to” wall assemblies. When is comes to wall assemblies we will go anywhere and speak to anyone that is interested.